Vendors
Before any orders can be placed you must first enter at least one vendor.
Adding a vendorNote
Staff members must have the vendors_manage permission (or the superlibrarian permission) in order to add vendors.
To add a vendor click the ‘New vendor’ button on the acquisitions module main page.

The new vendor form is broken into three sections: company information, contacts and ordering information.
Company information: basic information about the vendor

Name (required): this name is the name that will appear everywhere in Koha when referring to this vendor
Postal address, physical address, phone, fax, website, account number: these fields are optional and should be filled to help with generating claim letters and invoices
Vendor type: use this field as needed to categorize your vendors (for example, bookseller, donor, electronic resource provider)
Note
By default, this field is a free text field. If you’d rather have a drop-down menu, add values in the VENDOR_TYPE authorized value category.
Aliases: add one or more aliases to a vendor as additional keywords to search with in the vendor search. For example, the vendor ‘American Library Association’ could have the alias ‘ALA’.
Contacts: information regarding your contact(s) at the vendor’s office
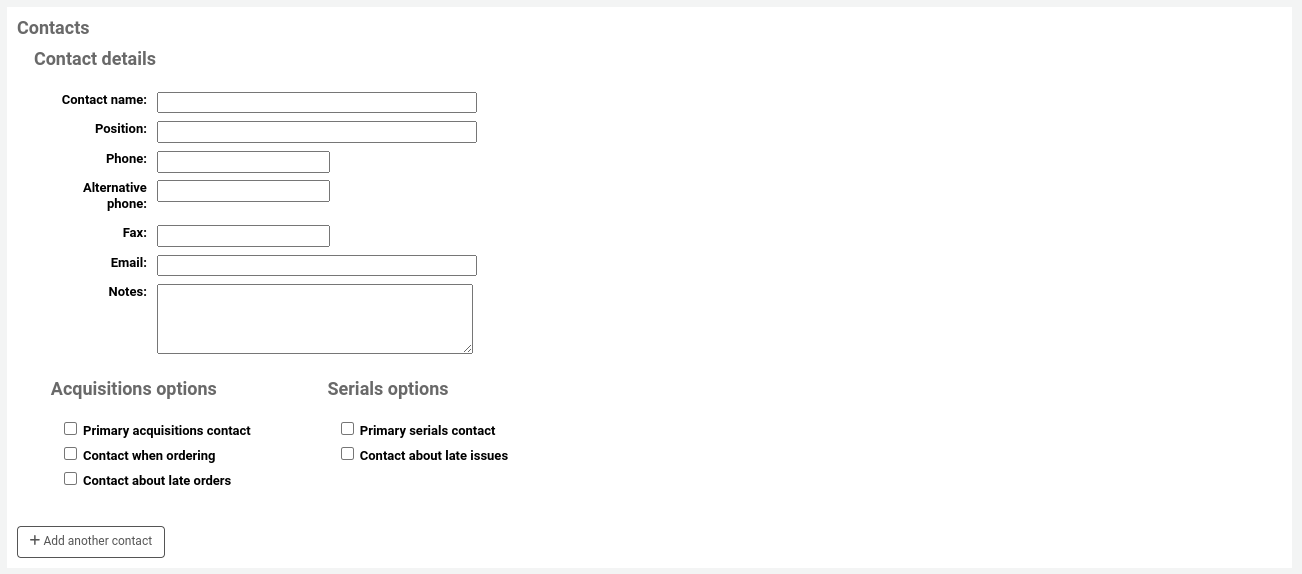
None of these fields are required, they should only be entered if you want to keep track of your contact’s information within Koha
Primary acquisitions contact: check this box if this person is your primary contact regarding acquisitions from this vendor
Primary serials contact: check this box if this person is your primary contact regarding serial acquisitions from this vendor
Contact when ordering? check this box if you want to be able to send your orders by email directly to this person (see the editing baskets section below)
Contact about late orders? check this box if you want to be able to send your acquisitions claims by email directly to this person
Contact about late issues? check this box if you want to be able to send your serials claims by email directly to this person
You can add more than one contact per vendor by clicking on the ‘Add another contact’ button
Interfaces: information regarding the vendor’s website, software, or portal that you use to manage orders or gather statistics from this vendor or organization. Entering an interface is not required, use this section only to keep track of the information within Koha. To add a vendor interface, click on ‘Add another interface’.

Fill out the form (all fields are optional):
Name: enter the name of the interface, this will be visible in Koha.
Type: choose the interface type.
Note
Values in this drop-down menu are managed in the VENDOR_INTERFACE_TYPE authorized value category.
URI: enter the interface’s URL address.
Login: enter the username for the vendor interface.
Password: enter the password for the vendor interface.
Note
The password entered here will be encrypted in the database. It will not be shown by default in the vendor details page, there will be a ‘Show’ link in place of the password which can be clicked to display the password.
Danger
Please note that Koha is not a password manager. While the password is encrypted and access to it is permission-based, it is still a security risk to save it here. Using an actual password manager is recommended. Use this field at your own risk.
Account email: enter the email used for the account on this interface.
Notes: enter any notes regarding this interface.
Click ‘Add another interface’ if you need to add more than one interface for this vendor.
Ordering information: general billing information

To be able to order from a vendor you must make them ‘Active’
Choose the currency for list prices and invoice prices
Note
Currencies are set up in the Currencies and exchange rates administration section
If your library is charged tax, mark your tax number as registered
Note if your list prices and invoice prices include tax
Enter your tax rate if your library is charged taxes on orders
Note
Tax rates are set in the TaxRates system preferences
If the vendor offers a consistent blank discount, enter that in the ‘Discount’ field
Note
You can enter item specific discounts when placing an order
If you know how long it usually takes orders to arrive from this vendor you can enter a delivery time. This will allow Koha to estimate when orders will arrive at your library on the late orders report.
Notes are for internal use
Searching for vendorsSearch for vendors either from the search bar at the top of the page

Or in the ‘Manage orders’ box on the main acquisitions page.

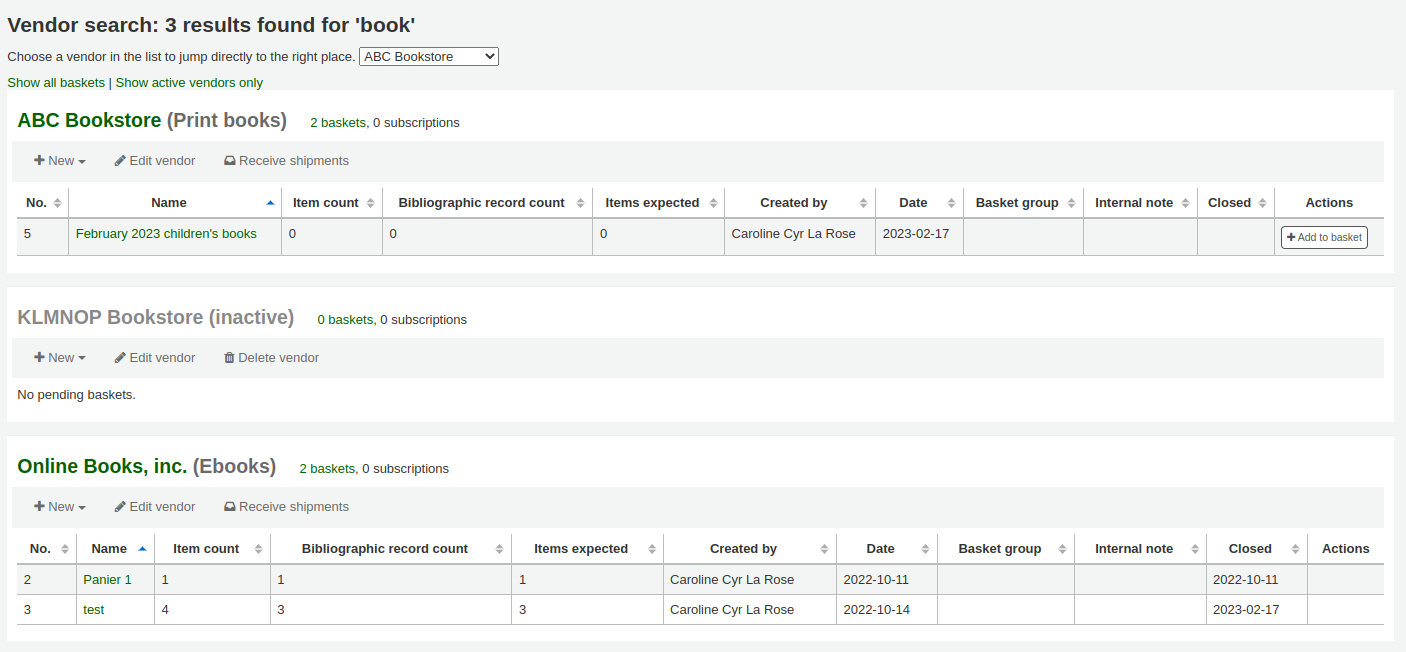
You can search for any part of the vendor’s name, or their aliases.
Note
An empty search will return all vendors.
If you have a lot of vendors, you can use the dropdown menu to jump directly to a result.
By default, all vendors appear in the results, with inactive vendors in gray font and an ‘(inactive)’ note next to their name. You can click on ‘Show active vendors only’ to hide inactive vendors.
In the results, you can see all the currently open baskets. You can click on ‘Show all baskets’ to show closed baskets as well.
There are action buttons under each vendor:
‘New’ can be used to create a new basket, or add a new contract to that vendor.
‘Edit vendor’ is used to edit the vendor information.
‘Receive shipments’ will appear when a vendor has baskets with orders.
‘Delete vendor’ will appear when a vendor has no baskets.
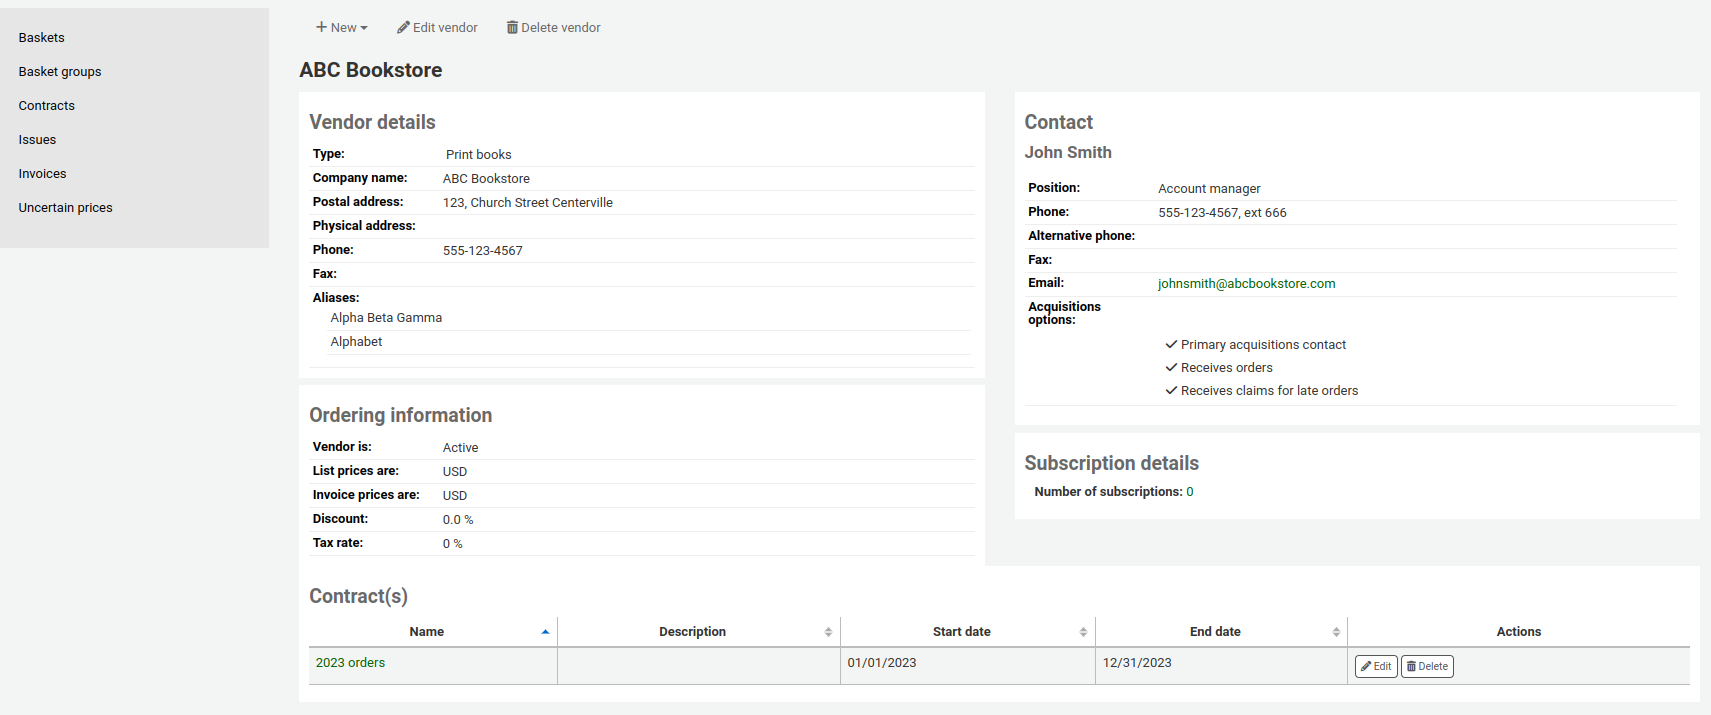
Viewing a vendorTo view a vendor’s information page, search for the vendor from the acquisitions home page.

From the results, click on the name of the vendor you want to view.
Note
Staff members must have the vendors_manage permission (or the superlibrarian permission) in order to edit existing vendors.
To make changes to a vendor search for the vendor from the acquisitions home page.
Click the ‘Edit vendor’ button on the results page

or on the vendor information page.

You can define contracts (with a start and end date) and attach them to a vendor. This is used so that at the end of the year you can see how much you spent on a specific contract with a vendor. In some places, contracts are set up with a minimum and maximum yearly amount.
Adding a contractNote
Staff members must have the contracts_manage permission (or the superlibrarian permission) in order to add contracts to vendors.
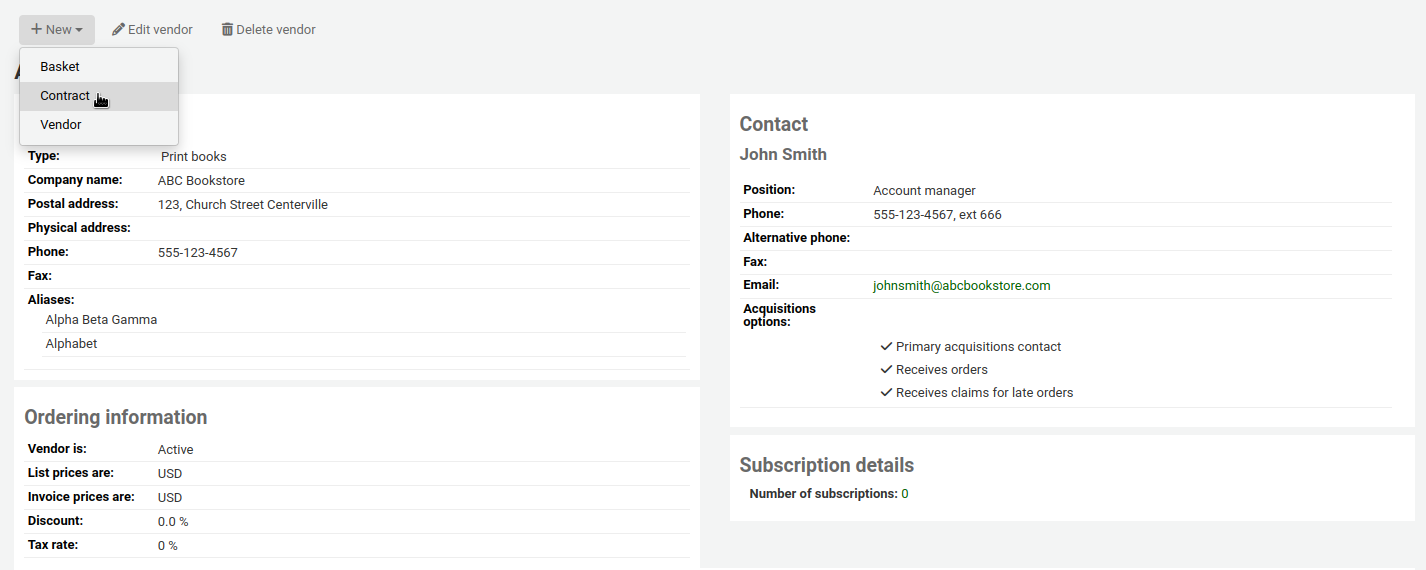
You can add a contract to a vendor by searching for the vendor, clicking the ‘New’ button and choosing the ‘Contract’ option.

Alternatively, you can access the vendor page and click ‘New’ and choose ‘Contract’ from there.
The contract form will ask for some very basic information about the contract

Warning
You cannot enter a contract retrospectively. The end date must not be before today’s date.
Once the contract is saved it will appear on the vendor page.

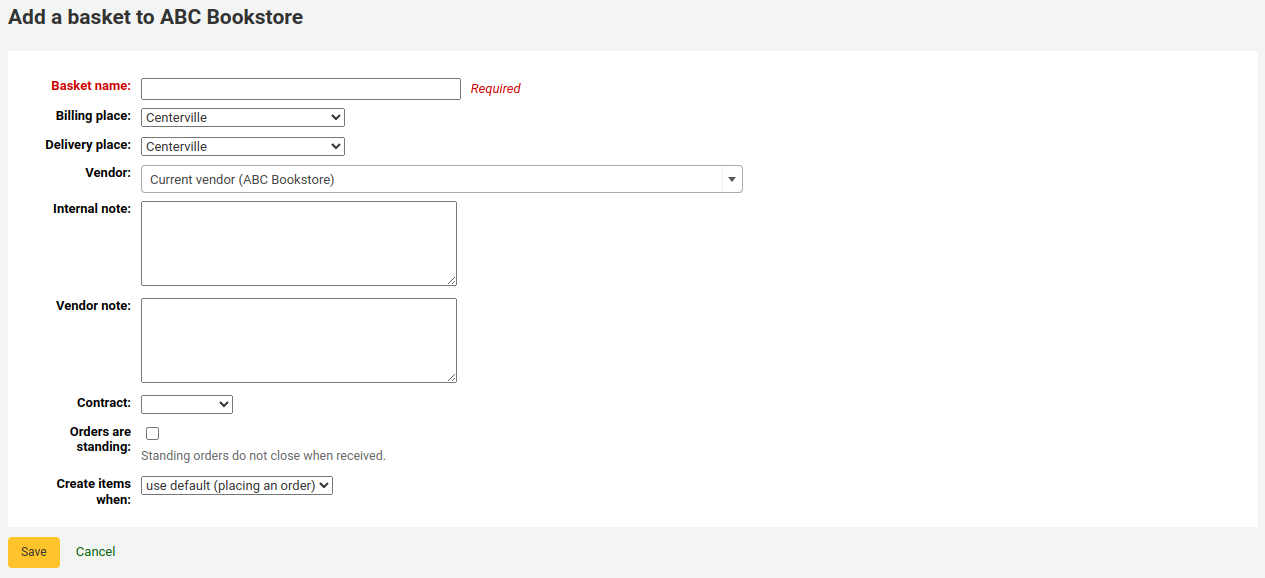
It will also be an option when creating a basket.
Version
This feature was introduced in version 23.11 of Koha.
Note
Staff members must have the issue_manage permission (or the superlibrarian permission) in order to view and manage vendor issues.
Vendor issues are a way to keep track of problems that might arise with vendors. This helps when comes the time to renegotiate contracts.
To access vendor issues, go to the vendor’s page and click on ‘Issues’ from the menu on the left side.

This page will show all the issues that have been recorded for this vendor.

To record a new issue,
Click ‘New issue’
Fill out the form with the issue information.

Type: choose the type of issue.
Note
Values in this drop-down menu are managed in the VENDOR_ISSUE_TYPE authorized value category.
Started on: choose the date on which the issue started.
Ended on: choose the date on which the issue ended, if that is the case.
Notes: enter details about the issue.
Click ‘Submit’.
To edit an existing issue, click the ‘Edit’ button in the table.
If an issue is no longer relevant, you can delete it by clicking the ‘Delete’ button in the table.
