Adding a subscription
Note
Only staff with the
create_subscription permission
(or the superlibrarian permission)
will be able to add serial subscriptions.
Note
Only staff with the create_subscription permission (or the superlibrarian permission) will be able to add serial subscriptions.
Subscriptions can be added by clicking the ‘New’ button on any bibliographic record and choosing ‘New subscription’
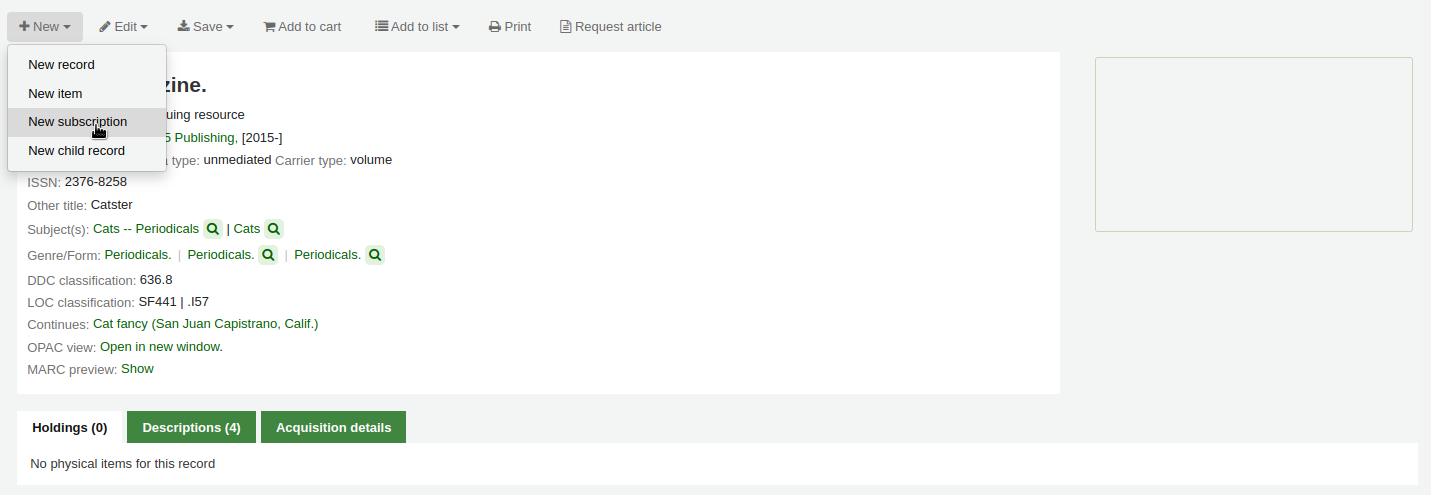
Or click the ‘New subscription’ button in the serials module

If you are entering a new subscription from the Serials module you will be presented with a blank form (if creating new from a bibliographic record the form will include the record number info).
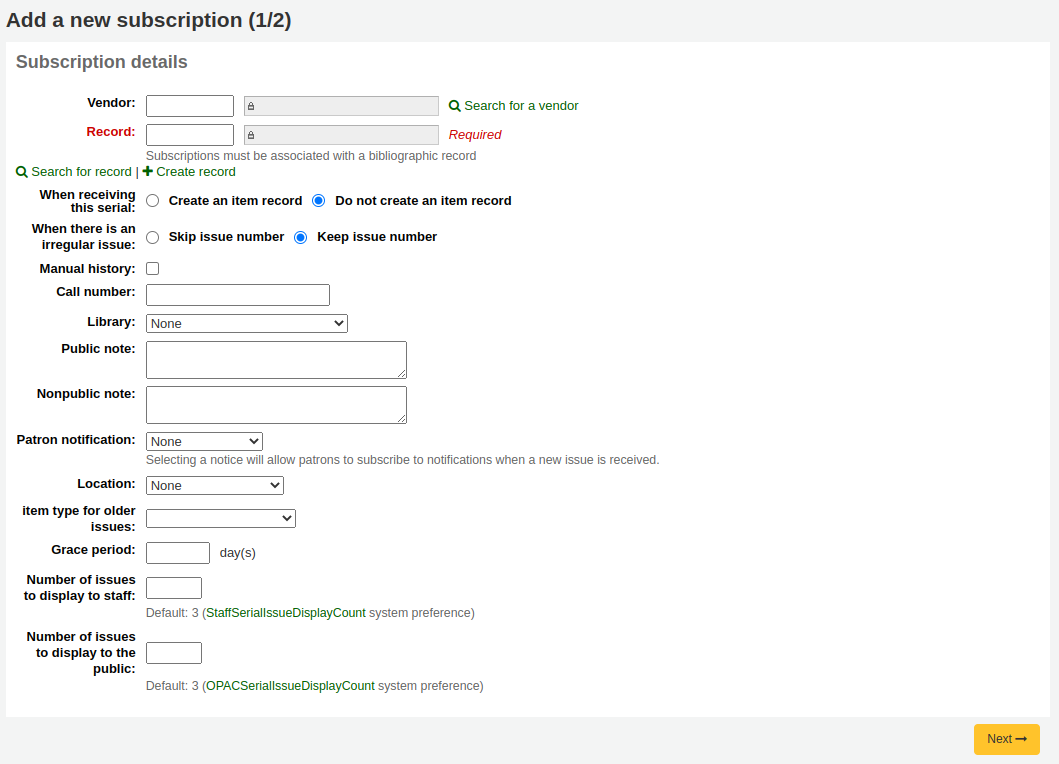
Vendor: can be found by either searching vendors entered via the Acquisitions module or manually entering the vendor ID number
Vendor information is not required
In order to claim missing and late issues you need to enter vendor information

Record: the biblionumber of the MARC record you’d like to link this subscription to
If you created a new subscription from a bibliographic record, the biblionumber and the title will already be filled in
You can search for an existing record by clicking on the ‘Search for record’ link below the boxes
If there is no existing bibliographic record for this subscription, you can create one by clicking on the ‘Create record’ link below the boxes
You can also manually enter the biblionumber for a record in the first box
Next you can choose whether a new item is created when receiving an issue
Note
If you add barcodes to issues or if your circulate them, choose to create an item upon reception
When there is an irregular issue: choose how to handle irregularities in your subscription, by either skipping the issue number or keeping the issue number
Note
If the numbers are always sequential, choose ‘Keep issue number’
Manual history: if checked, you will be able to enter serials outside the prediction pattern once the subscription is saved. For example, ‘The library has issues from June 1974 to December 1996’. To do so, go to the ‘Planning’ tab on the subscription detail page once the subscription is saved and click ‘Edit history’.
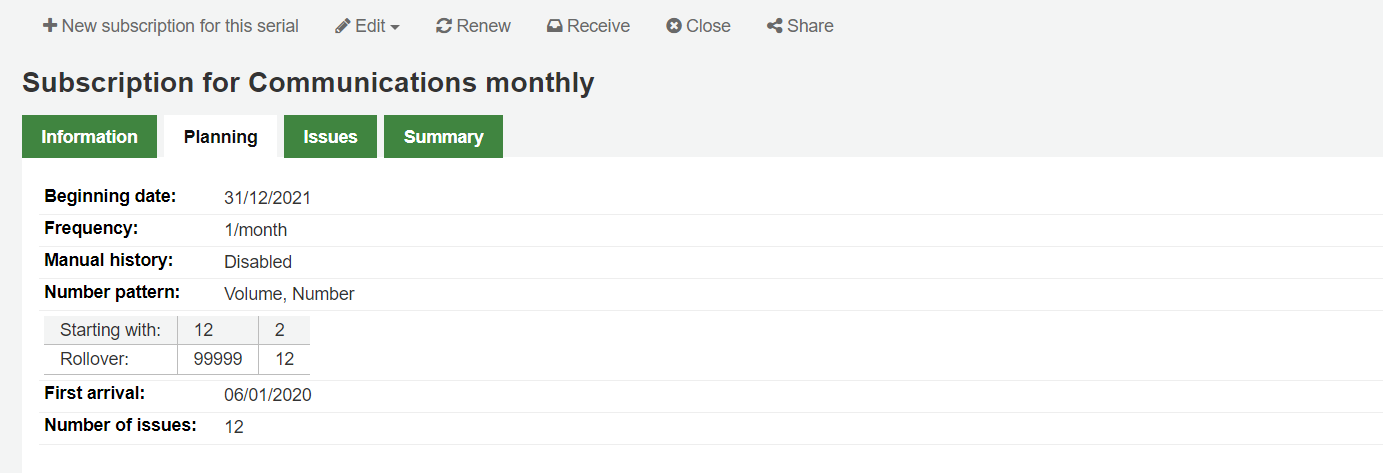
Call number: your item’s call number or call number prefix, this will be copied to items if they are created upon receiving.
Library: the branch that owns this subscription.
If more than one library subscribes to this serial you will need to create a subscription for each library
This can be done easily by using the ‘Edit as new (duplicate)’ option found on the subscription information page and changing only the ‘Library’ field

Public note: any notes you would like to appear in the OPAC for the patrons
Nonpublic note: should be used for notes that are only visible to staff members via the staff interface
Patron notification: you can pick a notice to send to patrons who subscribe to updates on this serial via the OPAC.
For this option to appear you need to make sure that you have a ‘Serials (new issue)’-type notice set up in the ‘Notices and slips’ tool
Location: the shelving location, this will be copied to items if they are created upon receiving.
Item type: if creating items upon reception, choose the item type of the items created.
Item type for older issues: if creating items upon reception, choose the item type that will be assigned to previous issues when receiving new issues. This will only appear only if the makePreviousSerialAvailable is enabled.
Grace period: the number of days before an issue is automatically moved from ‘Expected’ status to ‘Late’. This mechanism requires that the SerialsUpdate.pl cron job is set up to run regularly.
Number of issues to display to staff: this allows you to control how many issues appear by default in the staff interface catalog, in the ‘Subscriptions’ tab of the bibliographic record.
If this is left empty, the value of the StaffSerialIssueDisplayCount system preference will be used.
Note
This does not affect the number of items shown in the ‘Holdings’ tab if you create items for issues. It only affects the number of issues displayed in the ‘Subscriptions’ tab.
Number of issues to display to the public: this allows you to control how many issues appear by default in the OPAC, in the ‘Subscriptions’ tab in bibliographic records
If this is left empty, the value of the OPACSerialIssueDisplayCount system preference will be used.
Note
This does not affect the number of items shown in the ‘Holdings’ tab if you create items for issues. It only affects the number of issues displayed in the ‘Subscriptions’ tab.
Once that data is filled in you can click ‘Next’ to enter the prediction pattern information.
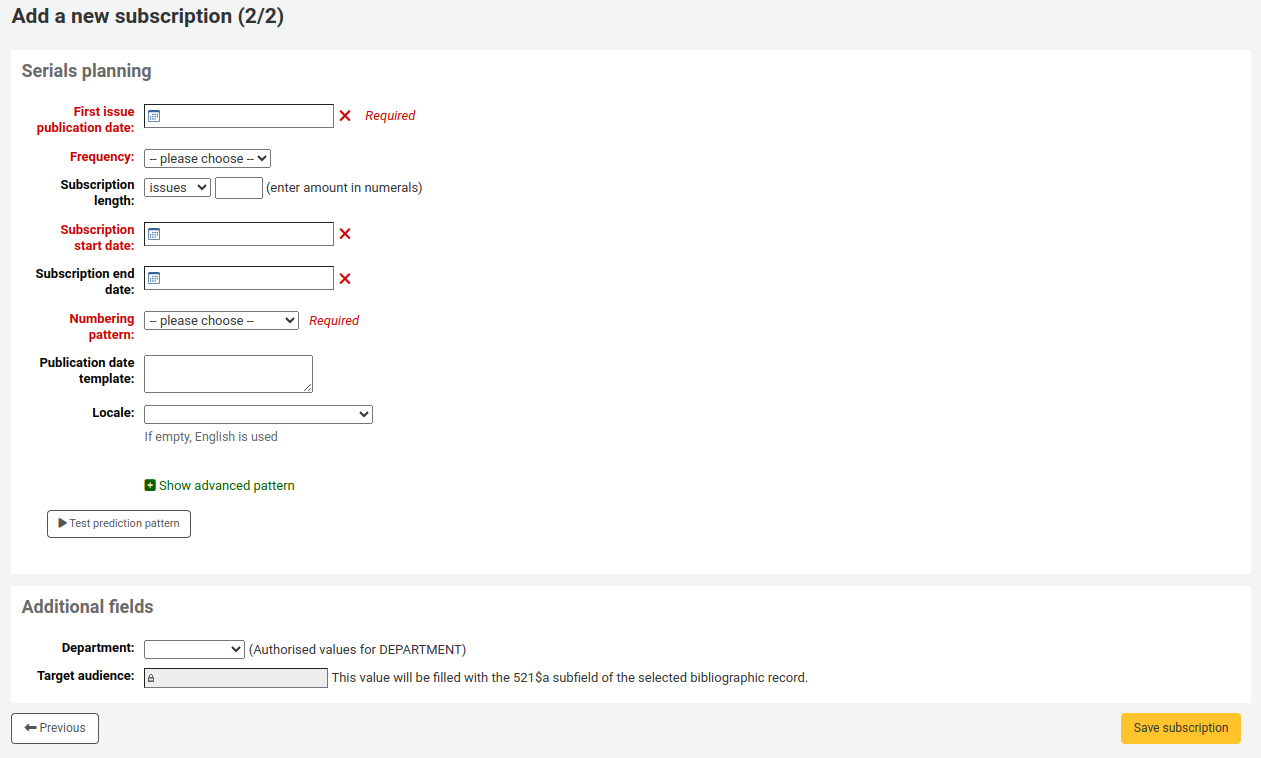
First issue publication date: enter the date of the issue you have in your hand, the date from which the prediction pattern will start
Frequency: choose the frequency of your serial. There are several pre-defined options all of which are visible alongside your own custom frequencies in ‘manage frequencies’. If the frequency you are looking for is not there, you can add a custom frequency.
Subscription length: enter the number of issues, weeks, or months in the subscription. This is also used for setting up renewal alerts.
Subscription start date: this is the date at which the subscription begins. This is used for setting up renewal alerts.
Subscription end date: this should only be entered for subscriptions that have ended (if you’re entering in a backlog of serials).
Numbering pattern: choose how issues are numbered. The options here are the ones in the manage numbering patterns section.
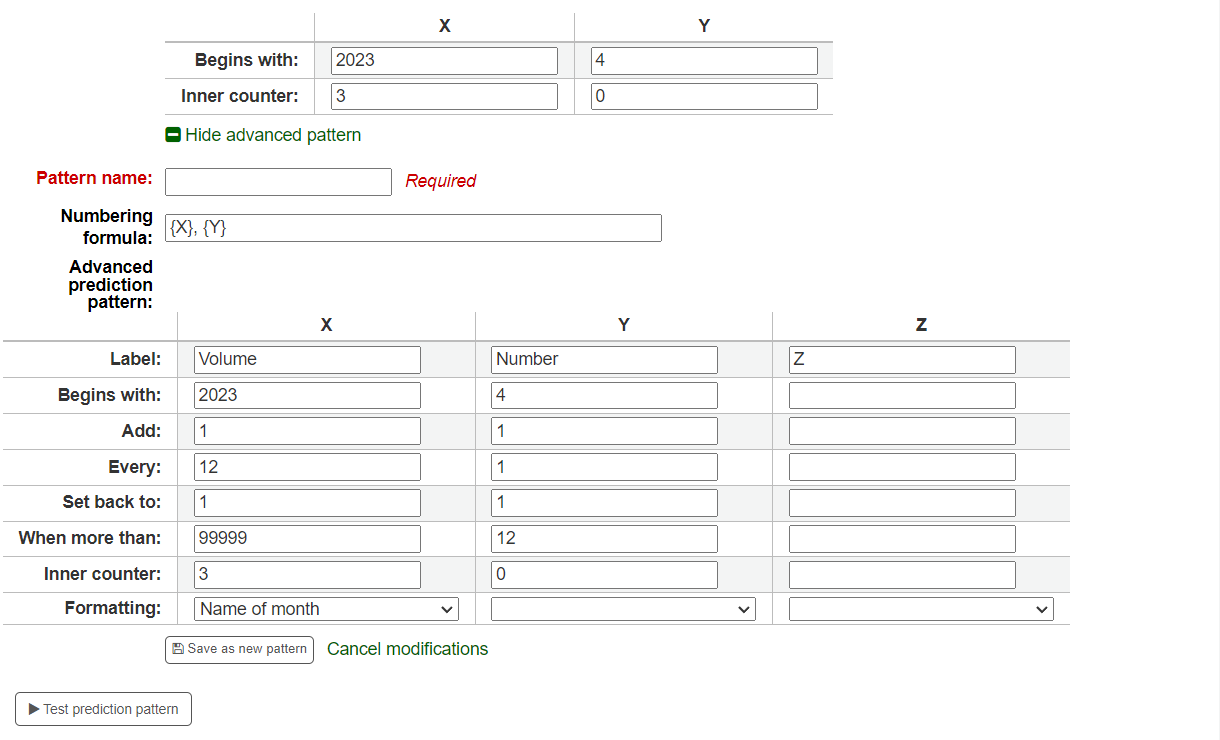
If the numbering pattern you need has not been created yet, you can create a new one by clicking on ‘Show advanced pattern’ and then ‘Modify pattern’. This is be the same as adding a numbering pattern (see section above).
Publication date template: this is the template that will be used for the ‘Published on (text)’ field. You can use Template Toolkit to create your template. For example, [% serialseq %] [% publisheddate %] will fill the ‘Published on (text)’ field with the serial number and date.
Note
You can use the following subscription fields in the template:
serialseq
serialseq_x
serialseq_y
serialseq_z
subscriptionid
biblionumber
status
planneddate
publisheddate
publisheddatetext
notes
routingnotes
Version
This field was added in Koha version 23.11.
Locale: if using names of days, months or season, you can choose the language in which these names will be displayed.
Note
Locale doesn’t currently work well with season names.
Once a ‘Numbering pattern’ is chosen the numbering table will appear.

Begins with: enter the first value for each variable, these should be the values of the issue entered in ‘First issue publication date’ above.
Inner counter: enter how many issues have already passed in the cycle, so that Koha can calculate when to cycle back.
For example: If the first issue to receive is “vol. 4, no. 1, iss. 796”, you need to set up “inner counter = 0” But if it’s “vol. 4, no. 2, iss. 797”, the inner counter should be “1”.
After filling in this data click the ‘Test prediction pattern’ button to see what issues the system will generate, if there are irregularities you can choose which issues don’t exist from the list presented.

If you have added custom fields, they will be editable above the buttons at the bottom of the screen
Click ‘Save subscription’ to save the information you have entered.
