Add a new patron
Patrons are added by going to the ‘Patrons’ module.
Get there: Patrons
Note
Only staff with the edit_borrowers permission (or the superlibrarian permission) will be able to add patrons.
Once there you can add a new patron.
Click ‘New patron’
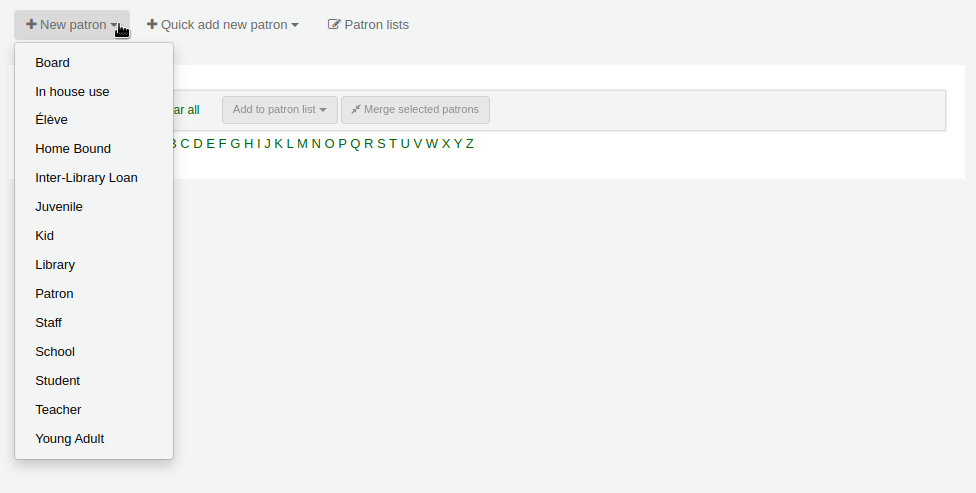
Note
The fields that appear on the patron add form can be controlled by editing the BorrowerUnwantedField system preference.
Note
Required fields are defined in the BorrowerMandatoryField system preference
First, enter the identifying information regarding your patron
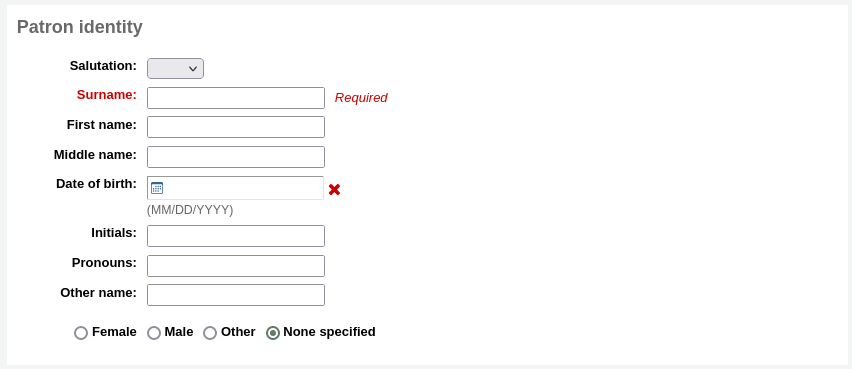
‘Salutation’ is populated by the BorrowersTitles system preference
Note
If you’d like to prevent full names from printing on slips and you’re not using the Initials or Other name fields for anything else, you can use them for shortened versions of the name to then be printed on the slip.
For example:
Then on the slip you can have it print the <<borrowers.initials>> instead of the full name (NCE).
Or you could do something like this:
Then on the slip you can have it print the <<borrowers.initials>>, <<borrowers.firstname>> instead of the full name (E, Nicole).
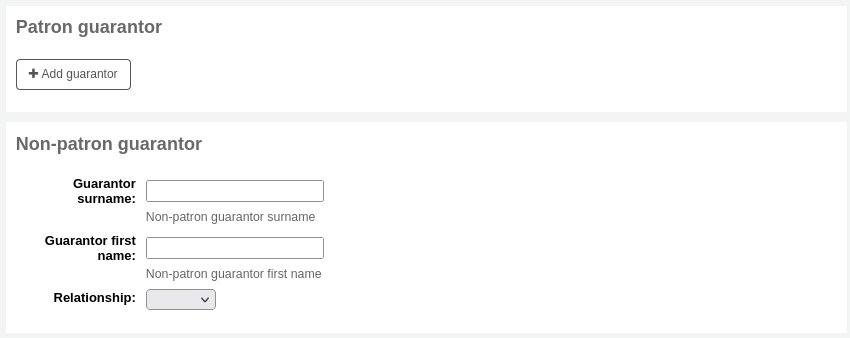
If this patron is a child, you will be asked to attach the child patron to an adult patron (guarantor)
Note
Guarantors can only be attached to patrons whose category has ‘Can be guarantee’ set to ‘Yes’.
Note
This field can be made mandatory with the ChildNeedsGuarantor system preference.
If the guarantor is a patron of the library, click ‘Add guarantor’ to search your system for an existing patron
Click ‘Select’ to choose the patron
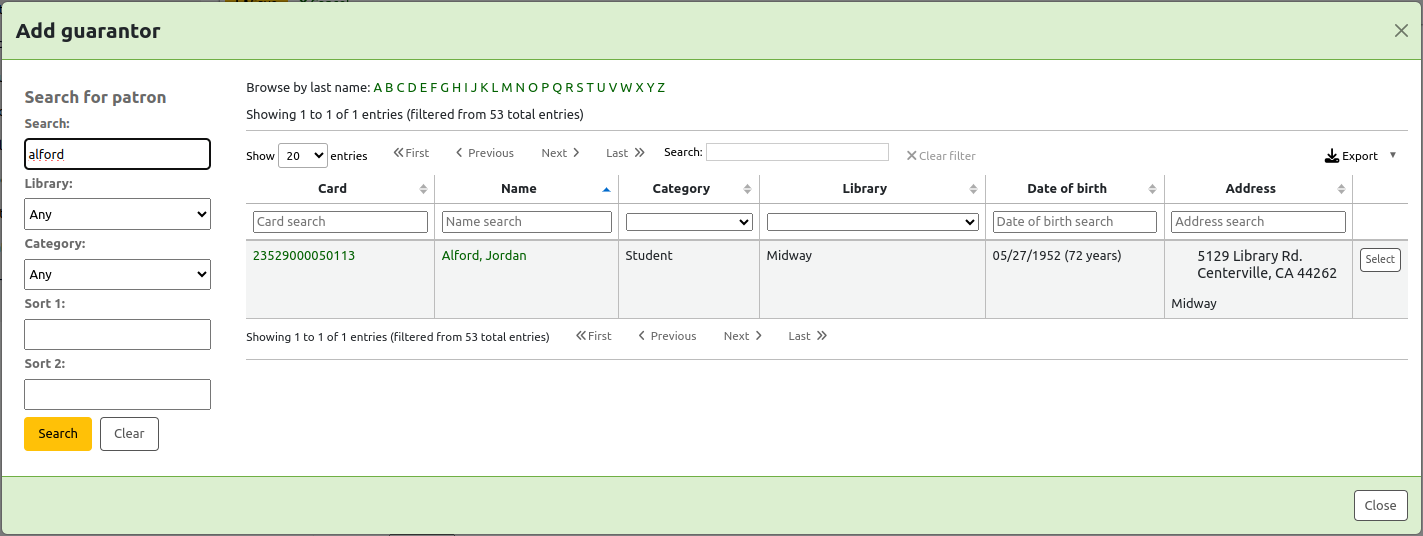
The relationships are set using the borrowerRelationship system preference

Note
It is possible to add more than one guarantor to a patron account (both parents for example).
Warning
A patron who is a guarantee cannot be a guarantor to someone else and vice versa.
If the guarantor is not a patron, you can still add their information in the ‘Non-patron guarantor’ section.
Next enter the main address and contact information
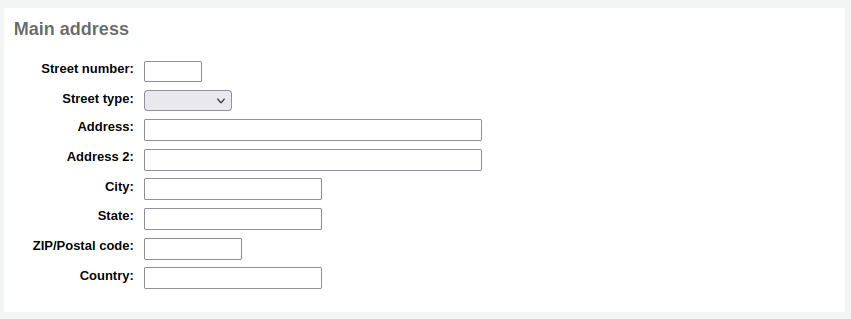
Note
The street type drop-down menu is populated by the ROADTYPE authorized value category.
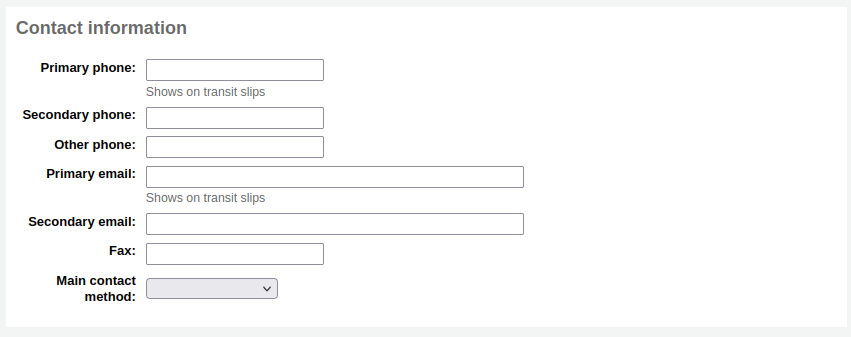
For contact information, note that the primary phone number and primary email address are the ones that appear on notices and slips printed during circulation (receipts, transfer slips and hold slips). The primary email is also the one that overdue notices and other messages go to.
The ‘Main contact method’ can be used in reports and for staff to know which method to use first when trying to contact the patron.
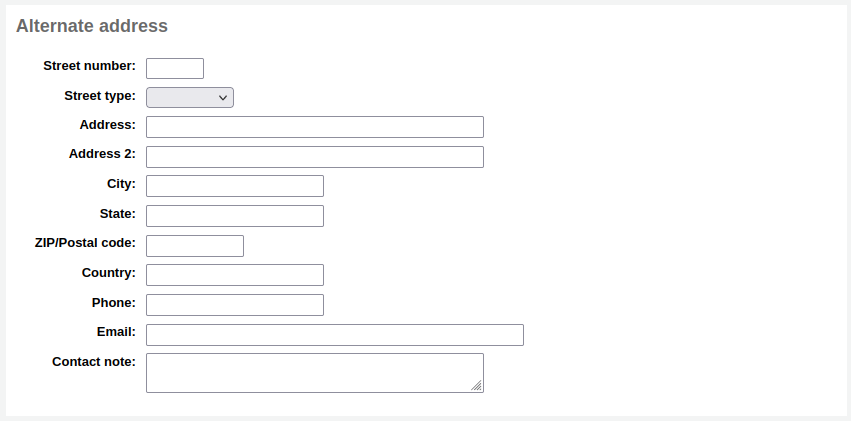
You can also record an alternate address for each patron. This could be used in an academic setting to store the patron’s home address for example.
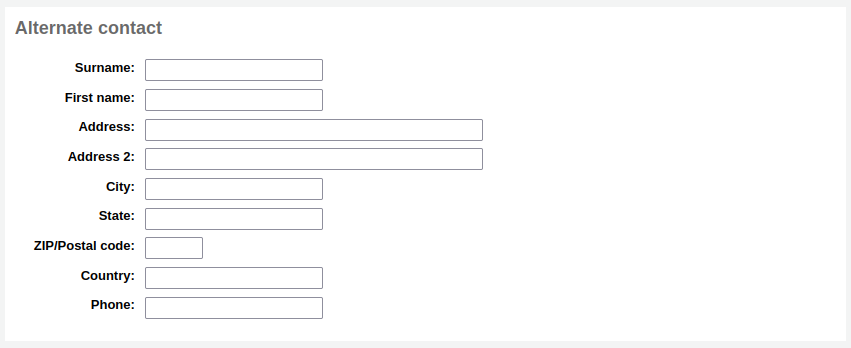
Each patron can have an alternate contact. An alternate contact could be a parent or guardian, for example.
The library management section includes values that are used within the library

The card number field is automatically calculated if you have the autoMemberNum system preference set that way
Note
For a newly installed system, this preference will start at 1 and increment by 1 each time after. To have it start with the starting number of your barcodes, enter the first barcode by hand in the patron record and save the patron. After that, the field will increment that number by 1.
If you accidentally chose the wrong patron category at the beginning you can fix that here
Sort 1 and 2 are used for statistical purposes within your library
You can create dropdown menus for these fields by adding authorized values in the Bsort1 authorized value category or the Bsort2 authorized value category
‘Allow auto-renewal of items’ is used to control whether this patron’s checkouts will be renewed according to the circulation rules. If set to ‘Yes’, items for which automatic renewal is enabled in the circulation rules will be automatically renewed. This requires the automatic_renewal cronjob to run daily. If set to ‘No’, items for which automatic renewal is enabled in the circulation rules will not be automatically renewed.
Protected: protected patrons cannot be deleted either manually or by batch. Use this for system patrons such as statistical patrons, SIP2 patrons, the self checkout user, or superadmins.
Version
The ‘Protected’ option was added in version 23.11 of Koha.
‘Check for previous checkouts’ is used to set the patron’s personal preference regarding checking their circulation history to see if they have borrowed This item in the past. This overrides the setting of the patron category and of the CheckPrevCheckout system preference.
Preferred language for notices: if TranslateNotices is set to allow, you will be able to choose among the installed languages the language in which the patron would prefer to receive notices (such as overdue notices and advanced notices).
Next, the library set-up section includes additional library settings
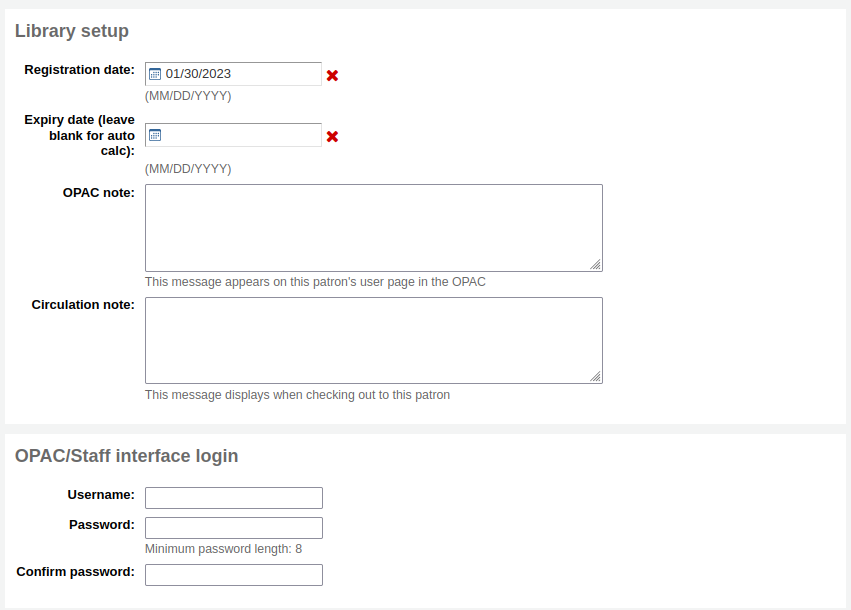
The registration date will automatically be filled in with today’s date
The expiry date will automatically be calculated based on your patron category settings
The OPAC note is a note for the patron, it will appear in the patron’s online account on the OPAC

Note
See also OPAC messages
The Circulation note is meant solely for your library staff and will appear when the circulation staff goes to check an item out to the patron

The ‘OPAC/Staff interface login’ section asks for the username and password to be used by the patron (or staff member) to log into their account in the OPAC and for staff to log in to the staff interface.
Staff will only be able to use this login information to log in to the staff interface if they have at least the catalogue permission.
If you have enabled the housebound module (with the HouseboundModule system preference), you will be able to choose a housebound role for this patron.

If you have set additional patron attributes in the administration module, these will appear next

Finally, if you have the EnhancedMessagingPreferences system preference set to ‘allow,’ you can choose the messaging preferences for this patron.
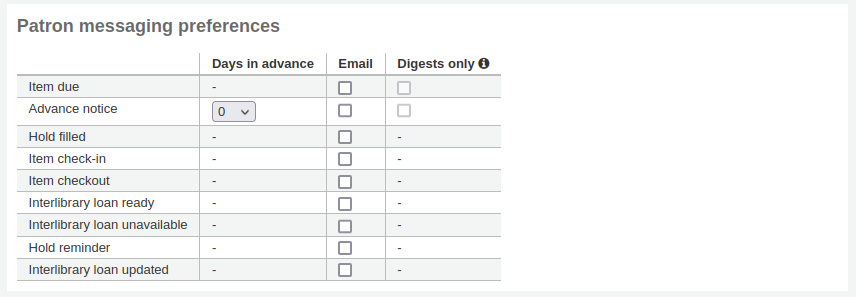
See the definition of each notice in the advance notices and hold notices section
Warning
These preferences will override any you set via the patron categories
Warning
These preferences can be altered by the patron via the OPAC if the EnhancedMessagingPreferencesOPAC system preference is set to ‘show’.
Once finished, click ‘Save’
If the system suspects this patron is a duplicate of another it will warn you.

Note
See the PatronDuplicateMatchingAddFIelds system preference to see or change which fields are used to detect duplicate patrons. The default is the surname, the firstname and the date of birth.
If you have set a minimum or upper age limit on the patron category and are requiring that the birth date be filled in, Koha will warn you if the patron you’re adding is too old or young for the patron category you have selected:

If the patron’s category has an enrollment fee, the fee will be charged to the patron’s account when the account is created. You can then manage the charge in the patron’s accounting tab.
Quick add a patronIf your circulation desk is very busy and you want to register patron quickly, you can use the ‘quick add’ feature. It’s a shortened version of the add patron form with only a couple of necessary fields to fill out.
This feature uses two system preferences: BorrowerMandatoryField and PatronQuickAddFields. These are the two system preferences that control which fields are in the quick add form.
To quick add a patron, go to the Patrons module
Get there: Patrons
Click on the ‘Quick add new patron’ button.
You will be asked to choose a patron category.
Then, you will be presented with a shortened form.
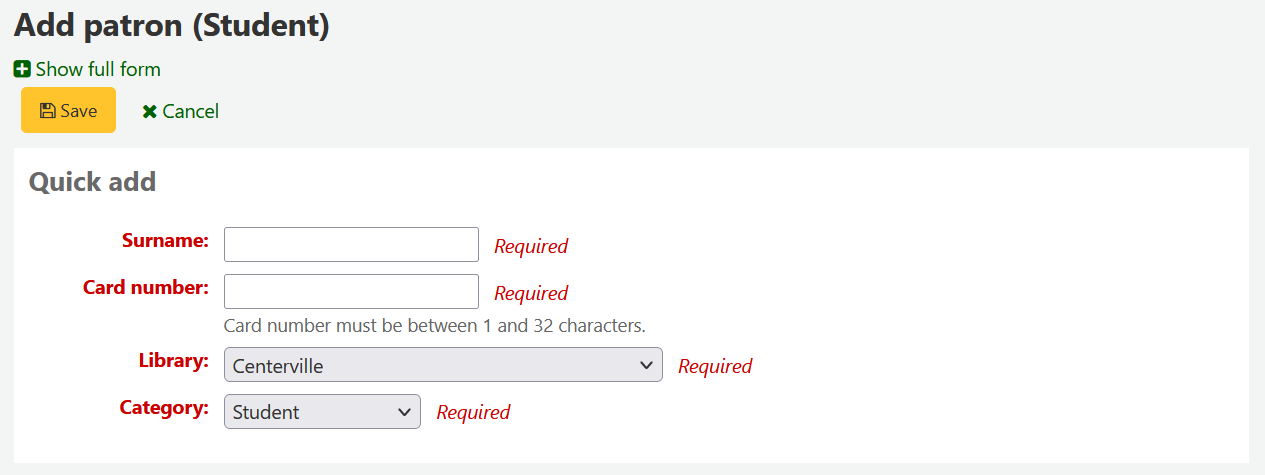
Once the form is filled out, click on ‘Save’.
If you need to access the full form, you can click on ‘Show full form’ above the ‘Save’ button.
