Editing patrons
Patrons in Koha can be edited using one of many edit buttons.
Note
Only staff with the edit_borrowers permission (or the superlibrarian permission) will be able to edit patron files.
To edit the entire patron record simply click the ‘Edit’ button at the top of the patron record.

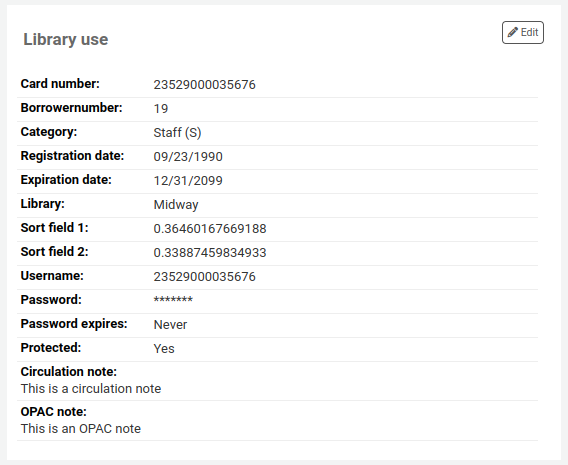
To edit a specific section of the patron record (for example the ‘Library use’ section) click the ‘Edit’ button beside the section.

Edit the patron’s file and click ‘Save’.
Warning
Note that changing your own username will log you out of Koha.
Patron passwords are not recoverable.
The stars on the patron details page next to the password label are always there even if a password isn’t set.
If a patron forgets their password, or if a patron’s account is ‘locked’ or ‘administratively locked’ (see the FailedLoginAttempts and the LockExpiredDelay system preferences, respectively), the only option is to reset their password.
This can be done from the staff interface. To change the patron’s password, click the ‘Change password’ button.

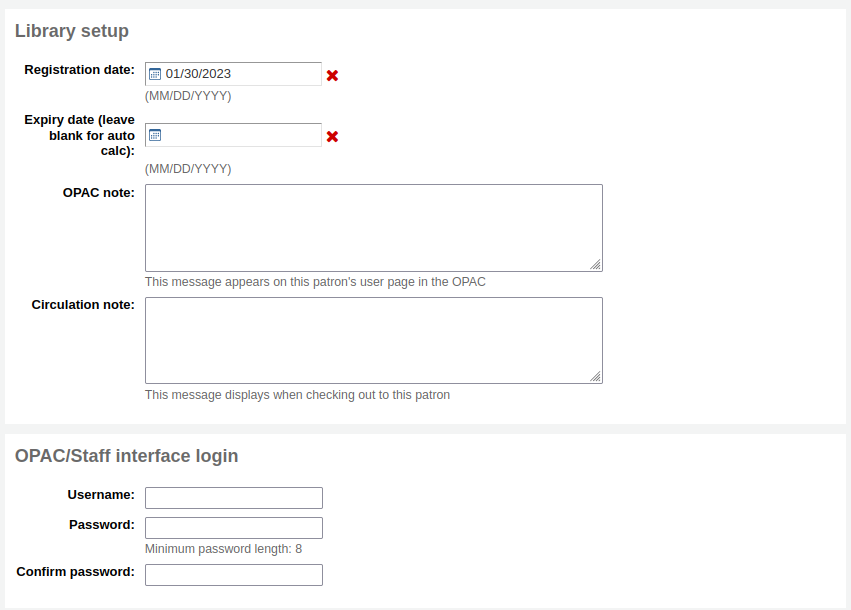
Koha cannot display existing passwords as they are encrypted in the database. Leave the field blank to leave password unchanged.
This form can automatically generate a random password if you click the link labeled “Click to fill with a randomly generated suggestion. Passwords will be displayed as text.”
Warning
Note that changing your own username here will log you out of Koha.
Changing the password through this form will also update the password expiry date, as set in the patron category.
If the NotifyPasswordChange system preference is enabled, the patron will receive a notification indicating their password was changed.
Note
The content of this email can be customized with the Notices and slips tool. The code of the letter is PASSWORD_CHANGE.
If the OpacResetPassword system preference is enabled, or if the patron category allows it, you can also send a password reset email to the patron by clicking on ‘More’ and choosing ‘Send password reset’.

This will send a password reset email to the patron, similar to the one sent if they click on the ‘Forgot your password?’ link on the OPAC. However, the reset link is set to expire after 5 days rather than 2 days when it is sent this way.
Note
The content of the email can be customized with the Notices and slips tool. The code of the letter is STAFF_PASSWORD_RESET.
Only staff members with the superlibrarian permission can see and change the password expiry date manually. This date can be changed by clicking the ‘Edit’ button at the top of the patron’s record, or the ‘Edit’ button next to the ‘Library use’ section.
Adding patron flagsRestrictions are used to prevent patrons from checking out.
Patrons can also be blocked from checking items out by setting patron flags.

If you would like your circulation staff to confirm a patron’s address before checking items out to the patron, set the ‘Gone no address’ flag. This will create a warning when checking out.

If the patron reports that they have lost their card you can set the ‘Lost card’ flag to prevent someone else from using that card to check items out.

If you would like to bar a patron from the library you can add a manual restriction.

Note
This is the same as the restrictions tab at the bottom of the patrons details page.
Note
A patron can automatically be restricted with the Overdue/notice status triggers
If you enter in a date and/or note related to the restriction, you will see that in the restricted message as well.

You can leave notes in a patron record. There are several ways to do this: you can either add a circulation note or an internal message. These will not show in the OPAC for the patron to see. If you want the patron to see the notes and messages, use OPAC notes and OPAC messages.
Circulation notesCirculation notes are added to the patron’s file through the add patron form or the edit patron form, in the ‘Library set-up’ section.

In the staff interface, circulation notes will be in the ‘Library use’ section of the patron’s file.

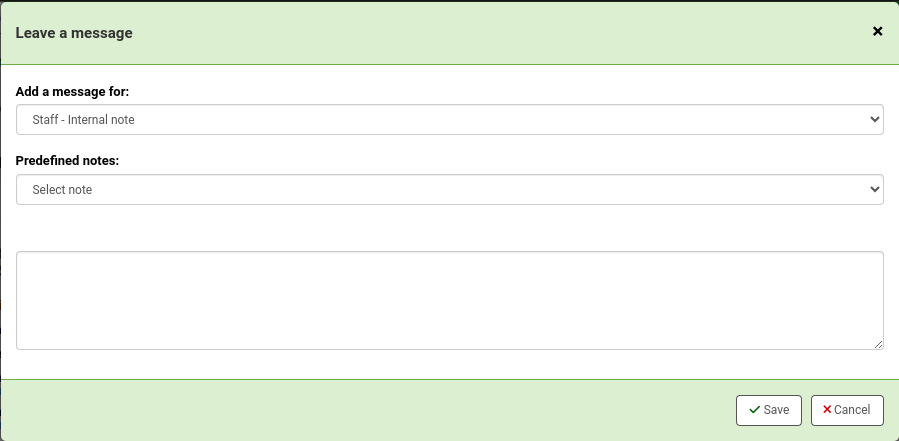
Internal messages are added to the patron’s file using the ‘Add message’ button.

To leave an internal message, choose “Staff - Internal note” in the ‘Add a message for’ field. Enter your message in the box, or choose a predefined message in the drop-down menu.

Note
Predefined messages are added in the BOR_NOTES authorized value category.
Once saved, the internal message is shown in bold red on the patron’s detail page in the staff interface, at the top of the page just under the row of action buttons.

It will also appear on the checkout page, to the right of the checkout box.

If you need to edit the message, click the ‘Edit’ button next to the message, edit the text and click ‘Save’.
Changing children to adultsChildren patrons do not become adults automatically in Koha unless the update patron categories cron job is running.
To upgrade a child patron to and adult patron category manually go to the ‘More’ menu and choose ‘Update child to adult patron’.

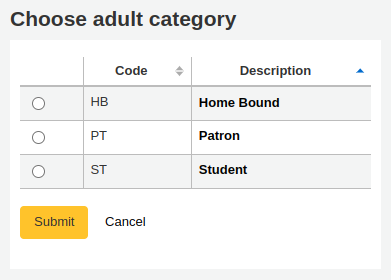
You will then be presented with a pop up window asking which one of your adult patron categories this child should be updated to.

Note
This list shows the patron categories that have the category type ‘adult’.
