
Check out (issuing)
To begin the checkout process you must enter the patron barcode or part of their name. The checkout option appears in three main places:
Check out option in the search bar at the top of the staff interface’s main page

Check out option in the search bar at the top of the main circulation page

Those two options are essentially a patron search. If you only have one result, Koha will automatically go to the patron’s file, in the ‘Check out’ tab.
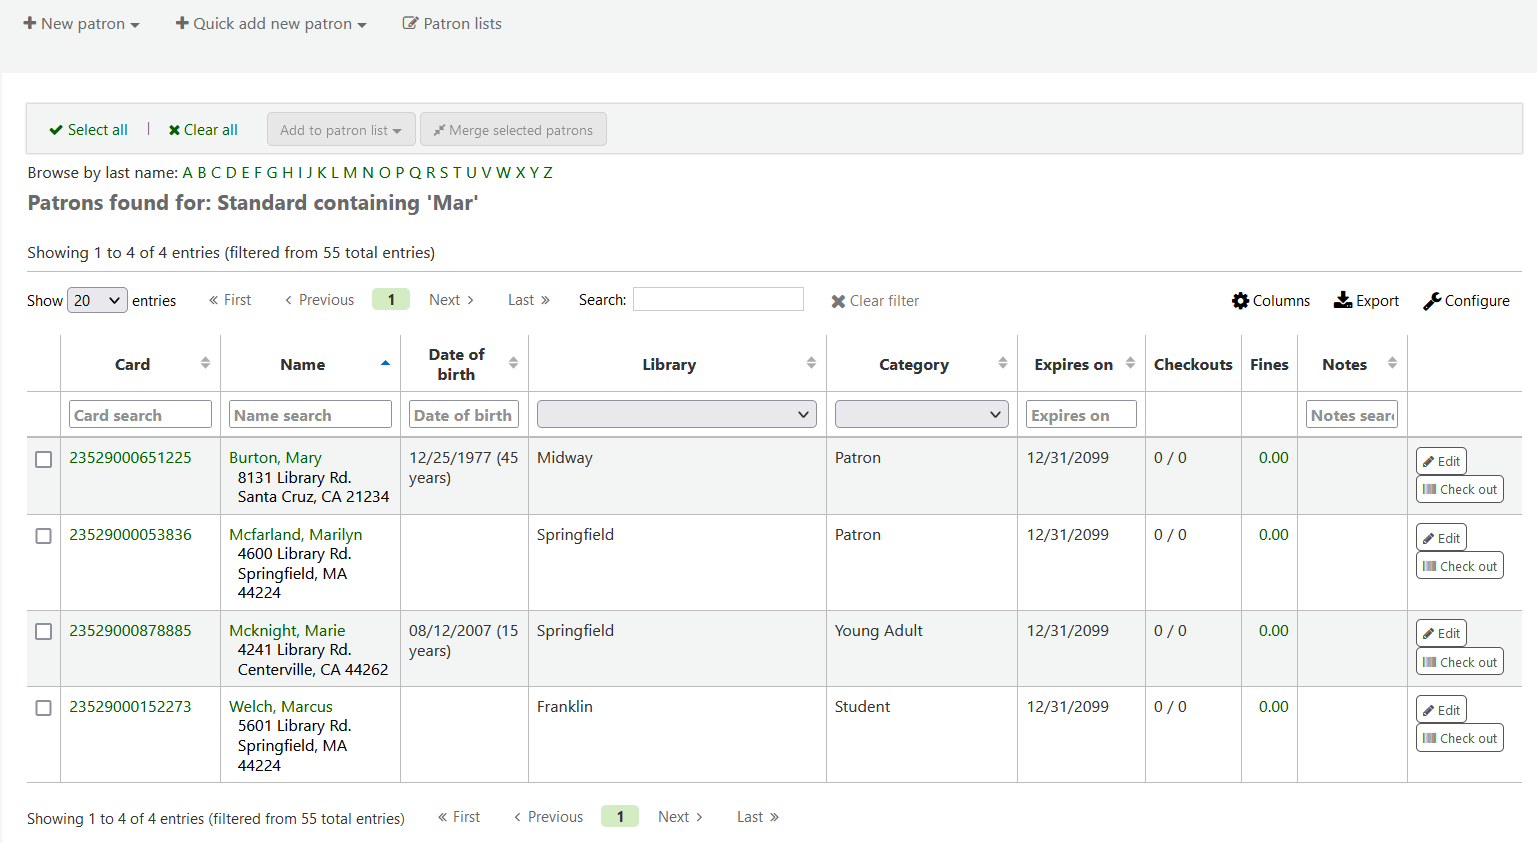
If your search gives you more than one result, it will ask you to choose which patron to check out to.
Note
You can customize the columns of this table in the ‘Table settings’ section of the Administration module, under the patrons tab (table id: memberresultst).
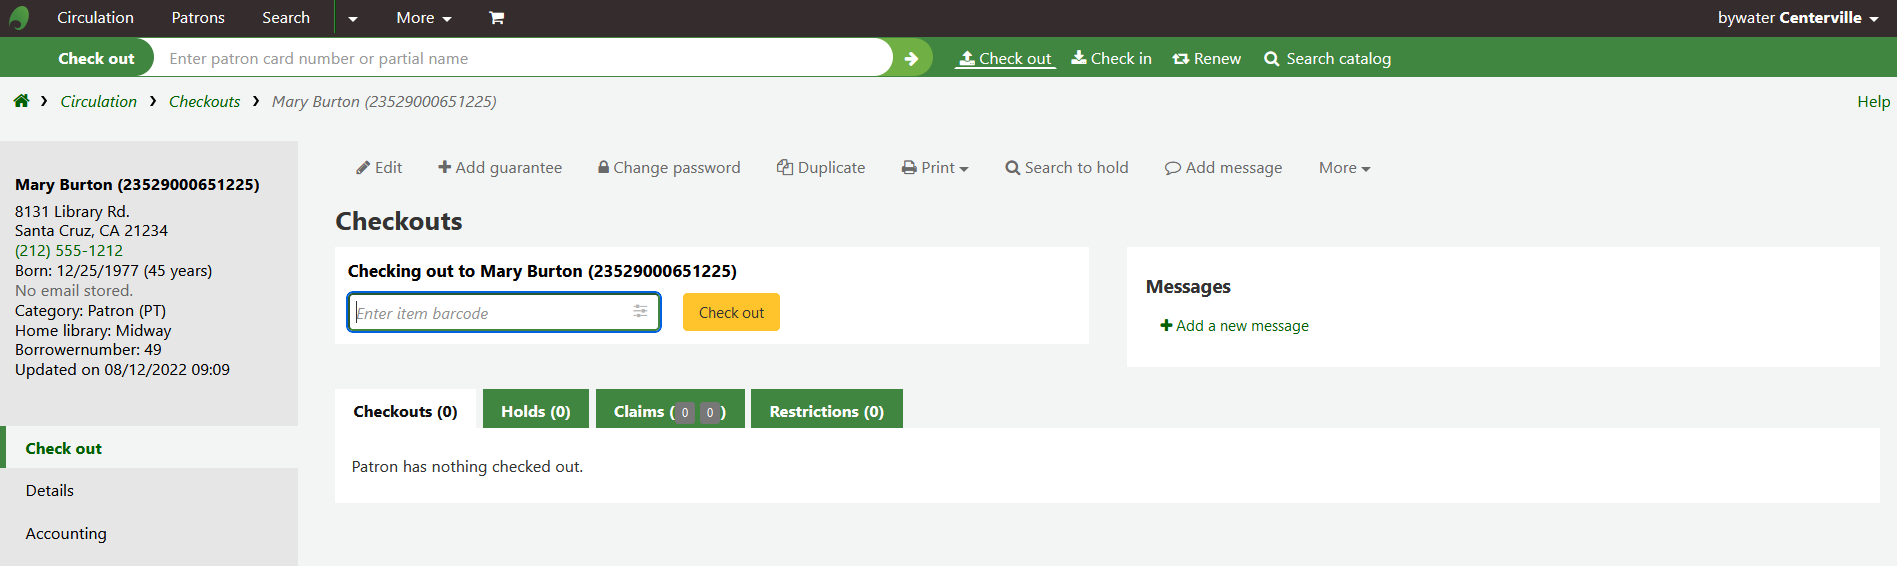
Clicking on a patron search result will bring you to the patron’s file, on the ‘Details’ tab. Click the ‘Check out’ tab to access the check out screen.
If you have enabled batch checkouts, click the batch check out tab on the patron record
To check an item out to a patron, first search for that patron using one of the many options listed above. You will then be presented with the checkout screen.
If ‘Always show checkouts automatically’ is checked, you will see the list of current checkouts below the check out box.
Note
The previousIssuesDefaultSortOrder system preference controls in which order these previous checkouts appear (earliest to latest, or latest to earliest).
Note
You can customize the columns of this table in the ‘Table settings’ section of the Administration module, under the circulation tab (table id: issues-table).
Note
To prevent too many service queries when checking out a number of items in a row, you can use the LoadCheckoutsTableDelay system preference to delay the loading of the table and lighten the load on resources.
At the top of the check out screen is a field to type or scan the item’s barcode into.
Note
Many modern barcode scanners will send a ‘return’ to the browser, making it so that the ‘Check out’ button is automatically clicked.
If the barcode is not found you will be prompted to use fast cataloging to add the item. Learn more about fast cataloging later in this manual.
If the itemBarcodeFallbackSearch system preference is set to ‘Enable’, you can enter a keyword search in this box instead of just a barcode (this will make it possible to check out using title and/or call number).
If the AutoSwitchPatron system preference is set to ‘Enable’, scanning a patron barcode here will take you to that patron’s file.
To see more checkout options click the ‘Checkout settings’ link to expand the checkout area.
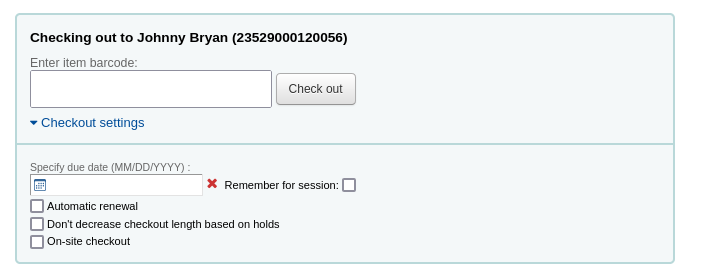
Specify due date: this option can be used to override the default due date for the item, as defined in the circulation and fines rules.
Note
This option will only appear if the SpecifyDueDate system preference is set to allow staff to override the due date.
The red ‘X’ is used to clear the date. If the ‘specify due date’ field is empty, the default due date, as defined in the circulation and fines rules is used.
Remember for this session: check this box to use the same date for all checkouts. This will not only keep the specified due date for this patron but for all patrons, until you log out of the staff interface.
Automatic renewal: this option will allow this item to automatically be renewed
To use automatic renewals,
the automatic_renewals cron job must be running
the circulation and fines rules regarding automatic renewals must be defined
Just like regular renewals, the checkouts will not be automatically renewed if there is a hold on the item.
Don’t decrease checkout length based on holds: this option overrides the decreaseLoanHighHolds system preference.
Note
This option will only appear if the decreaseLoanHighHolds system preference is enabled.
On-site checkout: this option indicates that this checkout is an on-site checkout.
Note
This option will only appear if the checkout of items on site to patrons is allowed. These are usually items that are not for loan that you would like to check out for in-library use.
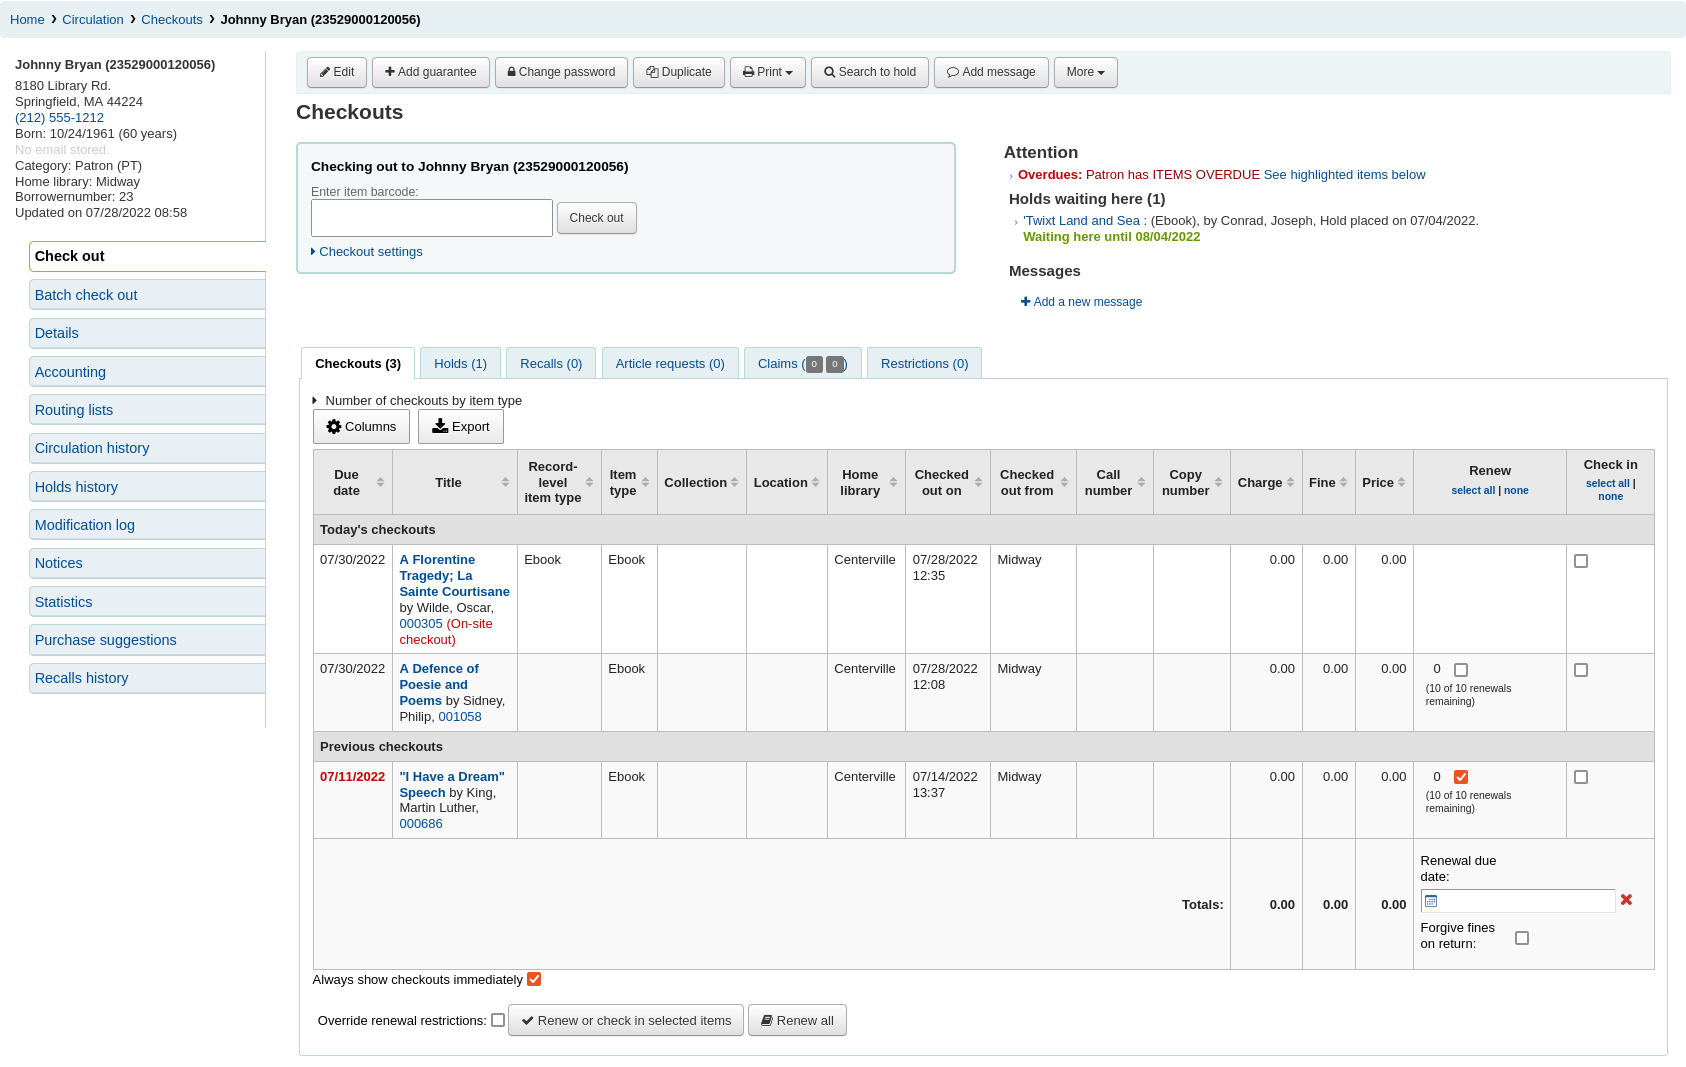
At the bottom of the page there is a summary of the patron’s current checked out items along with the due date (and time if the item is an hourly loan). Items checked out today will appear at the top, previously checked out items will be underneath.
Note
The todaysIssuesDefaultSortOrder system preference controls in which order these new checkouts appear (earliest to latest, or latest to earliest).
Note
Items that are hourly loan items will include the time with the due date.
If an item is checked out for on-site use, that information will be highlighted in red in the checkout summary.

If there are notes on the patron record these will appear to the right of the checkout box
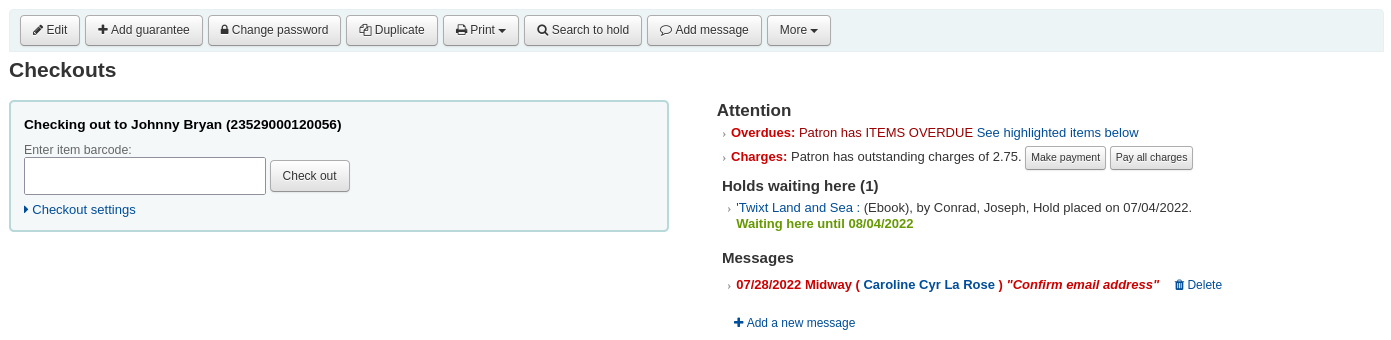
If the patron has a hold waiting at the library, that too will appear to the right of the check out box making it easy for the circulation staff to see that there is another item to give to the patron.
If you would like a more assertive hold warning, you can enable the WaitingNotifyAtCheckout system preference, which will generate a pop-up after each checkout to the patron who has waiting holds.
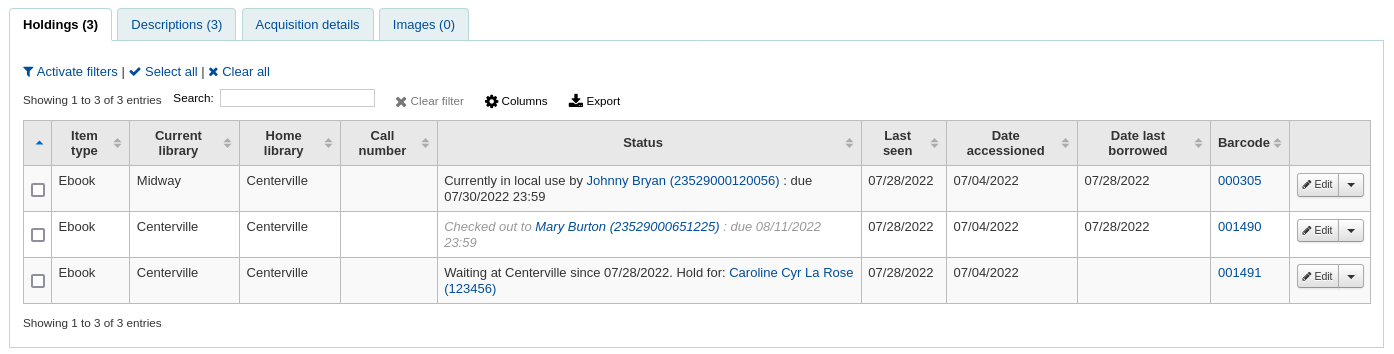
The details of the checkouts will appear on the record detail page in the staff interface as well.
Once you have checked out all of the items for the patron you can print them a receipt by choosing one of two methods.
If you have the CircAutoPrintQuickSlip preference set to ‘open a print quick slip window’ you can simply hit enter on your keyboard or scan a blank piece of paper with your barcode scanner. The idea being that you’re “checking out” a blank barcode which triggers Koha to print the ‘Quick slip.’
If you have the DisplayClearScreenButton system preference set to ‘Show print quick slip and clear buttons’ or ‘Show print slip and clear buttons’, there will be a small printer button in the top right of the checkout box, which can be used to print the slip or quick slip.

You can also click the Print button at the top of the screen and choose ‘Print slip’ or ‘Print quick slip’.

If you choose ‘Print slip’ it will print all of the items the patron has checked out, including those they checked out at an earlier date.
Note
The slip uses the ISSUESLIP notice. You can customize the notice in the Notices and slips tool.
Choosing ‘Print quick slip’ will print only the items that were checked out today.
Note
The quick slip uses the ISSUEQSLIP notice. You can customize the notice in the Notices and slips tool.
‘Print summary’ will generate a full page summary for the patron’s circulation information.
Note
The summary cannot be customized.
However, the tables for the checkouts, holds, and charges are customizable in the ‘Table settings’ section of the Administration module (table id: print-summary-checkouts, print-summary-holds, and print-summary-fines).
‘Print account balance’ will generate a summary of outstanding charges and unused credits in the patron’s account.
Note
The quick slip uses the ACCOUNTS_SUMMARY notice. You can customize the notice in the Notices and slips tool.
Note
This option will only appear if the patron has charges in their Accounting tab.
‘Print overdues’ will print out a slip that lists all items that are overdue.
Note
The overdue slip uses the OVERDUE_SLIP notice. You can customize the notice in the Notices and slips tool.
‘Print checkin slip’ will print out a slip that lists items that were checked in today.
Note
The checkin slip uses the CHECKINSLIP notice. You can customize the notice in the Notices and slips tool.
Tip
You can add custom slips in this menu by adding a new notice in the notices and slips tool in the ‘Patrons (custom slip)’ module.
For example, to have a slip with all the patron’s current holds,
Go to Tools > Notices and slips
Click ‘New notice’, and choose ‘Patrons (custom slip)’
Fill out the code and name for the slip. The name will be what appears in the ‘Print’ menu.
In the ‘Print’ template section, paste the code:
Click ‘Save’
Now, in a patron account, when you click on ‘Print’ the new custom slip should be available.
Other than printing a receipt, there are several ways to export a patron’s checkouts.
The ‘Export’ button at the top of the table allows you to export the patron’s current checkouts in either Microsoft Excel or CSV format, or even copy or print their checkouts.

The CSV file exported this way will contain the columns of the table that are visible. You can click on the ‘Columns’ button and remove some columns first, if needed.
If the ExportCircHistory system preference is enabled, there will be an ‘Export’ column in the checkouts table. This is used to export the patron’s current checkouts in either MARC or CSV format.

To export checkouts this way,
Select the checkouts to be exported using the checkboxes in the ‘Export’ column.
At the bottom of the table, choose the options for the export
Export checkouts using format
MARC with items: this will export the MARC records of the checked out titles, including the item information.
MARC without items: this will export the MARC records of the checked out titles.
CSV: this will export a CSV file of checked out titles. When this option is selected, a new dropdown menu will appear to choose a CSV profile.
Export bundle contents: if the patron checked out a bundle, this option will export the parent record as well as all the child records.
Don’t export fields: optionally, you can enter MARC fields that are not to be exported.
Note
The default values in the “Don’t export field” field are set in the ExportRemoveFields system preference.
When you’re done checking an item out if you have the DisplayClearScreenButton preference set to ‘Show’ you can clear the current patron by clicking the X in the top right of the patron’s info to remove the current patron from the screen and start over.
If you have the CircAutoPrintQuickSlip preference set to ‘clear the screen’ then you simply need to hit enter or scan a blank barcode and the screen will be cleared of the current patron.
Batch checkoutsIf you would like to perform a batch check out you can do so by turning on the BatchCheckouts system preference and assigning the proper patron categories via the BatchCheckoutsValidCategories system preference. This will allow you to use an RFID pad that reads multiple barcodes or perform a batch check out for training internal use.
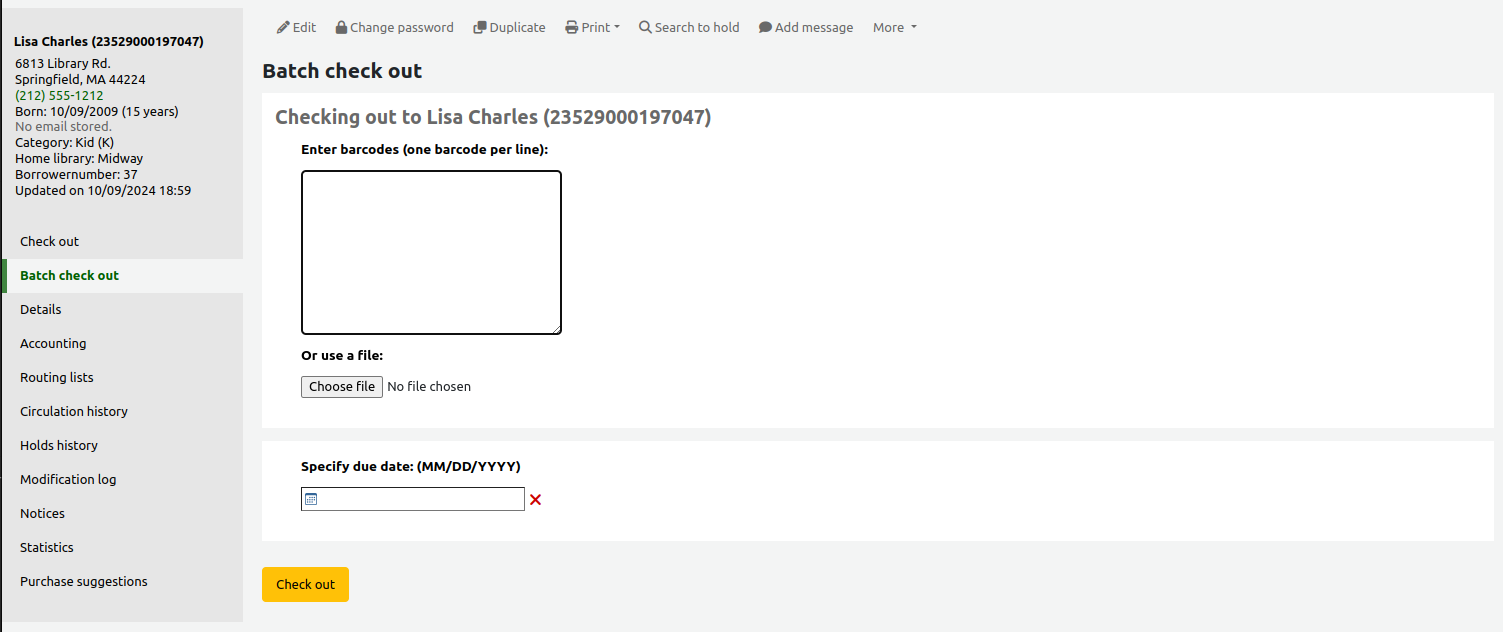
Access the batch checkout screen by going to the patron record and clicking the ‘Batch check out’ tab on the left.
From this screen, you can scan several barcodes or load a file of barcodes.
If the SpecifyDueDate system preference is enabled, you will have the option to set a due date for the checkouts.
If the OnSiteCheckouts system preference is enabled, there will be an option to specify these are on-site checkouts.
Version
The on-site checkout option in batch check out was added to Koha in version 23.11.
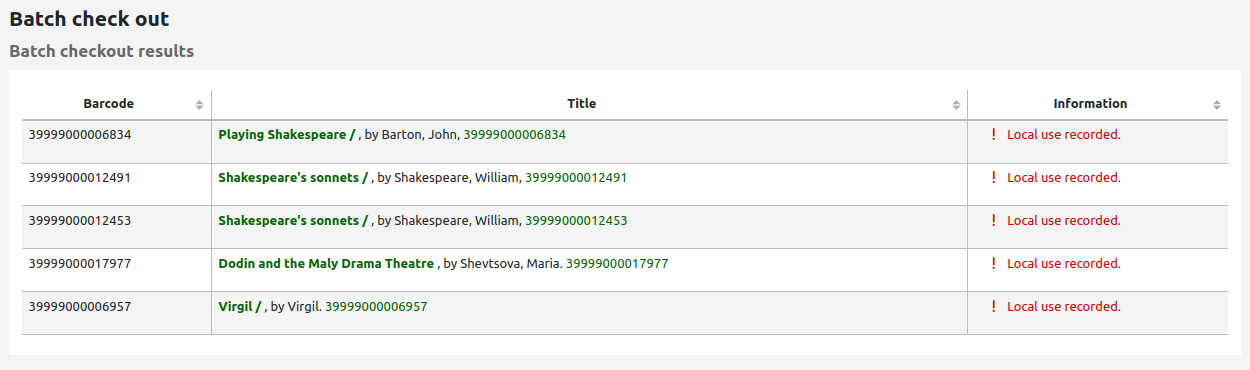
If the items cannot be checked out, a warning will be provided on the following screen, with the option to uncheck the items that are not to be checked out.

If you are using a statistical patron type to record in-house use, you’ll see that local use was recorded for each scanned item.
If you check out an item that has multiple pieces and you have cataloged that information in subfield 3 of the item record (in MARC21) a message will pop up when you check out that item telling you how many pieces should be there.

There are times when Koha will prevent the librarian from being able to check out items to a patron. When this happens a warning will appear notifying the librarian of why the patron cannot check items out.
Patron owes too much in fines
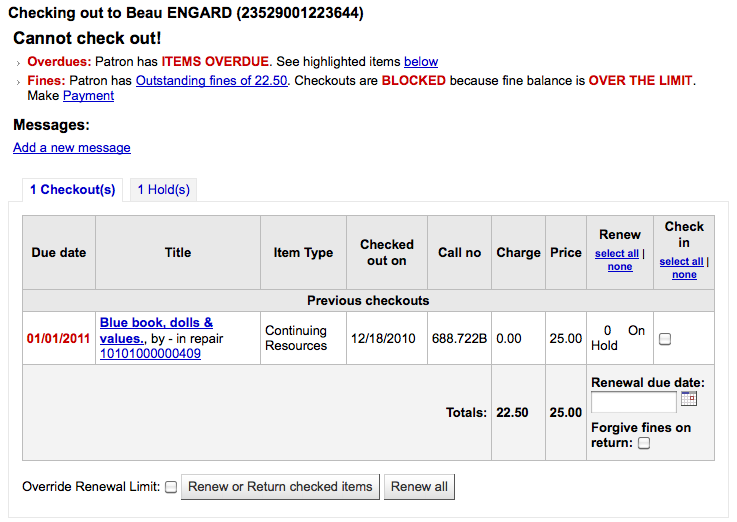
You can set the amount at which patron checkouts are blocked with the noissuescharge system preference
Patron has a restriction on their account

This can be set by the librarian editing a patron record and adding a restriction or by the Overdue/Notice Status Triggers
Staff with the force_checkout permission (or superlibrarian) will be able to temporarily override a restriction in order to check out anyway.

Patron needs to confirm their address

This can be set by the staff editing a patron record and adding a flag.
Patrons has lost their library card

This can be set by the staff editing a patron record and adding a flag.
‘This item has been lost with a status of “X”.’

This message appears if the IssueLostItem is set to ‘display a message’ and the item being checked out has a lost status.
The item is checked out.
Check out warningsSometimes checkouts will trigger warning messages that will appear in a yellow box above the check out field. These warnings need to be acknowledged before you will be able to continue checking items out.
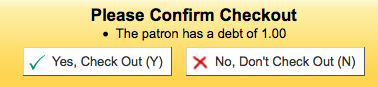
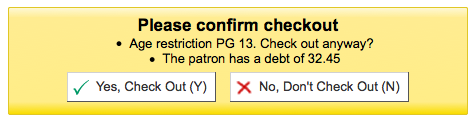
Patron has outstanding fines
Item on hold for someone else
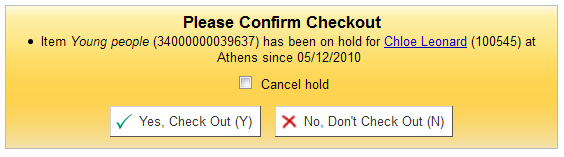
Item should be on the hold shelf waiting for someone else

Item booked for someone else
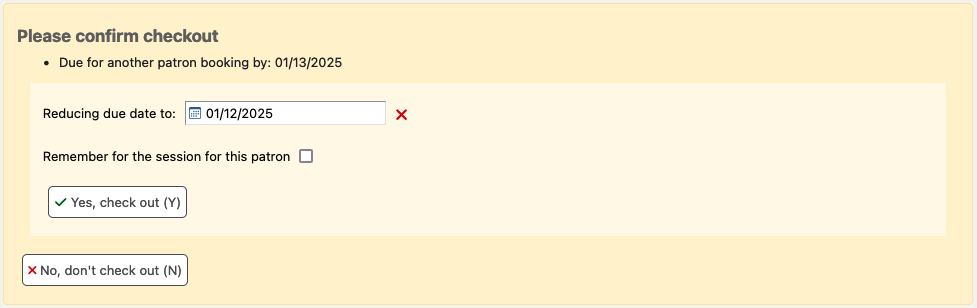
Bookable items can be issued without a prior booking, in accordance with the circulation rules. If a booking on the item being checked out is due to start before the end of the loan period, this warning will appear.
Koha will automatically suggest to reduce the item due date to a new date prior to the start of the booking. You can adjust this before checking out.
Item already checked out to this patron

Item checked out to another patron
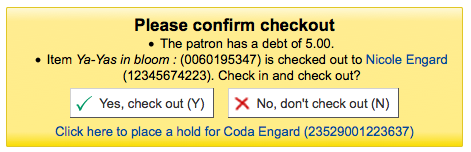
This warning will allow you to place a hold on the item for the patron you’re trying to check it out to.
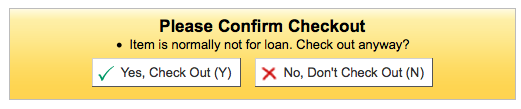
Item not for loan
Patron has too many things checked out and AllowTooManyOverride is set to ‘Allow’

Patron has too many things checked out and AllowTooManyOverride is set to “Don’t allow”

Item cannot be renewed

This can be overridden with the AllowRenewalLimitOverride system preference
Barcode not found

Learn more about fast cataloging later in this manual.
‘This item has been lost with a status of “X”. Check out anyway?’

This warning message appears if the IssueLostItem system preference is set to ‘require confirmation’ and the item being checked out has a lost status.
Staff must click ‘Yes, check out’ for the item to be checked out.
Item being checked out is not recommended for a patron of this age
Item being checked out meets the decreaseLoanHighHolds system preference criteria

Item has accompanying material (field 952$3, ‘Materials specified’, is filled)

If CircConfirmItemParts is set to ‘Require’, the staff member will have to confirm the checkout

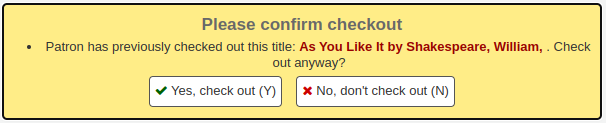
If the CheckPrevCheckout system preference says to check the patron’s circulation history, a warning will show to indicate that the patron has already checked out the item
Checkout notes are notes that patrons can add from the OPAC about a particular item they have checked out (for example: missing first page, or DVD is scratched, etc.).
To enable checkout notes, set the AllowCheckoutNotes system preference to ‘Allow’.
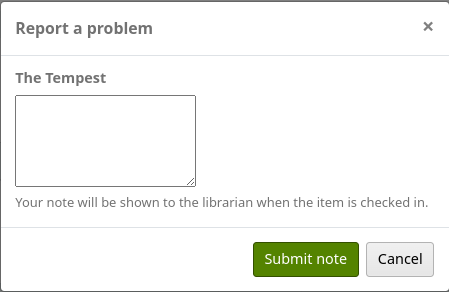
Once the system preference is activated, a new column titled ‘Report a problem’ will appear in the list of checkouts in the patron’s summary in the OPAC.

When the patron clicks on ‘Add note’, they will be able to write a note about this checkout.
Staff will be alerted of new checkout notes in the section at the bottom of the staff interface’s home page, with other pending requests.

Note
Only staff with the manage_checkout_notes permission (or the superlibrarian permission) will see the new checkout notes and have access to the checkout notes management page.
An email will also be sent to the email address in KohaAdminEmailAddress to alert the system administrator that a checkout note was added.
Note
You can customize this message in the Notices and slips tool. The letter code is CHECKOUT_NOTE.
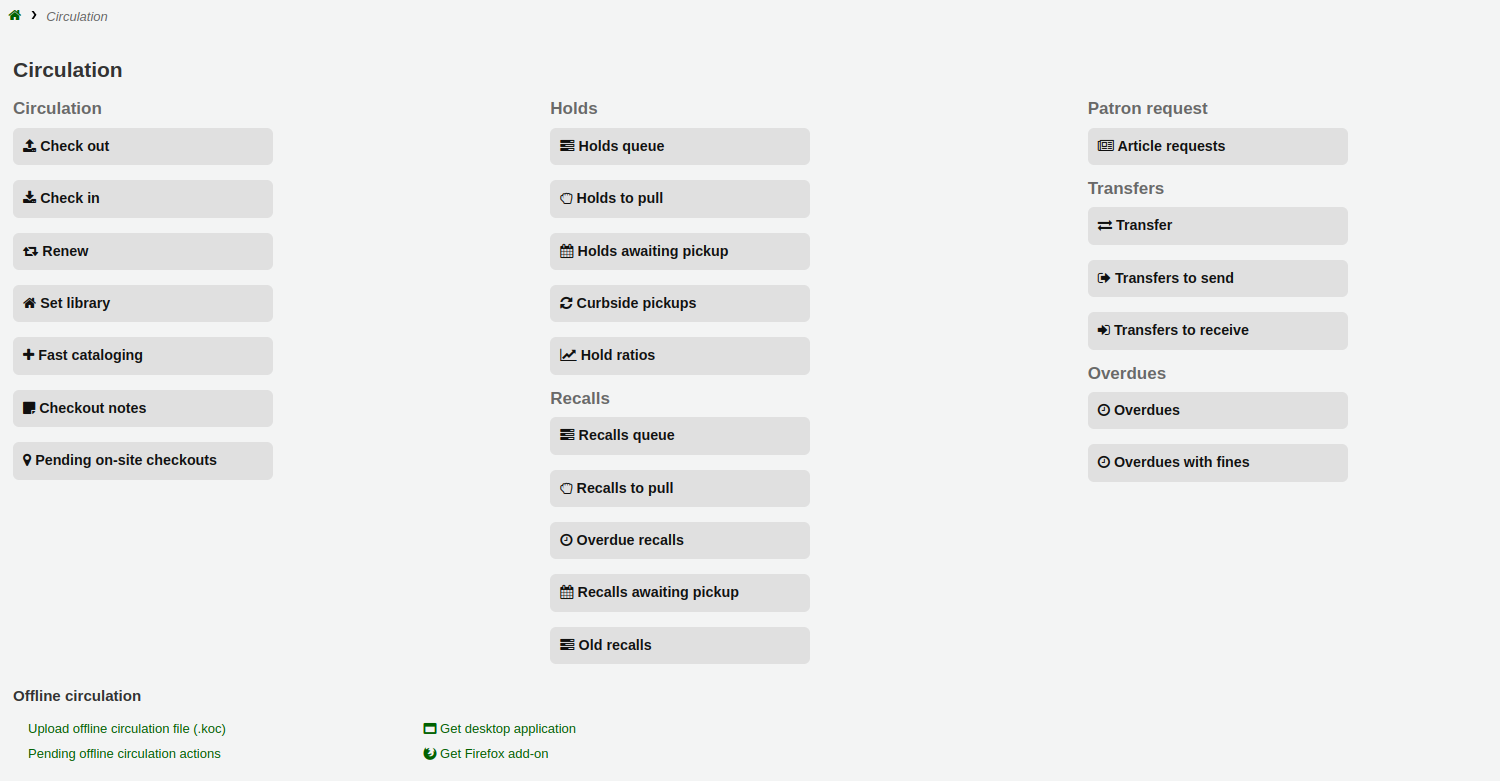
Checkout notes can be managed from the circulation module home page, under Circulation > Checkout notes, or by clicking on the message in the pending requests section of the staff interface home page.
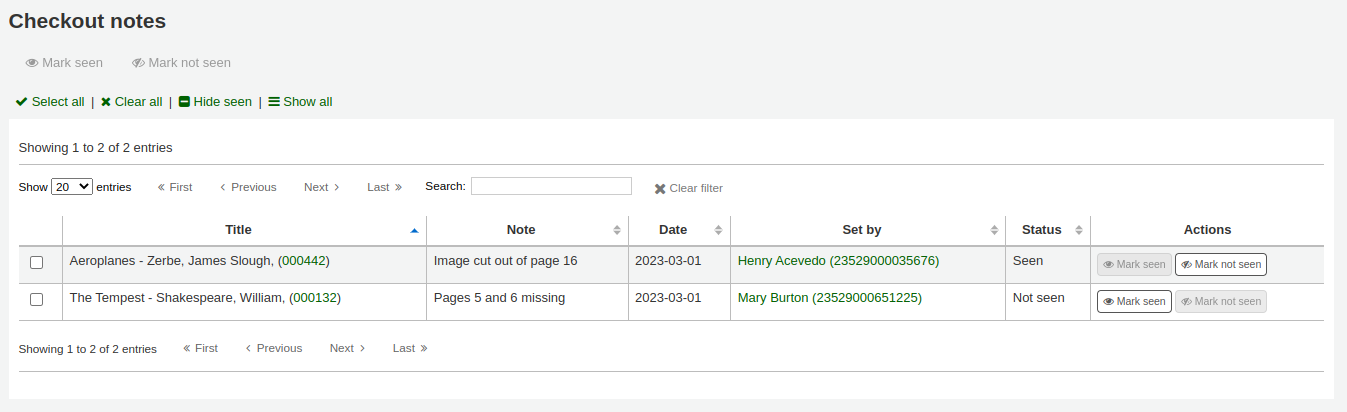
From this page, staff can mark notes as seen, either individually by clicking the ‘Mark seen’ button on the right, or in a batch by selecting the notes and clicking ‘Mark seen’ at the top of the page. Marking the notes as seen will remove them from the pending requests section of the staff interface homepage.
Seen notes can be filtered out with the ‘Hide seen’ link at the top of the table.
Checkout notes will also appear upon checkin.

Once the item is checked in, the note will be removed permanently from this page.