
Checking items in (returning)
Checking items in can be performed from various locations: the search bar at the top of the staff interface, the ‘Check in’ column in the patron’s checkout summary, or the dedicated ‘Check in’ page of the Circulation module.
Koha also offers an automatic check-in feature, which can be set in item types and requires the automatic_checkin.pl cron job.
Checking in from the search barTo quickly check in an item, you can select the ‘Check in’ option in the search bar at the top of the page (or press Alt + r, or Option + r on Mac computers), and scan the barcode in the search field.

This will check in the item and bring you to the ‘Check in’ section of the Circulation module to check in more items.
Note
There is no way to specify a return date, use the book drop mode, or forgive fines from the search bar. You need to go to Circulation > Check in to have access to those options.
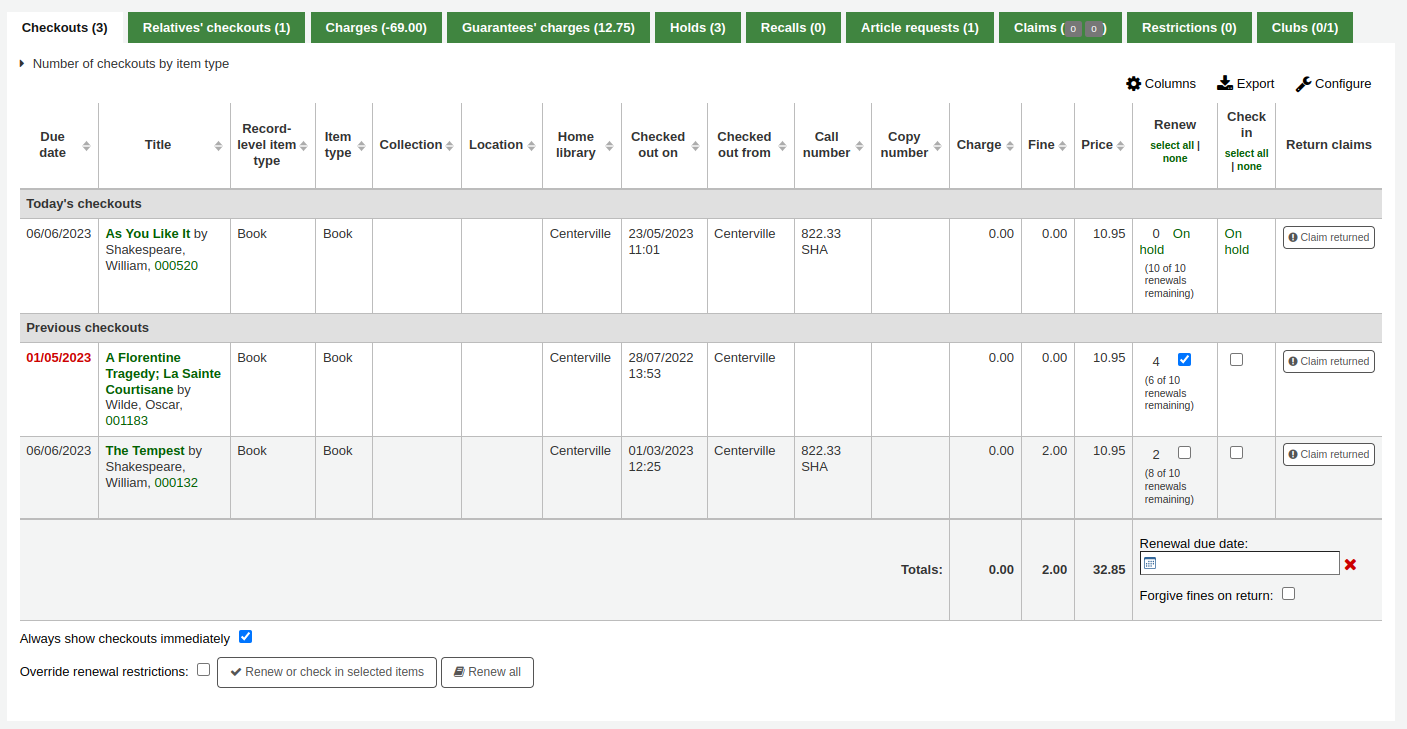
Another way to check in items is to visit the patron’s details page or checkout page and view their checkout summary at the bottom.
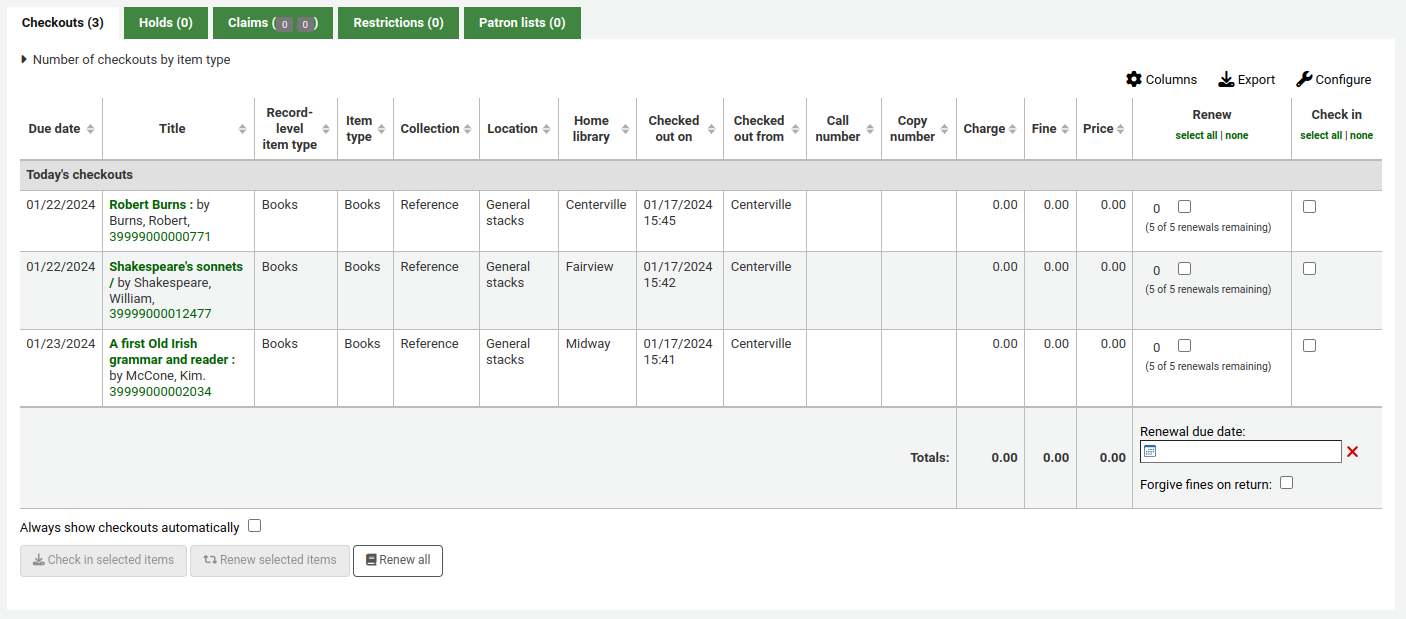
Check the box in the ‘Check in’ column of the items you would like to check in and click the ‘Check in selected items’ button.

Attention
Prior to Koha version 23.11, the button was called ‘Renew or check in selected items’ and served both for renewing and for checking in depending on which box was checked.
Warning
This method doesn’t require staff to scan the barcode, which can lead to errors when selecting the items to check in. Be careful when using this method.
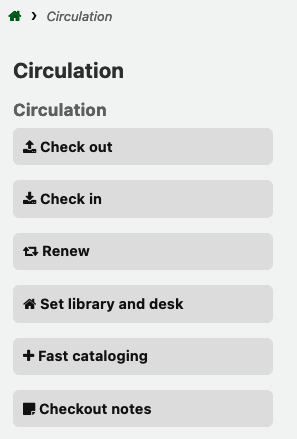
Get there: Circulation > Check in
You can also check items in from the ‘Check in’ section in the Circulation module.
To check an item in, scan the barcode of the item into the box provided.
A summary of all items checked in will appear below the check-in box.

Note
You can customize the columns of this table in the ‘Table settings’ section of the Administration module (table id: checkedintable).
Check-in settings are available by clicking on the settings icon in the barcode field. These are used for non-standard check-ins, for example, if you need to specify a different return date, or if you need to forgive all fines.

If the SpecifyReturnDate system preference is set to ‘Allow’ you will be able to arbitrarily set the return date from below the check in box.
If you are checking items in that were put in the book drop while the library was closed, you can check the ‘Book drop mode’ box before scanning items. This will effectively roll back the return date to the last date the library was open.

Note
This requires that the closed days are added to the calendar tool.
You can also choose to forgive all overdue charges for items you are checking in by checking the ‘Forgive overdue charges’ box before scanning items.
Note
This checkbox will only appear if you charge overdue fines, i.e., if the finesMode system preference is set to ‘Calculate and charge’.
There are several messages that can appear when checking items in:
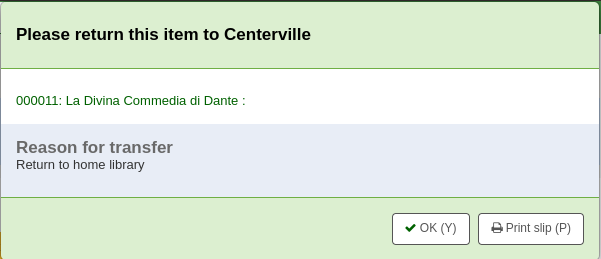
If the return policy dictates items need to be returned back to their home or holding library, a message will appear asking staff to transfer the item.
Note
When set to ‘Block’, the TransfersBlockCirc system preference will block all actions until the pop-up is confirmed.
When set to “Don’t block”, the AutomaticConfirmTransfer system preference determines what happens if the pop-up is dismissed without confirming the transfer.
After this item is checked in and the transfer is confirmed, the status of the item will be changed in the catalog to ‘in transit’.

To mark an item as back at the home or holding library, check the item in at that library.

A message will appear to tell you that the item is not checked out, but the status will now say available in the catalog. This step is necessary to mark items as received by the library.
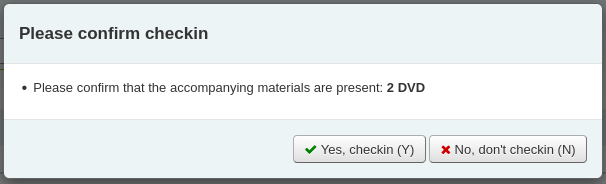
If you are checking in an item that should have multiple parts or pieces a message will appear warning you about the number of pieces you should have in your hand

If CircConfirmItemParts is set to ‘Require’, the staff member will have to confirm the checkin
If you’re checking an item in that has a hold on it, you will be prompted to confirm the hold
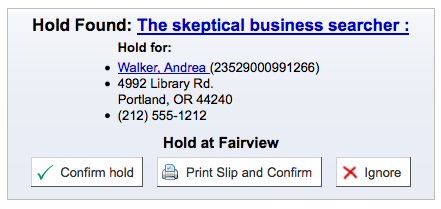
Clicking the Confirm hold button will mark the item as waiting for pickup from the library

Clicking the ‘Print slip and confirm’ button will mark the item as waiting for pickup at the library and present the library with a receipt to print and place on the book with the patron’s information
Ignoring the hold will leave the item on hold, but leave its status as Available (it will not cancel the hold)
If you’re checking in an item that has a hold on it at another branch you will be prompted to confirm and transfer the item
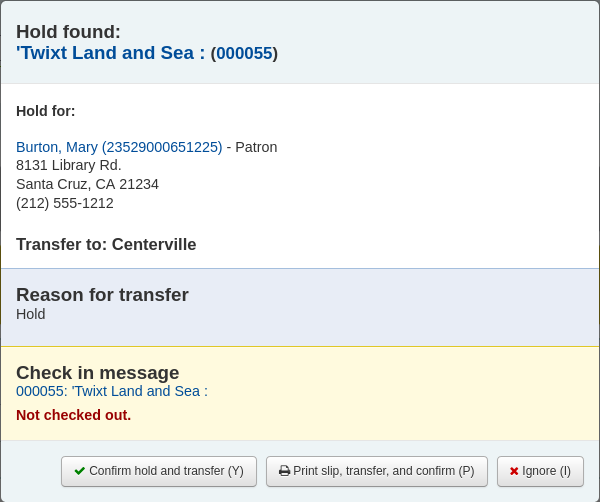
Clicking the ‘Confirm hold and transfer’ button will mark the item as in transit to the library where the hold was placed

Clicking the ‘Print slip, transfer and confirm’ button will mark the item as in transit to the library where the hold was placed and present the library with a receipt to print and place on the book with the patron’s information
Ignoring the hold will leave the item on hold, but leave its status as Available (it will not cancel the hold)
If you have the system showing you fines at the time of checkin (FineNotifyAtCheckin) you will see a message telling you about the fine and providing you a link to the payment page for that patron

If the patron claims they returned something, you can mark that item as ‘Claimed returned’ and track those claims.
In order to use this feature,
Add a new authorized value to the LOST category to represent items claimed as returned.
Enter the authorized value in the ClaimReturnedLostValue system preference (this enables the return claims feature).
Choose if a lost fee should be charged to the patron who claims an item as returned. Set a value in the ClaimReturnedChargeFee system preference (the default is to ask if a lost fee should be charged).
Optionally set a number of return claims a patron can make before a warning appears in their record in the ClaimReturnedWarningThreshold system preference.
Once the feature is enabled, a button to ‘Claim returned’ will appear in the patron’s checkouts tab.
To claim an item as returned,
Click the ‘Claim returned’ button next to the checkout.
In the pop-up, enter any notes about this claim.
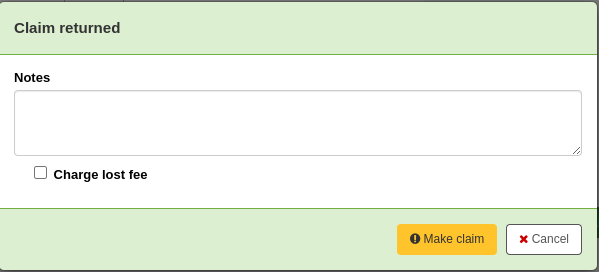
If the ClaimReturnedChargeFee system preference is set to ask whether or not the lost fee should be charged to the patron, there will be a checkbox to charge the fee.
Click ‘Make claim’.
The claimed returned item will stay in the patron’s checkouts, and its lost status will be updated. The claim will also appear in the ‘Claims’ tab.
Resolving a return claimTo resolve a claim,
Go to the patron’s record in the ‘Claims’ tab.

Click ‘Actions’ next to the item and choose ‘Resolve’.
In the pop-up, choose a resolution and new lost status.
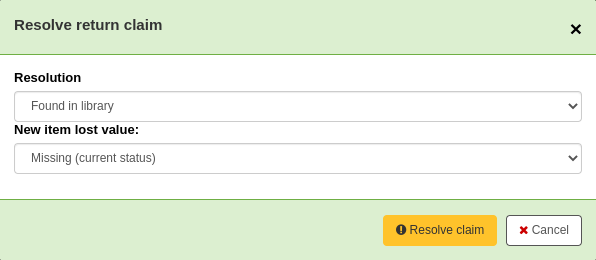
Resolution: the resolution is the reason this claim is being closed.
Note
The values are managed in the RETURN_CLAIM_RESOLUTION authorized value category.
New item lost value: this is the new lost status for this item.
Note
The values are managed in the LOST authorized value category.
Click ‘Resolve claim’.
The resolved claim will stay in the patron’s record, unless they are purged by the cleanup_database.pl cron job after the number of days specified in the CleanUpDatabaseReturnClaims system preference.
Note
It is possible to set up return claims to be automatically resolved when the item is checked in or checked out with the system preferences AutoClaimReturnStatusOnCheckin and AutoClaimReturnStatusOnCheckout.