
Holds
Koha allows patrons to put things on hold. A ‘Hold’ is a way to reserve an item. Depending on your circulation and fines rules and hold system preference settings, patrons will be able to place items on hold for pickup at the library at a later date and time.
See the section placing holds in the OPAC chapter to learn how to place holds from the OPAC.
Placing holds in the staff interfaceNote
Staff members must have the place_holds permission (or the superlibrarian permission) in order to be able to place holds.
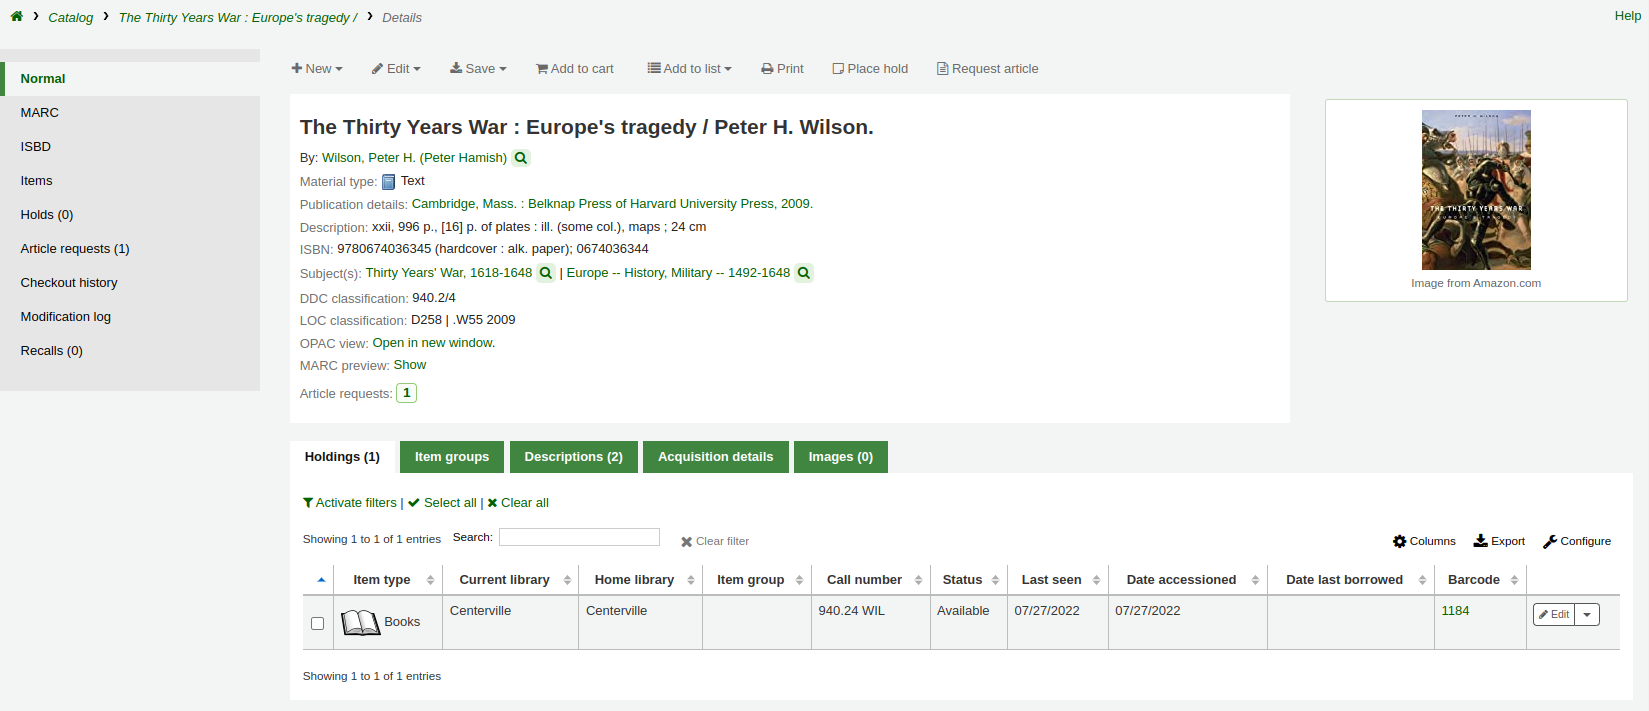
There are several ways to place holds from the staff interface. The most obvious is using the ‘Place hold’ button at the top of any bibliographic record.
You can also click the smaller ‘Place hold’ link found at the top of your catalog search results, or the ‘Holds’ link found below each result.

To place holds on multiple titles at the same time, check the boxes next to the titles in the search results, and click the ‘Place hold’ button at the top of the search results.
Note
This feature can be disabled with the DisplayMultiPlaceHold system preference.
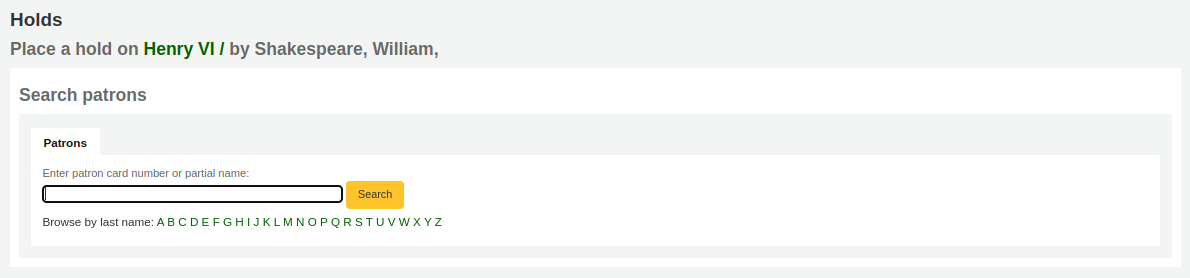
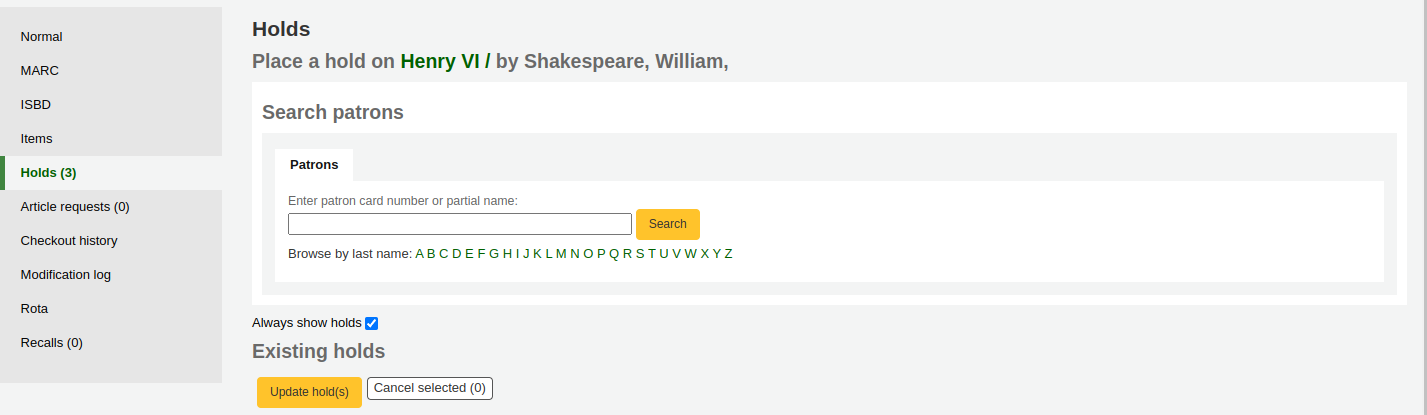
You will be asked to search for a patron by barcode or any part of their name to start the hold process.
If you’d like to search for the patron first and then the bibliographic record for the hold, you can open the patron record and click on the ‘Search to Hold’ button at the top of the patron record.

After clicking the button, you will be brought to the catalog search page where you can find the title or titles you need to place a hold on. Under each title in the result list, there will be an option to ‘Place hold for (patron name).’

If you want to place a hold on multiple titles for this patron, check the boxes to the left of the titles, click the arrow to the right of the ‘Place Hold’ button and choose ‘Place hold for (patron name)’.

Note
Once the holds are placed, you can choose to have Koha ‘forget’ the patron’s name by clicking the arrow to the right of the ‘Place hold’ button on the search results and choosing the ‘Forget (patron name)’ option.
Depending on how many items you choose to place a hold on at once, you will see a different place hold form. If you are placing a hold on one bibliographic record, you will see a list of all of the items you can place a hold on.
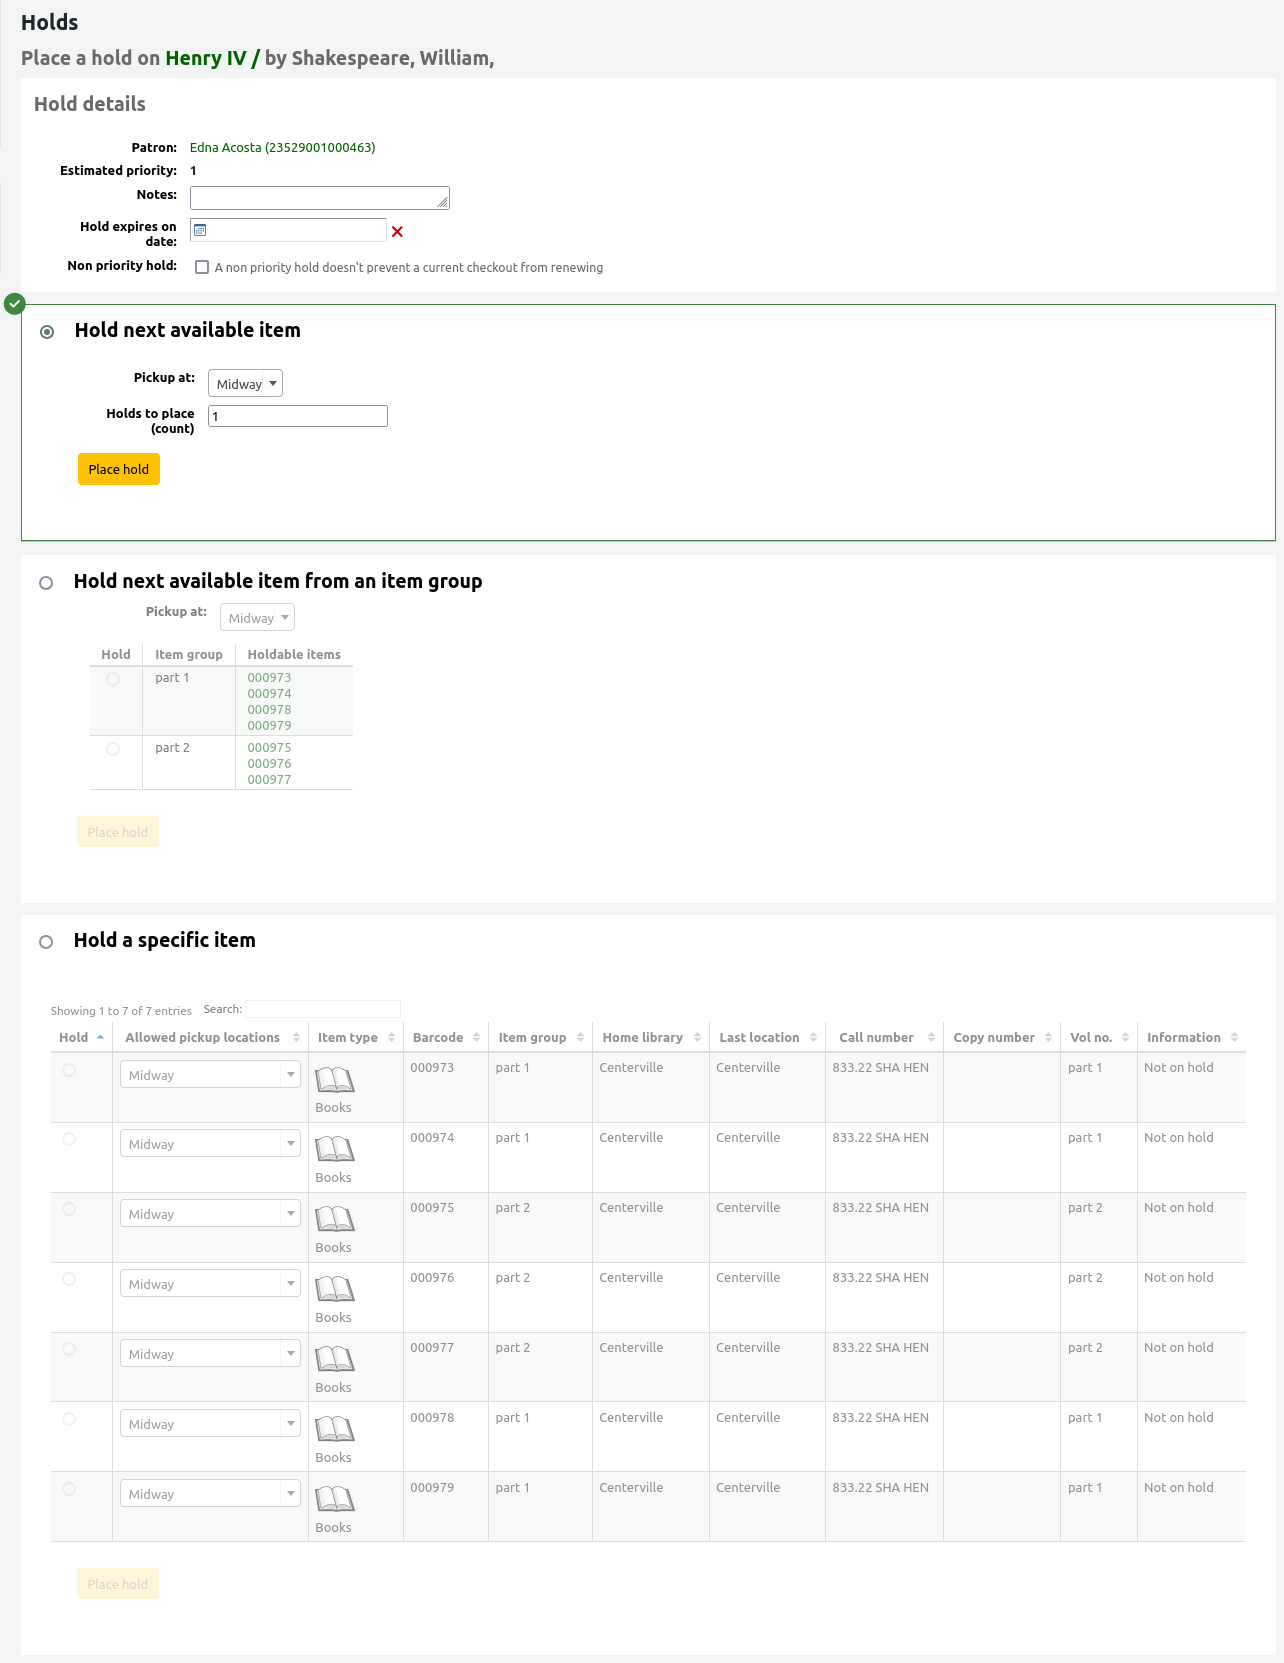
Patron: the patron’s name for whom this hold is
Estimated priority: this takes into account holds that are already placed on this title
Notes: enter any notes that might apply to this hold
Request specific item type: if the AllowHoldItemTypeSelection system preference is set to ‘Allow’ there will be an option to choose to limit the hold to a specific item type
Hold starts on date: if the AllowHoldDateInFuture system preference is set to ‘Allow’, and the patron wants the hold to start on a date other than today, enter the date here
Hold expires on: if the patron has specified that they don’t want the item after a certain date, or if you have limits on hold lengths, you can enter an expiration date for the hold in the ‘Hold expires on date’
Note
To cancel expired holds automatically, your system administrator needs to set the cancel_expired_holds.pl cronjob to run on a regular basis.
Non-priority hold: if you are placing a hold for internal purposes, such as checking for missing pages or needing to add a label, check the ‘Non-priority hold’ box. This type of hold will not prevent the patron who currently has the item from renewing their checkout.
To place a hold on the next available item (default setting), fill the next part of the form. For more specific hold settings, choose an item group in the ‘Hold next available item from an item group’ section or a specific item in the ‘Hold a specific item’ section below.

Pickup at: choose the library where the patron will pick up the item
Note
The default pickup library is determined by the DefaultHoldPickupLocation system preference.
Request specific item type: if the AllowHoldItemTypeSelection system preference is set to ‘Allow’ there will be an option to choose to limit the hold to a specific item type
Holds to place (count): if multiple holds per record are allowed, you can enter a number in the ‘Holds to place (count)’ text box to place that number of holds for the selected patron.
Note
The ‘Holds to place (count)’ text box will only appear if the Circulation and Fines rules are set to allow a ‘Holds per record’ limit that is greater than 1, but not Unlimited, for this combination of item type and patron category.
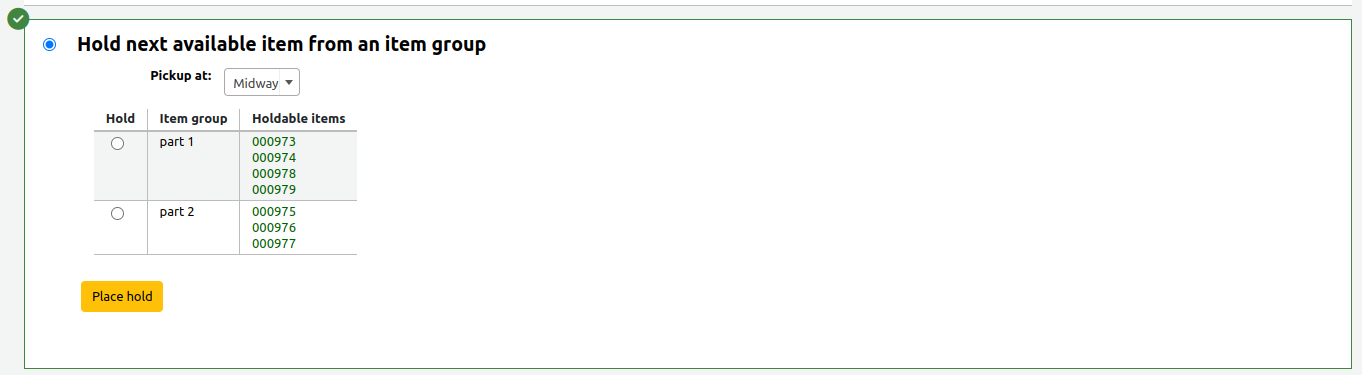
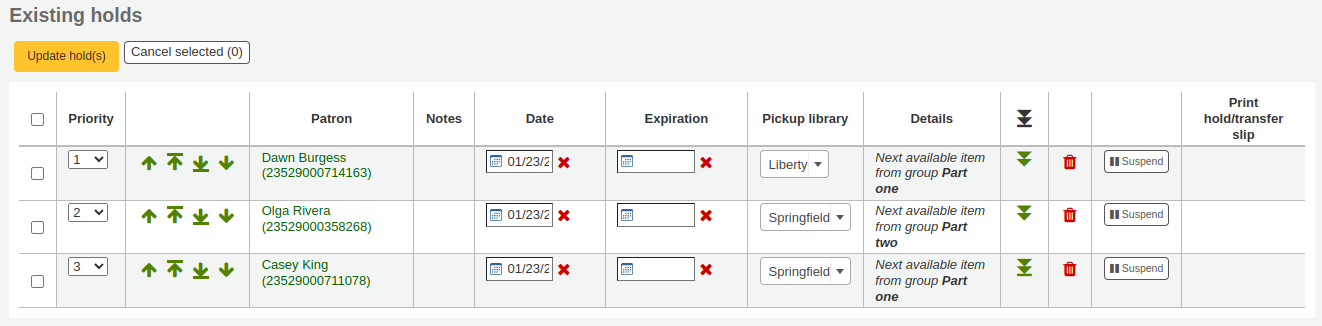
To place a hold on the next available item from an item group, rather than the next available item on the whole record or a specific item, select this section and fill it out.
Note
This section will only appear if the EnableItemGroupHolds system preference is set to ‘Enable’ and the record has item groups. You can choose to place a hold on the next available item of a group.
Pickup at: choose the library where the patron will pick up the item
Note
The default pickup library is determined by the DefaultHoldPickupLocation system preference.
Select an item group on which to place the hold.
To place a hold on a specific item, rather than the next available item on the whole record or the next available item in an item group, select this section and fill it out.
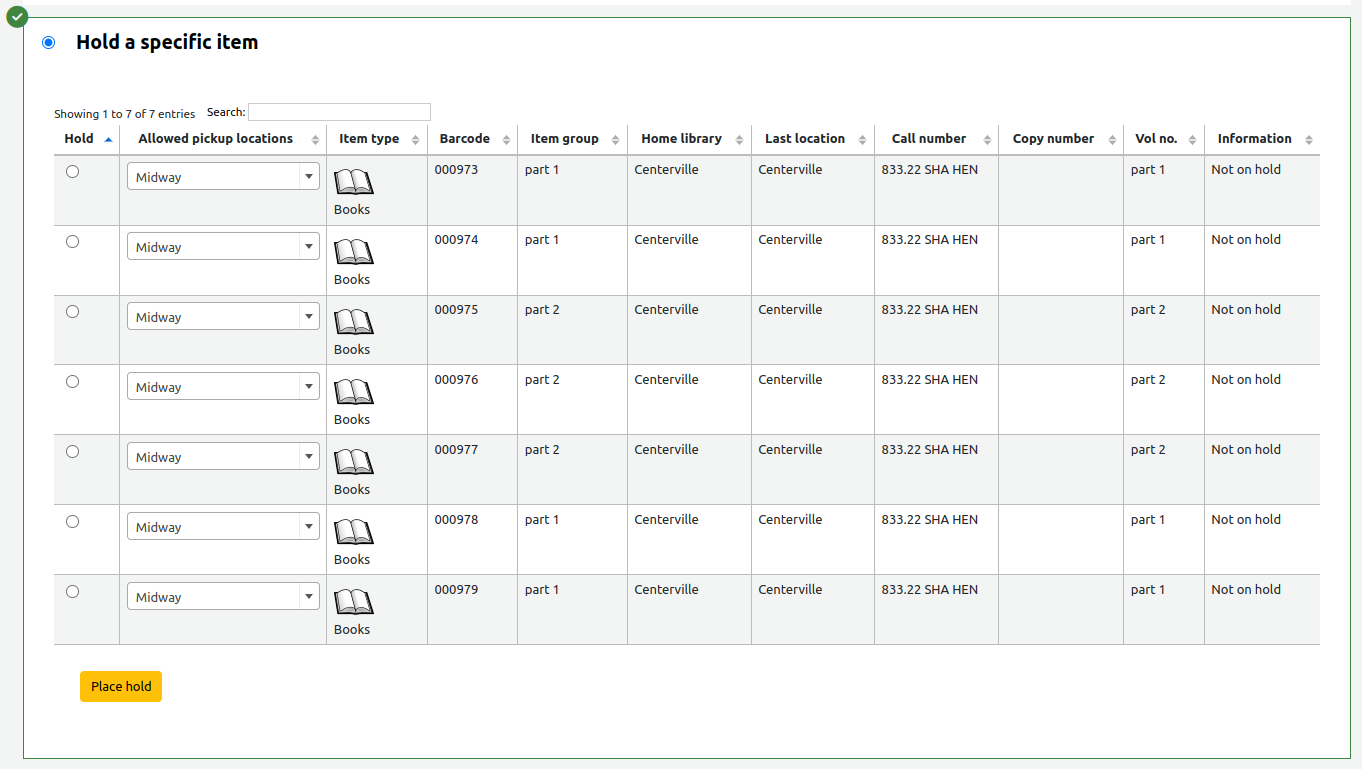
Select the item to place on hold.
Note
Enabling the DisplayMultiItemHolds system preference will allow to select multiple individual items in this section to place multiple item-level holds at the same time for the same patron. If the system preference is enabled, the system will allow you to select more than one item.
If necessary, change the pickup location.
Note
The default pickup library is determined by the DefaultHoldPickupLocation system preference.
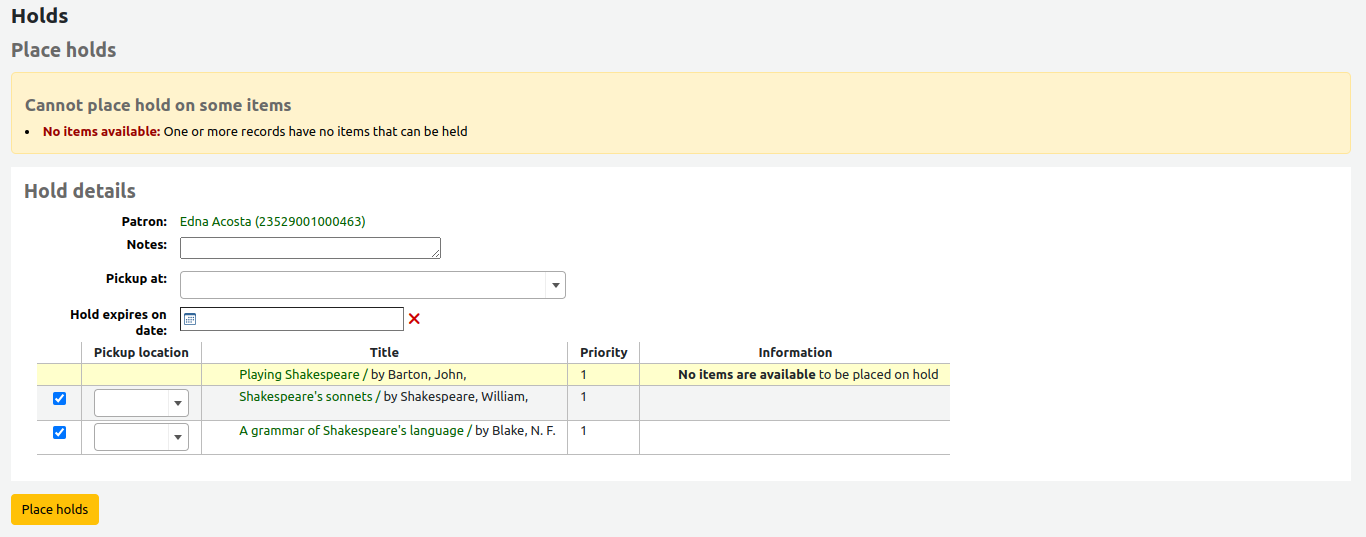
If you’re placing holds on multiple records, you will be presented with the next available option for all titles. If no items are available for hold it will say so on the confirmation screen.
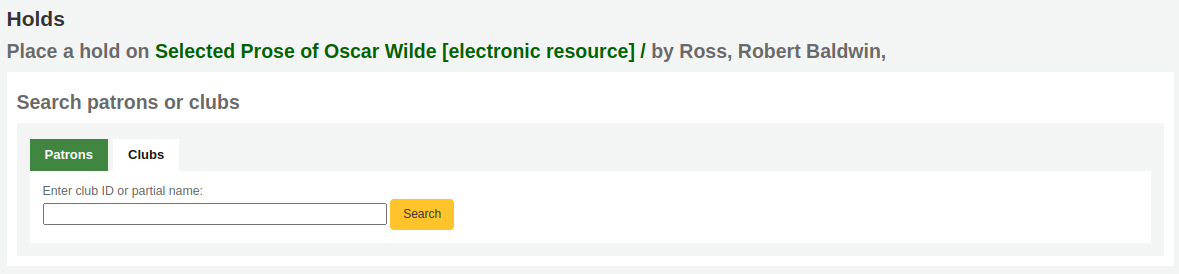
If your library uses the patron clubs feature, use the ‘Clubs’ tab to place a hold for a club.
To place a hold for a club, click the ‘Clubs’ tab, search for and select the club name, and click the ‘Place hold’ button.
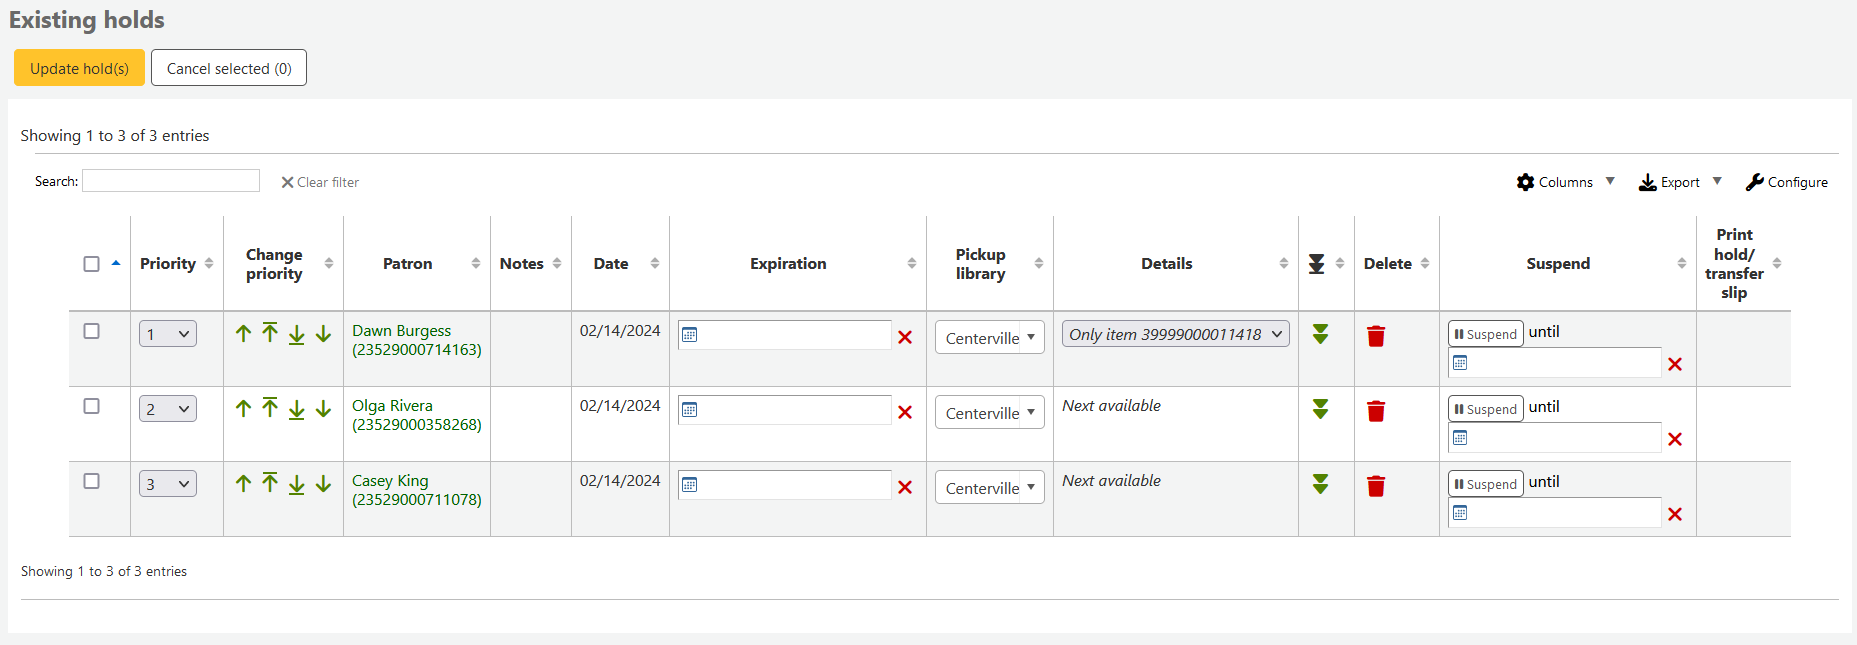
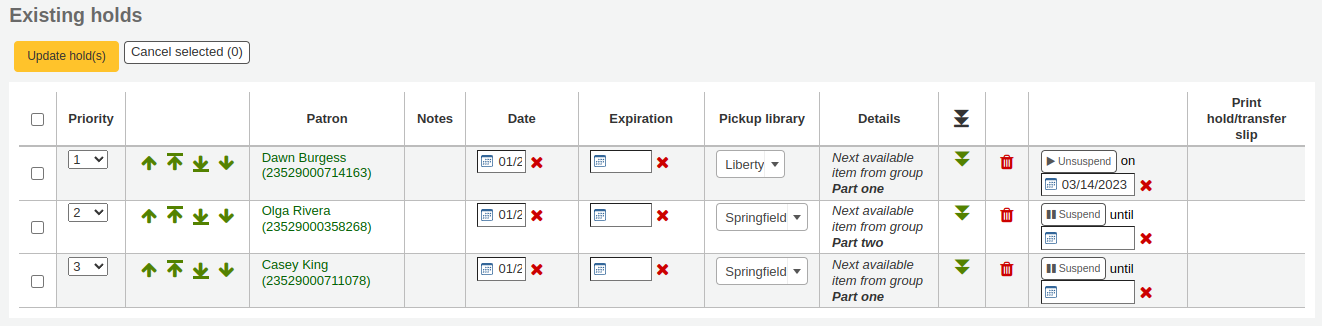
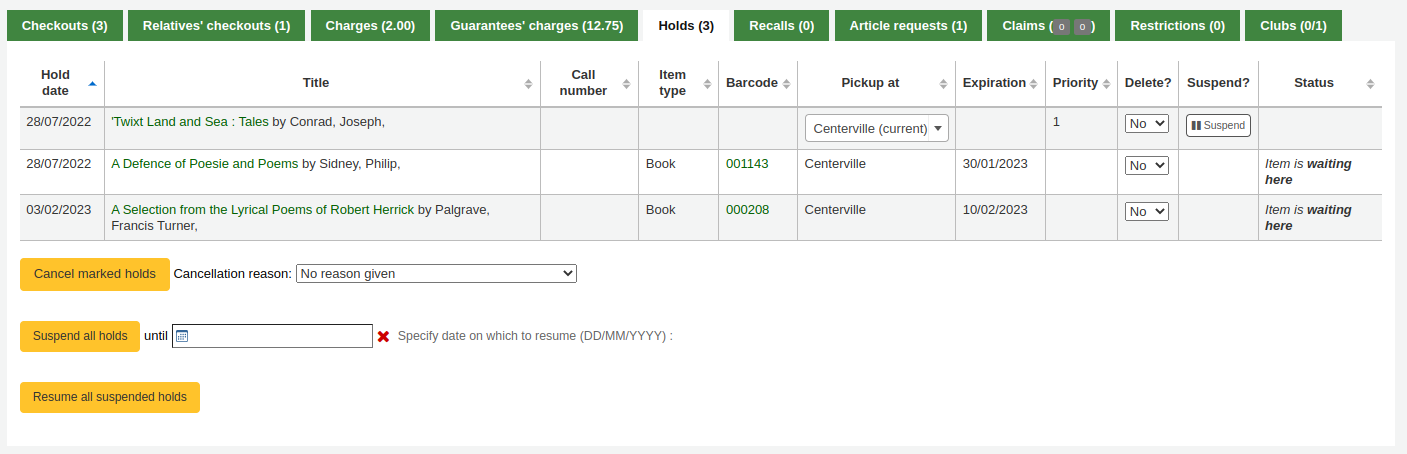
Holds can be altered and cancelled from the holds tab found on the left of the bibliographic record.
From the list of holds you can change the order of the holds, the pickup location, whether the hold is on a specific item or for the next available item, suspend, or cancel the hold.
Note
If the HoldsSplitQueue system preference is set, you will see the holds list split across different tables by either pickup library, item type or both.
Note
If the AllowHoldDateInFuture system preference is set to “Don’t allow”, you will not have the option to edit the date the hold was placed (the column labelled Date).
Note
Depending on how the HidePatronName system preference is set, the list may show card numbers instead of names in the patron column like in the image above.
Note
Staff members must have the modify_holds_priority permission (or the superlibrarian permission) in order to be able to change holds’ priorities.
To rearrange holds, make a selection from the ‘Priority’ drop-down or click the arrows to the right of the priority pull down.
Warning
Clicking the double down arrow to the right of the hold will stick the hold at the bottom of the list even if more requests are made.
For example, if your library has home-bound patrons that are allowed to keep items out for months at a time, it would not be fair to other patrons if a home-bound patron were able to check out a brand new book and keep it for months. For this reason, the home-bound patron’s hold request would stay at the bottom of the queue until everyone else who wanted to read that book has already done so.
In the list of existing holds, lowest priority holds are indicated by the double down arrow with a line underneath.
Clicking the double arrow again will put the hold back in regular priority, in last place.
Version
This feature was added in version 23.11 of Koha.
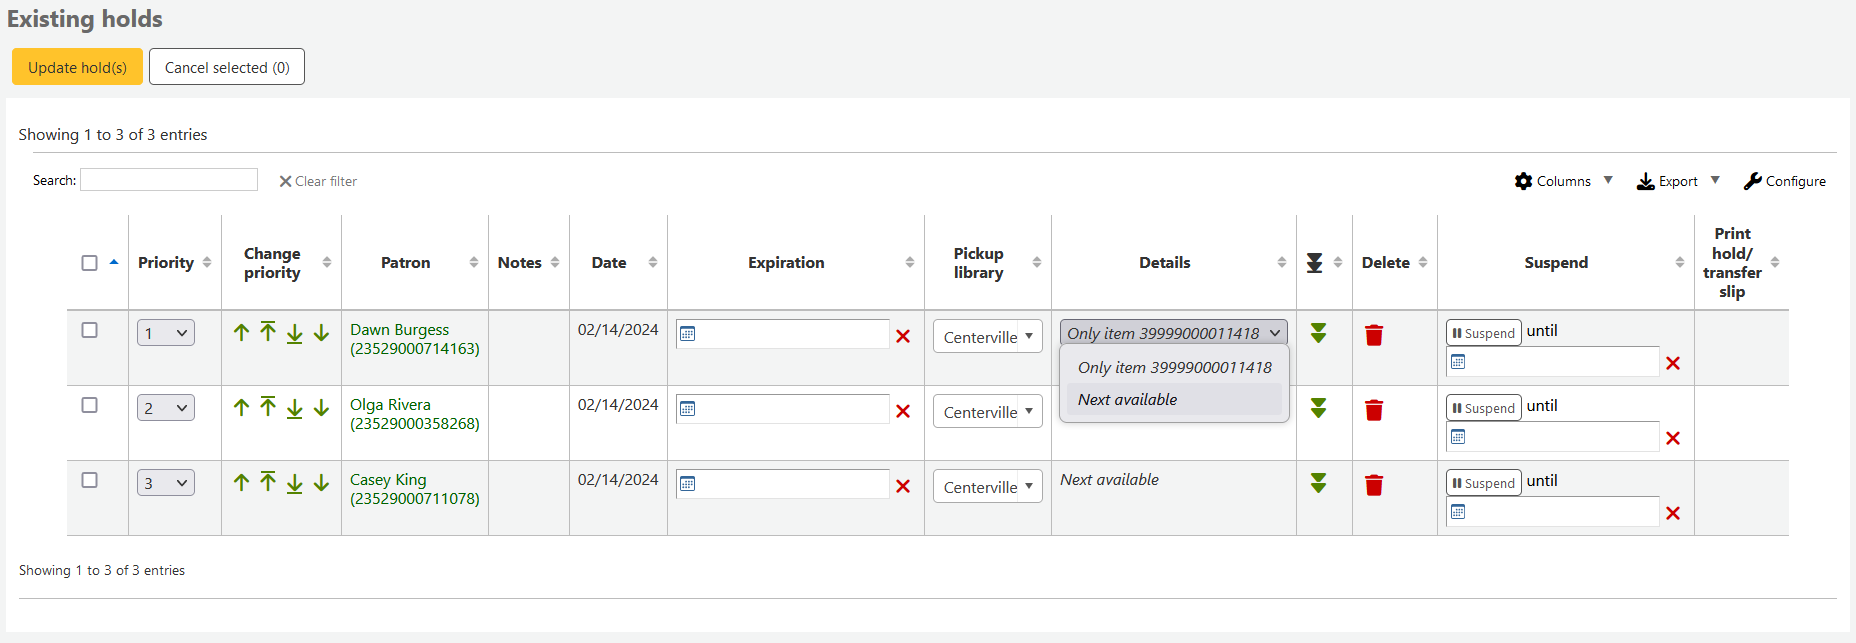
Sometimes it can be necessary to change a hold that has been made on a specific item (known as an item level hold) to a hold that is not specific to an item and will be filled as soon as the next item is returned (often referred to as a record level hold). To change the level of a hold, make a selection from the ‘Details’ dropdown and confirm the change by clicking the ‘Update hold(s)’ button above.
If a patron asks to have their hold suspended and the SuspendHoldsIntranet system preference is set to ‘Allow’, you can do so by clicking the ‘Suspend’ button at the far right.
If the patron gives you a date for the holds to resume, you can enter that in the date box and click the ‘Update hold(s)’ button to save your changes.
Note
If the AutoResumeSuspendedHolds system preference is set to “Don’t allow” there will not be the option to put an end date on the hold suspension.
Note
The auto_unsuspend_holds.pl cron job is required to automatically resume suspended holds.
You can also unsuspend holds manually by clicking the ‘Unsuspend’ button.
If the SuspendHoldsOpac system preference is set to ‘Allow’, patrons will be able to suspend and unsuspend their own holds from their online account.
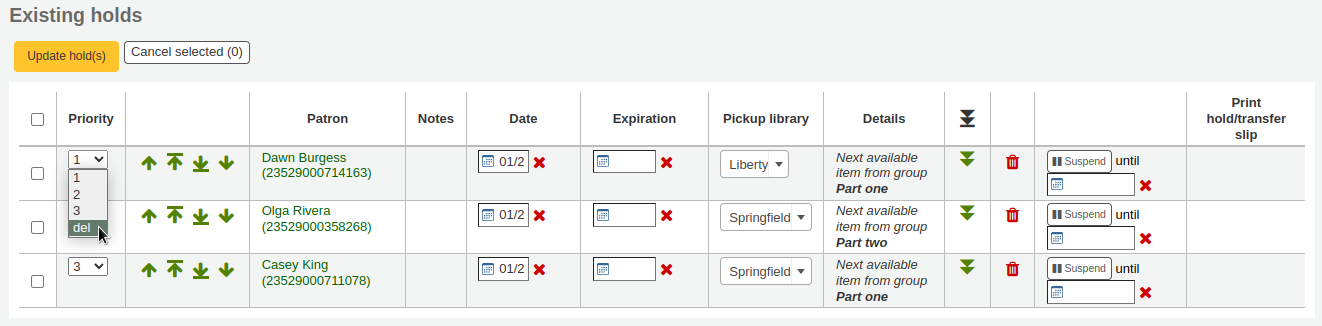
Deleting holdsTo delete or cancel a hold, click the red trash can to the right of the hold line.
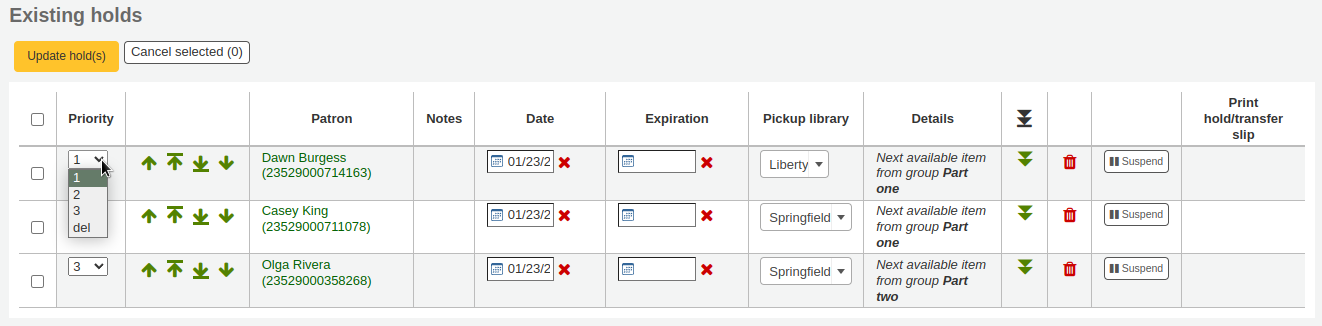
To delete/cancel a bunch of holds you can choose ‘del’ from the drop-down menu on the left of each line and then click ‘Update hold(s)’ at the bottom of the list.
Alternatively, you can select the holds to be cancelled and click the ‘Cancel selected’ button.
Receiving holdsWhen items that are on hold are checked in or out the system will remind the circulation staff that the item is on hold and offer them options for managing the hold.
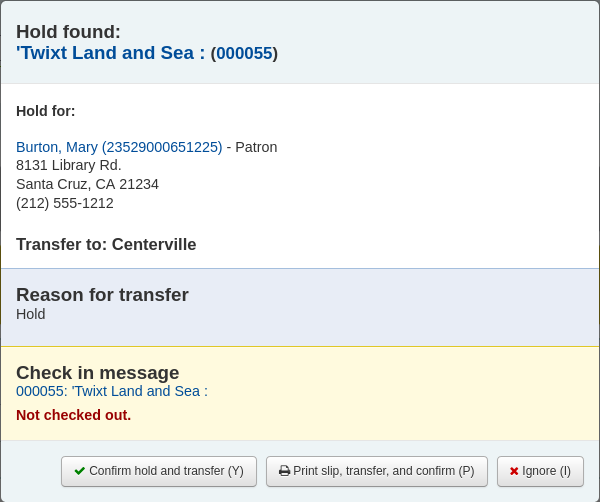
When you check in an item that has a hold on it the system will ask you to either confirm and transfer the item
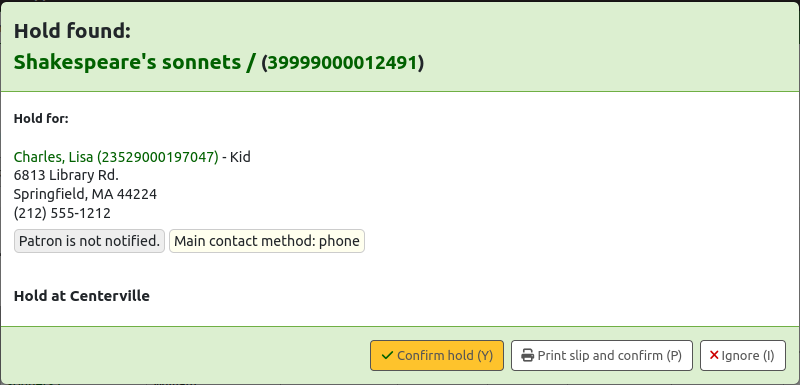
or just confirm the hold
If the item needs to be transferred, clicking ‘Confirm and transfer’ or ‘Print slip, transfer, and confirm’ will mark the item as in transit to the proper library.
If the item is already at the pickup library, clicking the ‘Confirm’ or the ‘Print slip and confirm’ button will mark the item as ready for pickup by the patron.
Clicking ‘Ignore’ will retain the hold, but allow the item to be checked out to another patron or change the status of the item (if it was returned damaged, for example).
The ‘Print slip and confirm’ or ‘Print slip, transfer, and confirm’ options will open a printable page that you can attach to the item with the necessary hold or transfer information.
Note
The slip that is printed is the HOLD_SLIP notice. It can be modified with the Notices and slips tool.
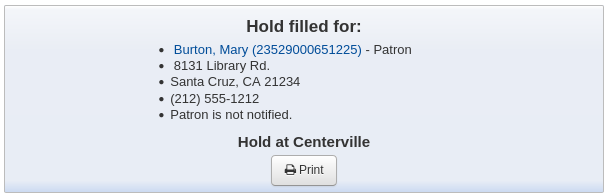
When the hold is confirmed, if the patron is notified, the ‘hold filled’ notice will be sent to them.
Note
The notice that is sent is the HOLD notice. It can be modified with the Notices and slips tool.
Note
If the HoldsAutoFill system preference is enabled, the circulation staff will not have to confirm the hold, but they will have the option to print the hold or transfer slip.
If the HoldsAutoFillPrintSlip system preference is enabled, the print window to print the hold or transfer slip will open automatically.
Once confirmed, the hold will show as ‘waiting’ on the patron record and on the checkout screen under the ‘Holds’ tab.
The item record will also show that the item is on hold.

In some cases, a patron may come in to pick up a hold on behalf of someone else. In this case, make sure that the hold is cancelled when you check the item out to someone else. Alternatively, a check out might be attempted in error for an item that is already waiting for someone else. In this case you will be presented with a warning message.

Cancel hold: in combination with ‘Yes, check out’, this option will cancel the current hold and check the item out to the new patron.
Revert waiting status: in combination with ‘Yes, check out’, this option will revert the waiting status of the hold (the patron who placed the hold will be back in first position in the queue) and check the item out to the new patron.
Yes, check out: this option will check the item out to the current patron.
Don’t check out and print slip: this option will open the print window to print the hold slip, the check out will be cancelled and the hold will remain.
No, don’t check out: this option will cancel the check out, the hold will remain.
If you check in an item that is already waiting to be picked up, a pop up indicating that a hold was found and the item is already waiting will appear. In addition to this, there is an option to allow staff to cancel the hold and choose a hold cancellation reason.
Note
Hold cancellation reasons are connected to the HOLD_CANCELLATION authorized value category.
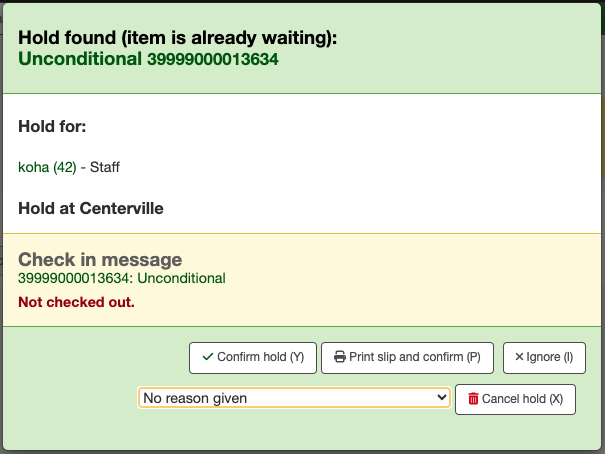
Confirm hold: this option will keep the existing hold.
Print slip and confirm: this option will open the print window to print the hold slip and keep the existing hold.
Cancel hold: this option will remove the hold.
If you cancel the hold and further holds exist for the item you will be presented with a new option to confirm the hold for the next patron.
A reason can be allocated to the cancellation of the hold. A notice can be sent to the patron explaining why this hold was cancelled.
Warning
If you want to send a notice with the cancellation reason, you will need to add a new notice with code “HOLD_CANCELLATION” if you do not have one already.