
Self check-in
In order to use the self check-in module, you must first set the SelfCheckInModule system preference to ‘Enable’.
Then, you will have to create a patron with the self_checkin_module permission.
Note
Create a staff patron specifically for this action so that you don’t leave a real staff client logged into a computer all day. You can give this patron only the aforementioned permission so it cannot be used for anything else.
Once this is done, you can head over to the self check-in page: http://YOUR_KOHA_OPAC_URL/cgi-bin/koha/sci/sci-main.pl
Log in with your staff patron with self check-in permissions
Once the computer or kiosk is set and the self check-in user logged in, patrons will be able to check-in their items themselves.

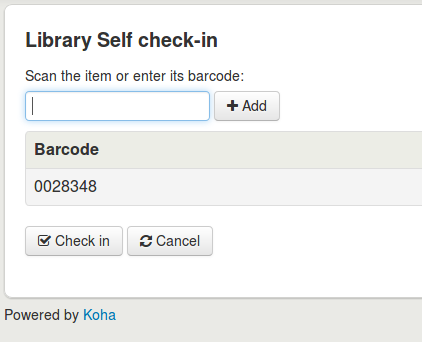
The patron will either scan the item’s barcode, if the computer is attached to a barcode scanner, or type in their item’s barcode in the box and click ‘Add’ or press enter.
Note
Most barcode scanners will automatically hit return after scanning.
Once they have scanned or entered all their items’ barcodes, they can click on the ‘Check-in’ button to return all the items at once.
Important
If the patron doesn’t click the ‘Check-in’ button, the items will not be returned and will stay in their account.
Important
The self check-in module will not warn user if the item is late, if they have fines, if the item is on hold for someone else, or if they have messages in their account.
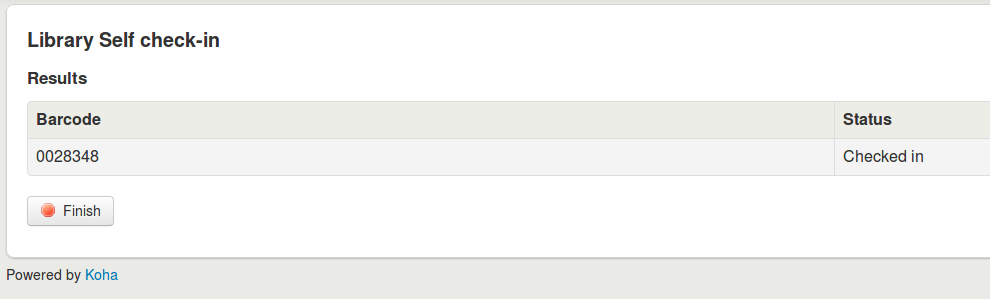
They can then click ‘Finish’ to return to the main self check-in page.
Note
If the patron doesn’t click ‘Finish’, the screen will refresh after the timeout period specified in the SelfCheckInTimeout system preference.
Note
Even if the patron doesn’t click ‘Finish’ the item will still be checked in from their account.
You can customize the look of your self check-in screens by using the SelfCheckInUserCSS system preference or the SelfCheckInUserJS system preference.
You can add content, like instructions on how to use the self check-in system for example, by using the SelfCheckInMainUserBlock display location in the HTML customizations tool.
Statistics about the transactions made through the self check-in module are logged into the action_logs table in the Koha database. You can therefore build a custom report to get the statistics you need.