
Trainsï
The trains page is the hub of the preservation module. This is where you will create and monitor all your preservation trains.
Note
The term âtrainâ has been chosen for two main reasons.
Firstly, because other terminology - âcartâ, âbasketâ, âbatchâ, etc. - was already in use for specific features in other Koha modules.
Secondly, the term âtrainâ is commonly used by French librarians because the physical book carts look like linked wagons when lined up.
Get there: More > Preservation > Trains

This is the list of all your trains. The table contains the following information:
Name: the name you gave to the train
Created on: the date the train was initiated
Closed on: the date you decided no item can be added to the train anymore
Sent on: the date all the train items are physically sent to the bookbinder
Received on: the date the train items are physically returned to the library
Actions:
Edit: to edit the trainâs settings
Delete: to remove the train from the page
Add items: to directly add items from the waiting list to the train with a barcode
New trainï
To add a train, click on the âNew trainâ button.
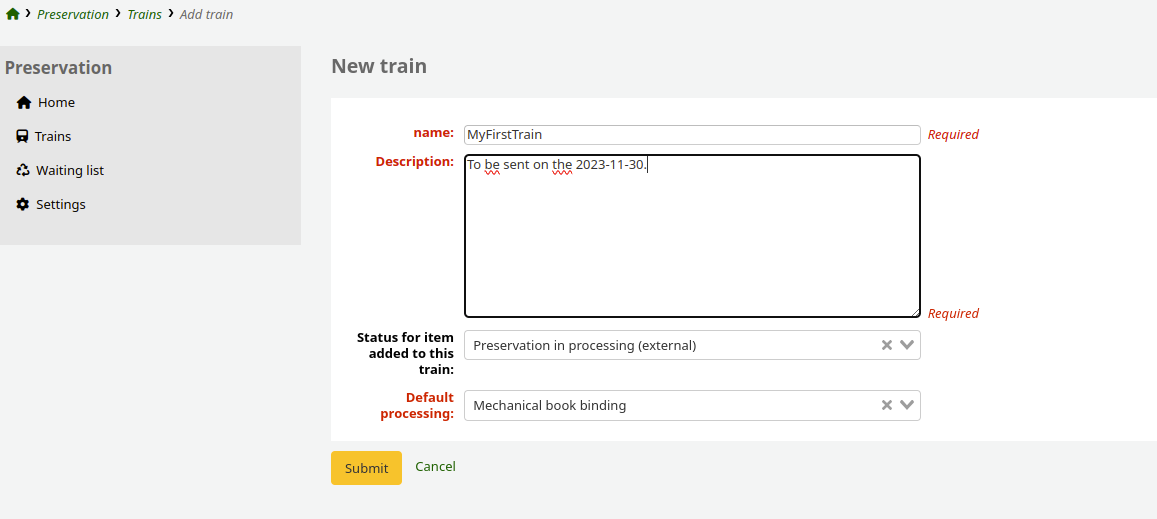
Name: the name you want to give to the train
Description: anything you would need to explain about this train
Status for item added to this train: choose from options set up in the NOT_LOAN authorized values category. The default value proposed is the one you set in the Preservation module settings or PreservationNotForLoanDefaultTrainIn system preference.
Default processing: the processing you want your train attached to. New processing are added in the Preservation module settings.
Click on the âSubmitâ button to create the new train and return to the trains page.
Add itemsï
Once your train has been created, the next step is to add the items that will be sent away for this round of preservation.
You can add items to a train:
one by one, from the Trains page;
in a batch, from the Waiting list page.
Adding items from the Trains pageï
Note
You have to add your items to the waiting list before you can add them to a train.
From the Trains page, either:
Click the âAdd itemsâ button in the Actions column.
Enter the itemâs barcode.
Or, click on a trainâs name.
Click the âAdd itemsâ button at the top of the page.
Enter the itemâs barcode.
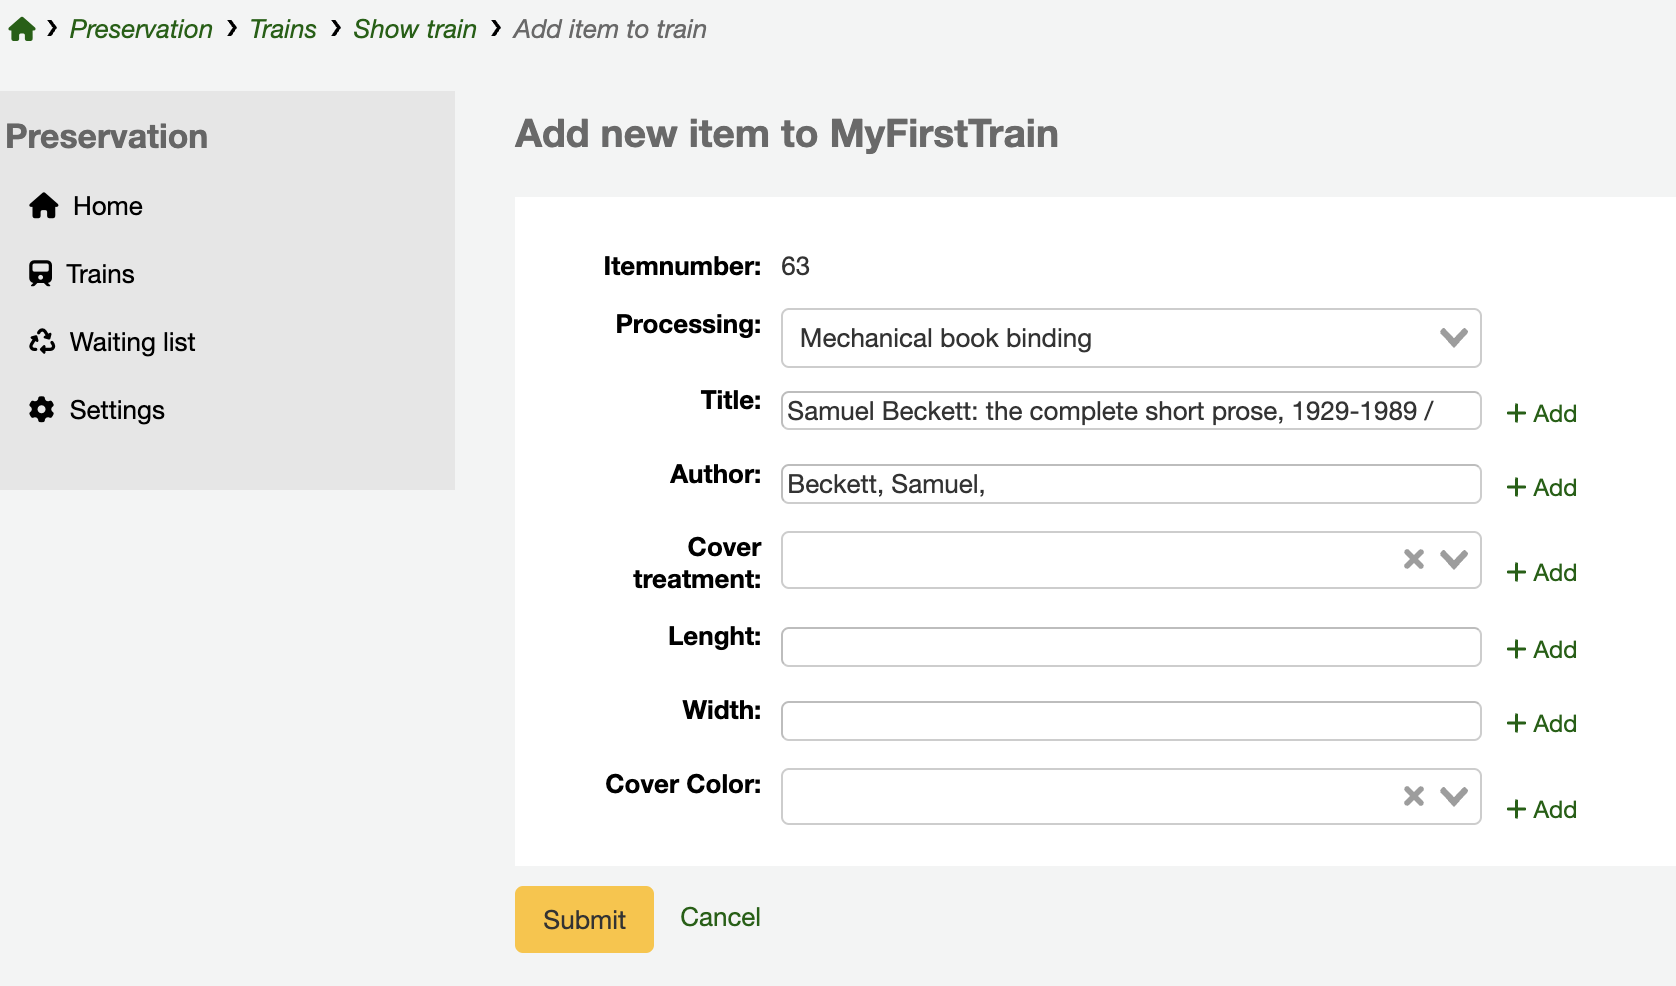
The form displayed shows the item number and the attributes for the default processing (chosen when creating the train).
All the processing attributes that are database columns are filled with data from the relevant fields.
All the attributes are editable, even when extracted from the Koha database or the authorized values.
Note
None of the modifications here will update the Marc data or the authorized values. The modified data is solely meant for use in the preservation module.
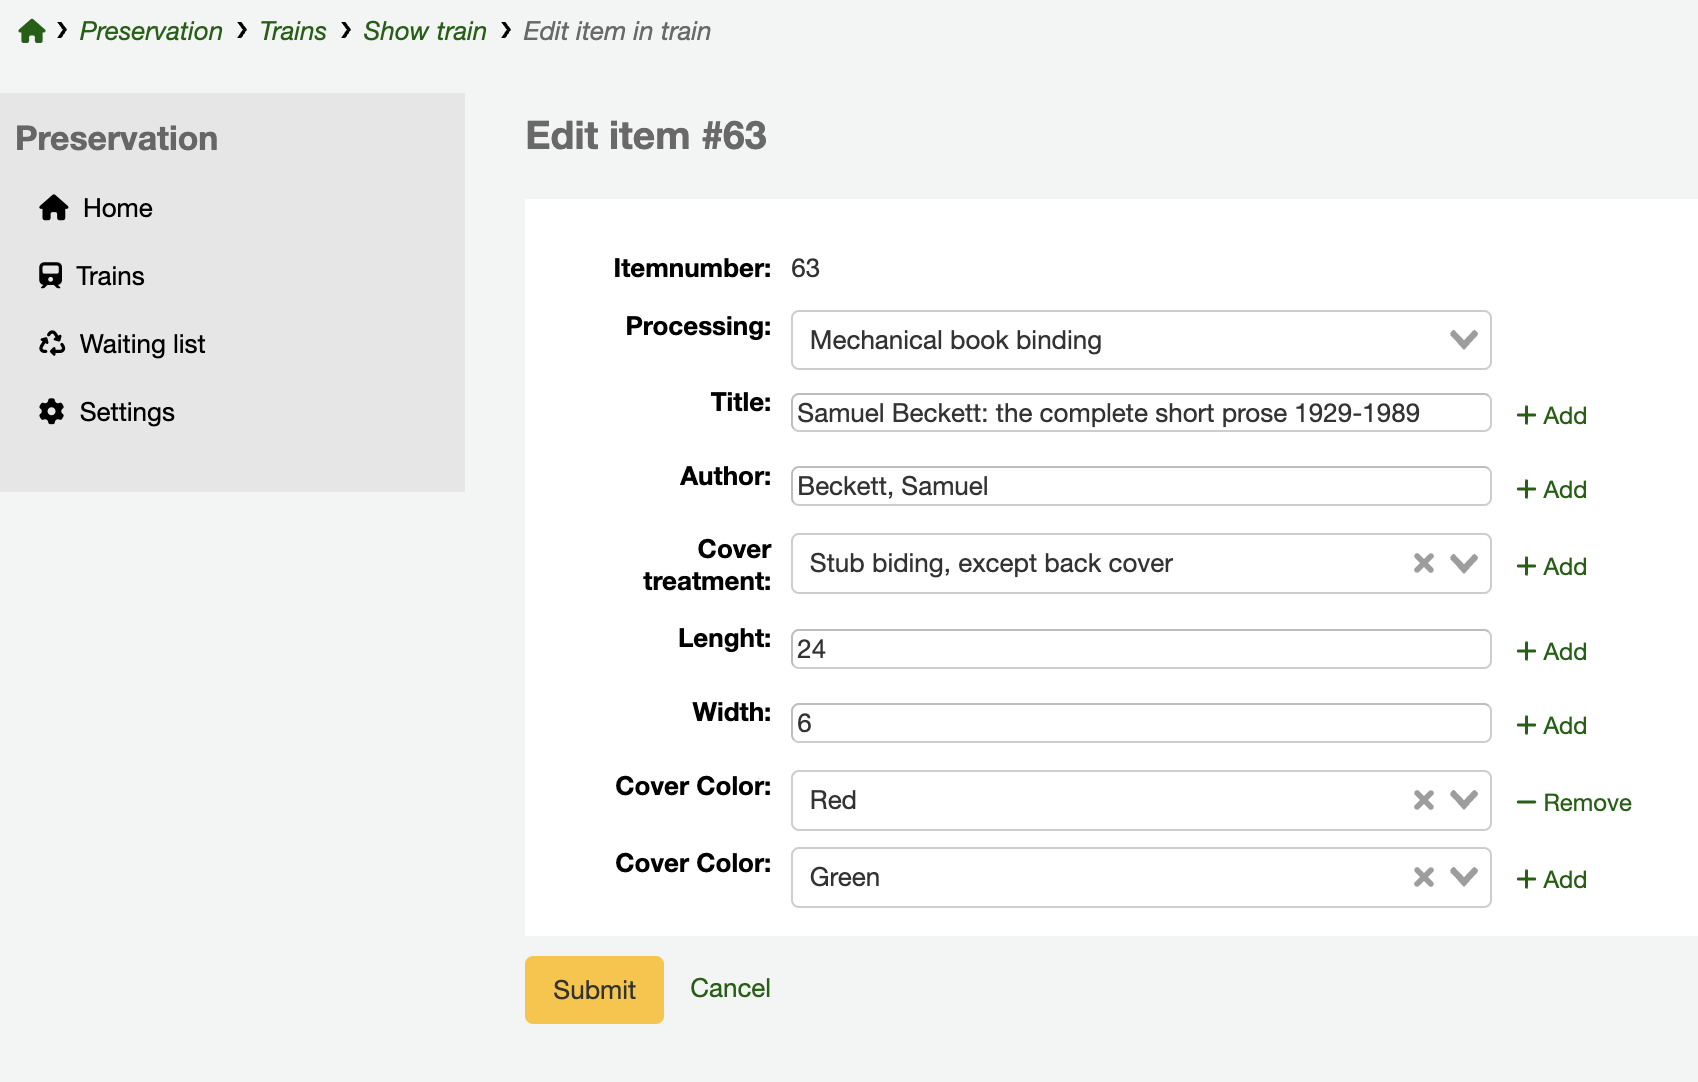
Each attribute can be duplicated.
You can also change the fields you need for this specific item by switching to another processing.
Note
If switching to another processing, the trainâs page will be unable to display a table summary.
Adding items from the waiting listï
To gain time, you can add items to a train immediately after adding them to the waiting list.
Click on the âAdd last x items to a trainâ button (where x refers to the number of items you just added).
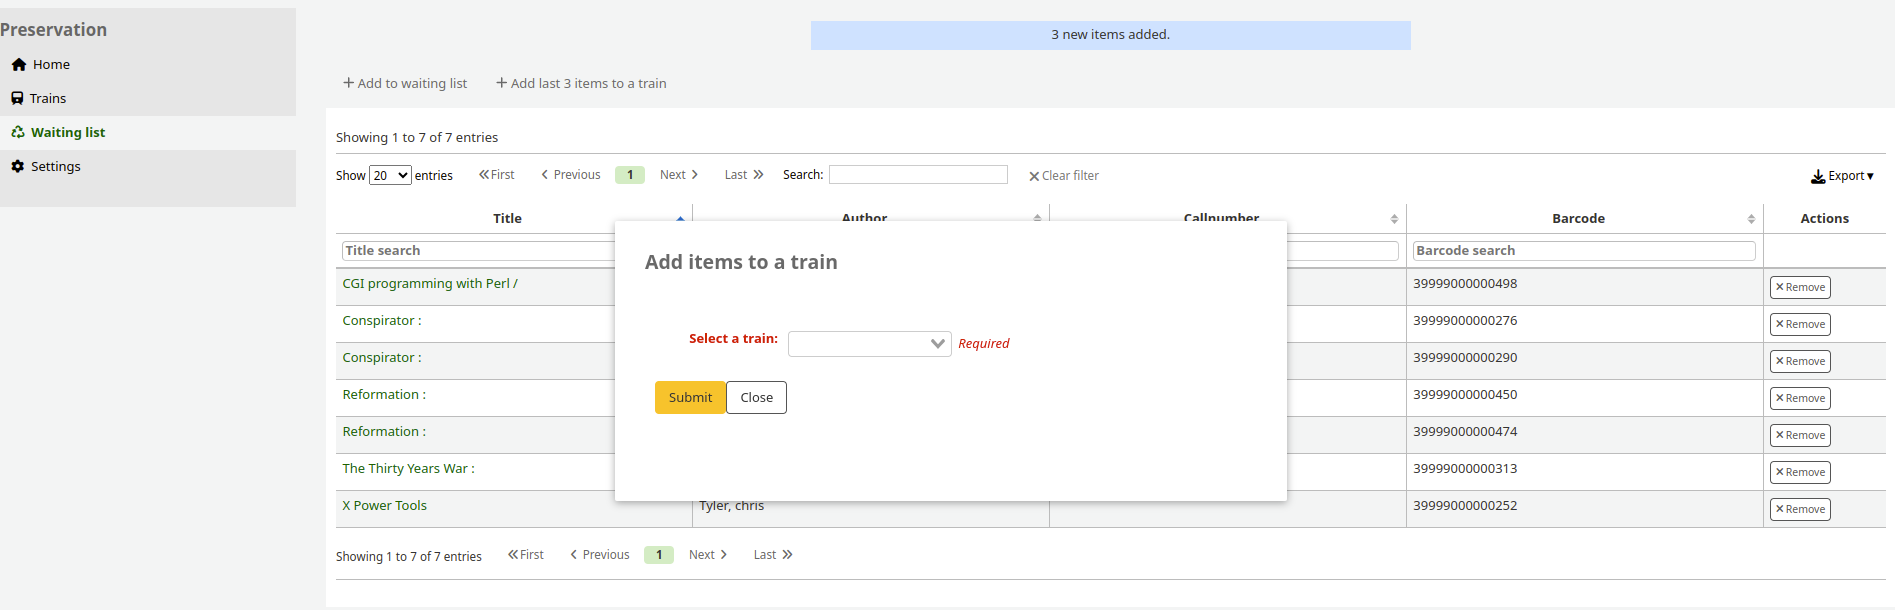
In the pop-up window that appears, select the desired train from the list of currently available preservation trains; then click âSubmitâ.
Note
This will add your items to the train as a batch. You will not get the option to edit the processing attributes for individual items.
If you need to edit the processing attributes afterwards, you can do so from the train: use the âEditâ button in the Items table.
Train managementï
To view a preservation train, click on the train name on the Trains page table.
Show trainï
Get there: More > Preservation > Trains > Show train
The train allows you to perform four different actions:
Add item: click on the button and a pop-up to add an item will appear.
Edit: the edit button will send you back to the train settings you completed in order to create the train.
Delete: deletes the entire train. The list of items in this train will disappear.
Warning
When deleting an entire train, the itemsâ Not for loan status does not automatically revert to the Available status.
Close / Sent / Received: a button to timestamp and monitor the workflow of your preservation train.
Under those four buttons you will see the displayed trainâs settings and the table of items included in the train.
Note
The column headers in the items table exactly match the attributes of the chosen processing.
If the default NOT_LOAN values for the waiting list and the train are different, the item disappears from the waiting list when added to the train. It appears in both otherwise.
Warning
It is recommended to keep the default processing the same throughout the whole workflow of the preservation train. Changing it while the train has items will disable the table view of items.
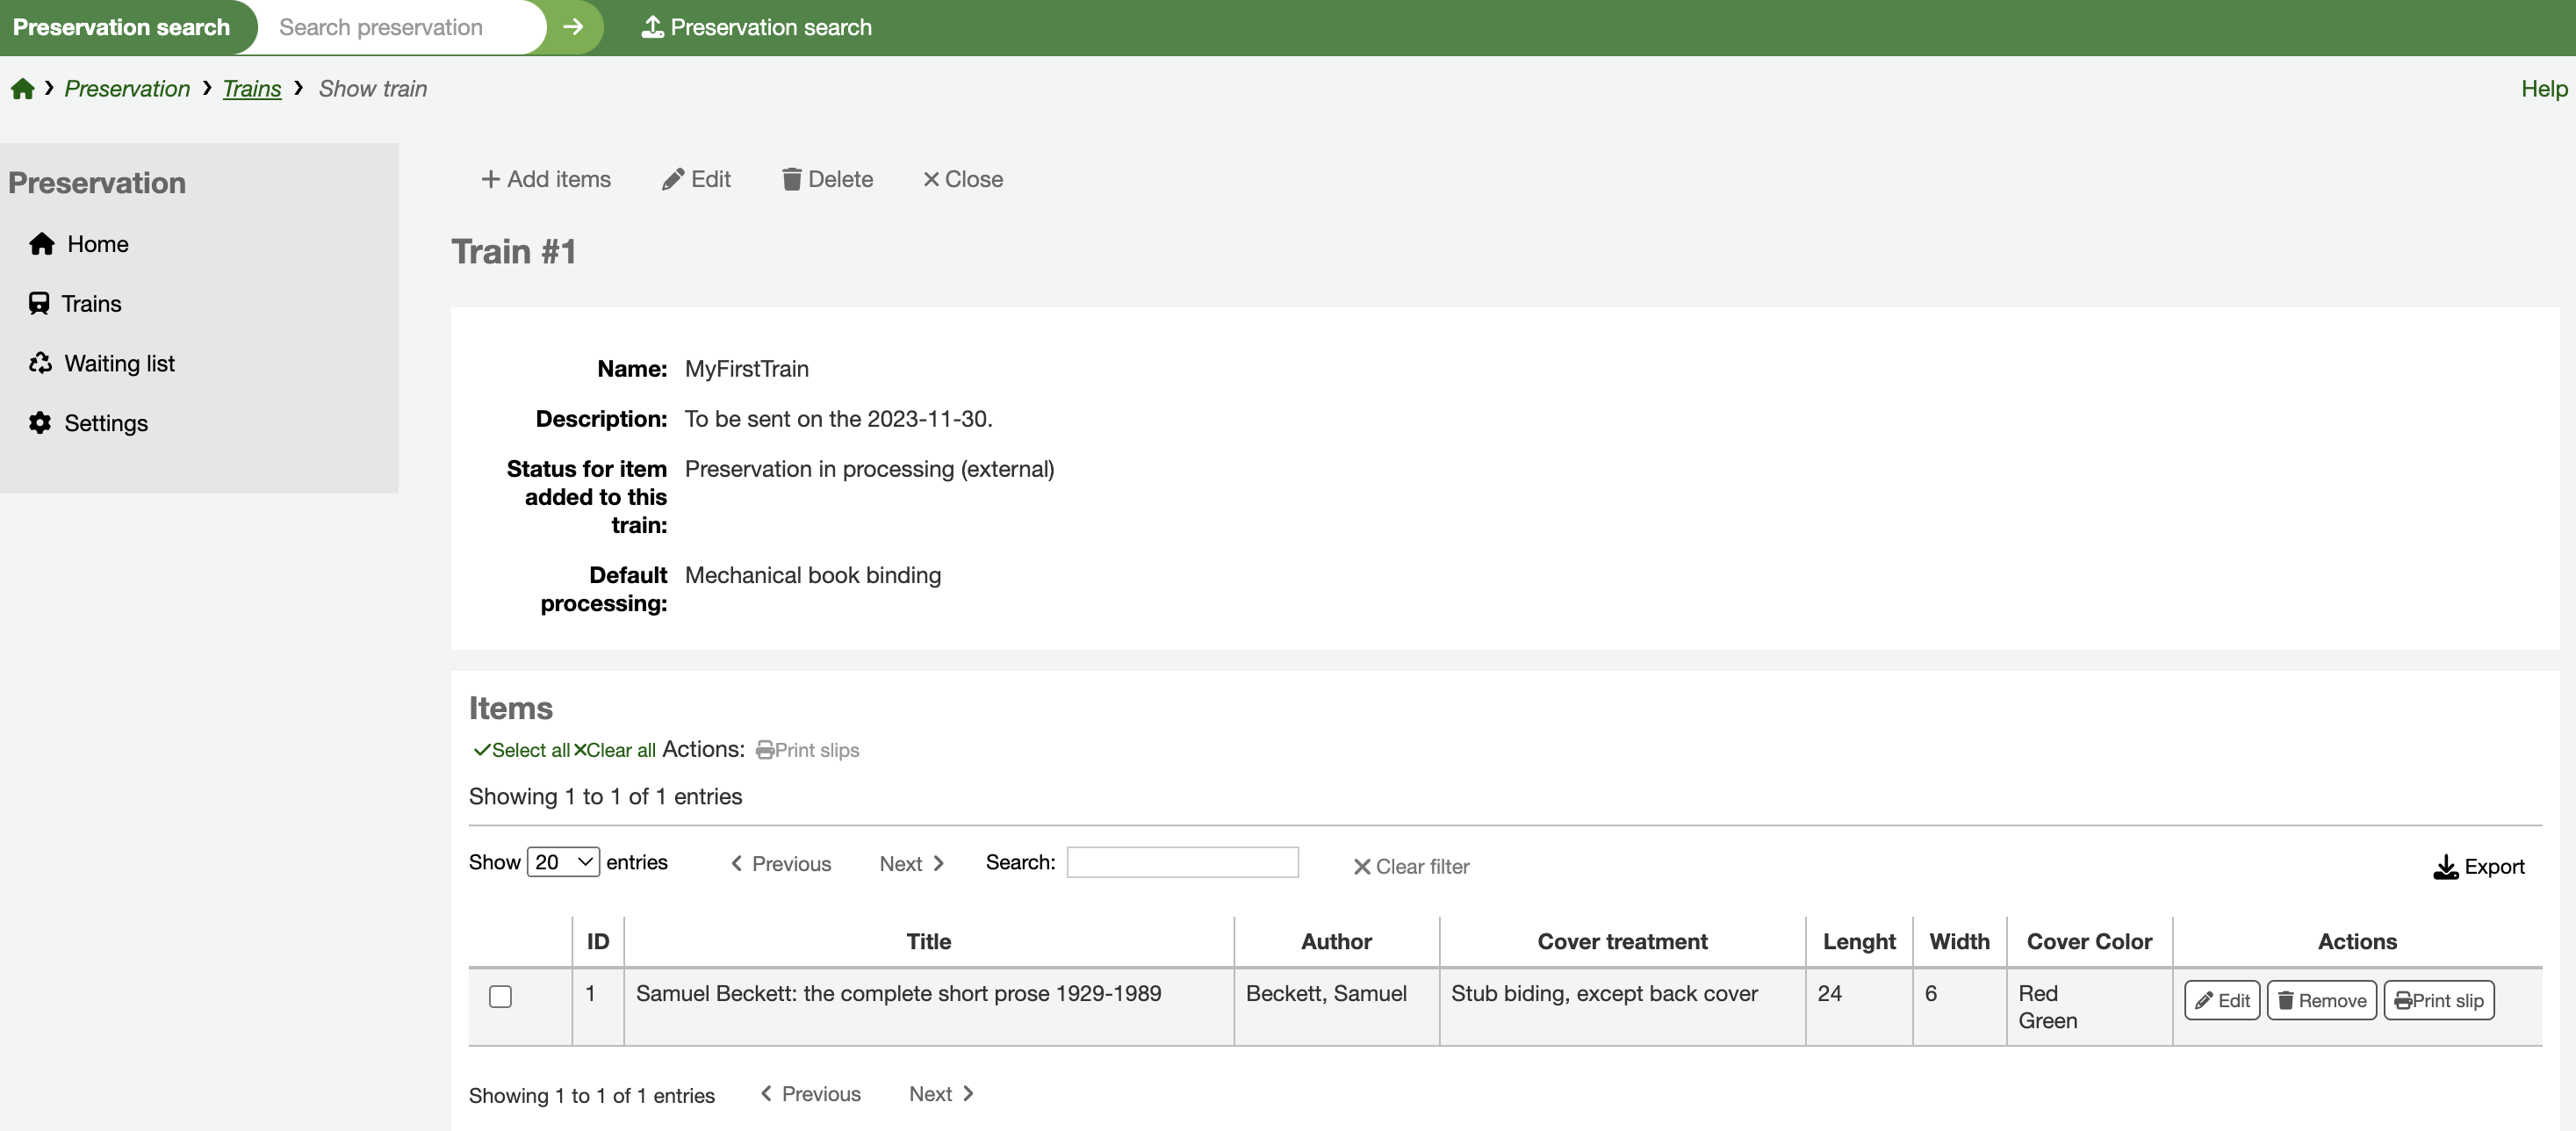
The preservation trainâs items table contains the information selected when adding an item. On the right of the same table, you have three actions :
Edit: to change the values of its preservation processing attributes.
Remove: to remove the item from the train.
Warning
When removing an item, the itemâs Not for loan status does not automatically revert to the Available status.
Print slip: when enabled in the processingâs default settings, the âPrint slipâ button appears in the actions.
Check the box on the left of the items, then click on âPrint slipsâ at the top of the items table.
If the default âTrain item slipâ (notice code PRES_TRAIN_ITEM) is used, the generated slip will contain all of the itemsâ information displayed in the table.
Close and sendï
Once all the items have been added and edited, you will need to close the train. Click on the âCloseâ button on the top of the page. This adds a âClosed onâ date to the train details.
When a train has been closed, no new items can be added to it.
The next step is to physically send the train to the bookbinder. To keep track of this information in Koha, click the âSendâ button where the âCloseâ button used to be. It will update the status of the train to Sent and add a âSent onâ date to the train details.
Receive trainï
Finally, when the train is physically returned to the library, click on the âReceiveâ button. This adds a âReceived onâ date to the train details.

Occasionally, items arriving from the bookbinder have defects and need to be sent back.
You can move any items from your received train to another open train: use the âCopyâ button in the Actions column and select the next train for this item to be sent on. Doing this will keep the preservation data from the first train, though you can edit it.
Note
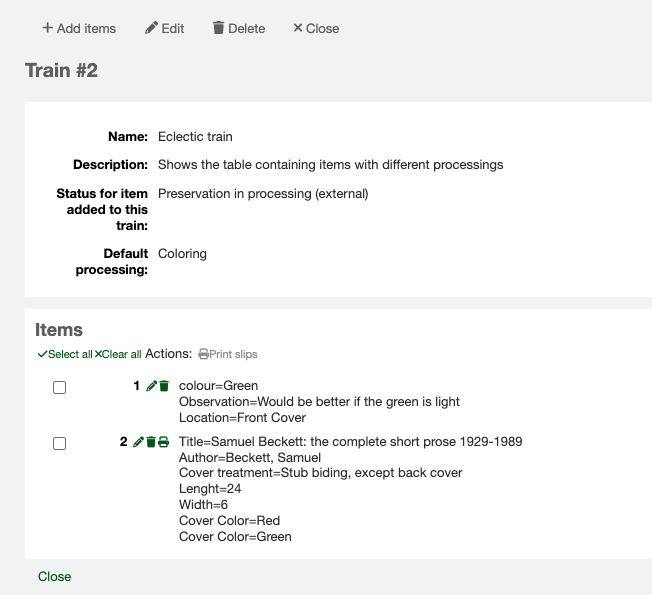
If the preservation train contains items with different processings, the items table wonât display. This is because each item would require a different table with different columns; they cannot coexist together in a unique view.
In this case, the table will instead appear as a raw list of items with their processing data.
Built with Sphinx using a theme provided by Read the Docs.