
Making a saleï
Note
Only staff with the
takepayment permission (or the
superlibrarian permission)
will have access to this module.
Note
Only staff with the takepayment permission (or the superlibrarian permission) will have access to this module.
When you first go in the point of sale module, the left side will show all the items for sale. These are debit types that were marked as âCan be soldâ.
Note
You can customize the columns of this table in the âTable settingsâ section of the Administration module (table id: invoices).
On the right side is the current sale.

Click on the âAddâ button next to the items to add to the current sale.
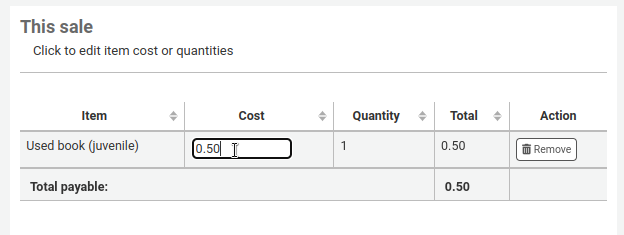
If you need to change the cost or the quantity, click on the amount on the right side and it will become an input box where you can enter the correct amount.
Once all the items have been added, quantities and prices adjusted if needed, fill out the âCollect paymentâ form.
Amount being paid: this is the total, it cannot be edited since itâs not attached to a patron file, it cannot be partially paid.
Amount tendered: enter the actual amount handed to you by the patron. The amount tendered must be equal or greater than âAmount being paidâ.
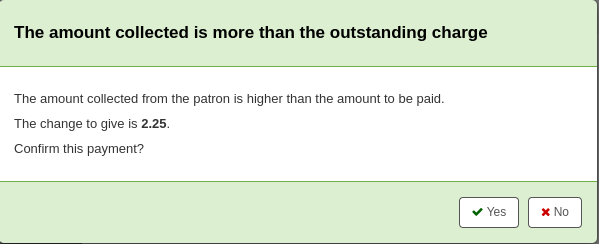
Change to give: if the amount tendered is greater than the amount being paid, Koha will calculate how much change should be returned to the patron.
Payment type: choose the type of payment.
Note
The values are managed in the PAYMENT_TYPE authorized value.
Cash register: choose the cash register in which to enter the transaction.
Click âConfirmâ to finalize the sale.
If change was to be given back to the patron, a pop-up window will appear to remind you, click âYesâ to confirm that you gave back the correct amount and confirm the payment.
You will have the choice to print or email the receipt for the sale.

Note
The receipts can be customized in the Notices and slips tool. The letter code is RECEIPT.
Built with Sphinx using a theme provided by Read the Docs.