
Patrons and circulation
Settings for controlling circulation and patron information.
Patron categoriesPatron categories allow you to organize your patrons into different roles, age groups, and patron types.
Get there: More > Administration > Patrons and circulation > Patron categories
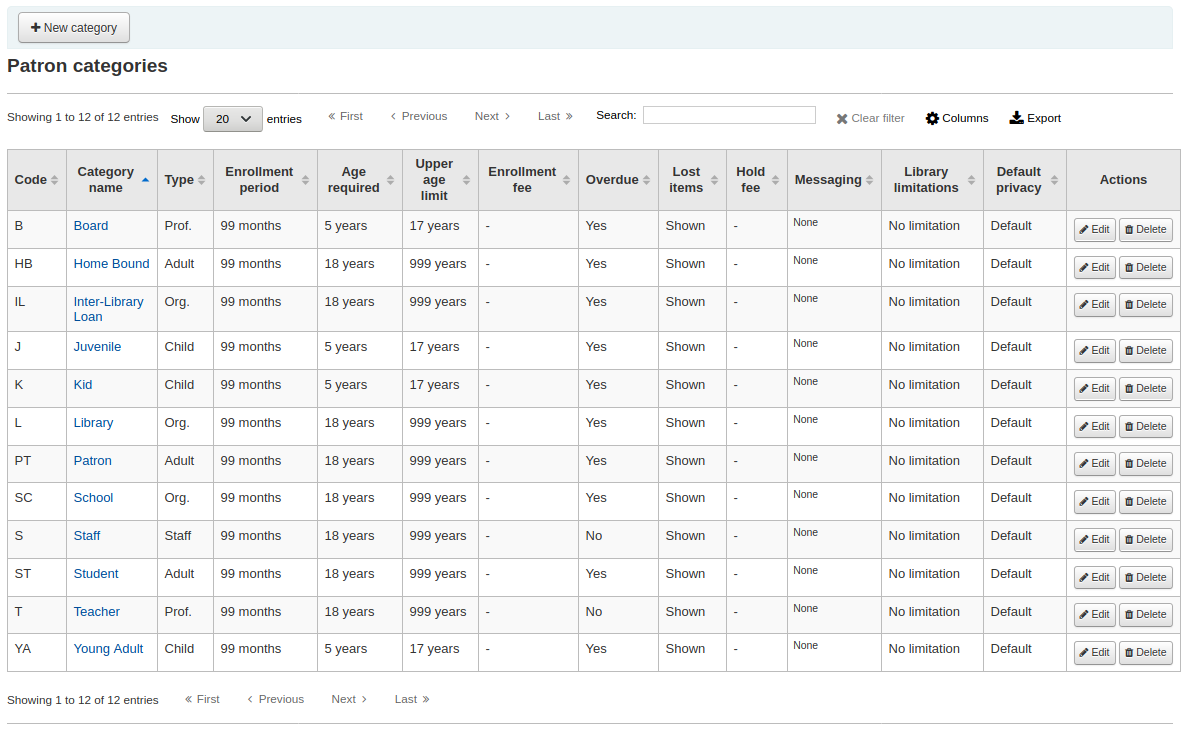
Note
You can customize the columns of this table in the ‘Table settings’ section of the Administration module (table id: patron_categories).
Note
Only staff with the manage_patron_categories permission (or the superlibrarian permission) will have access to this section.
To add a new patron category click ‘New category’ at the top of the page
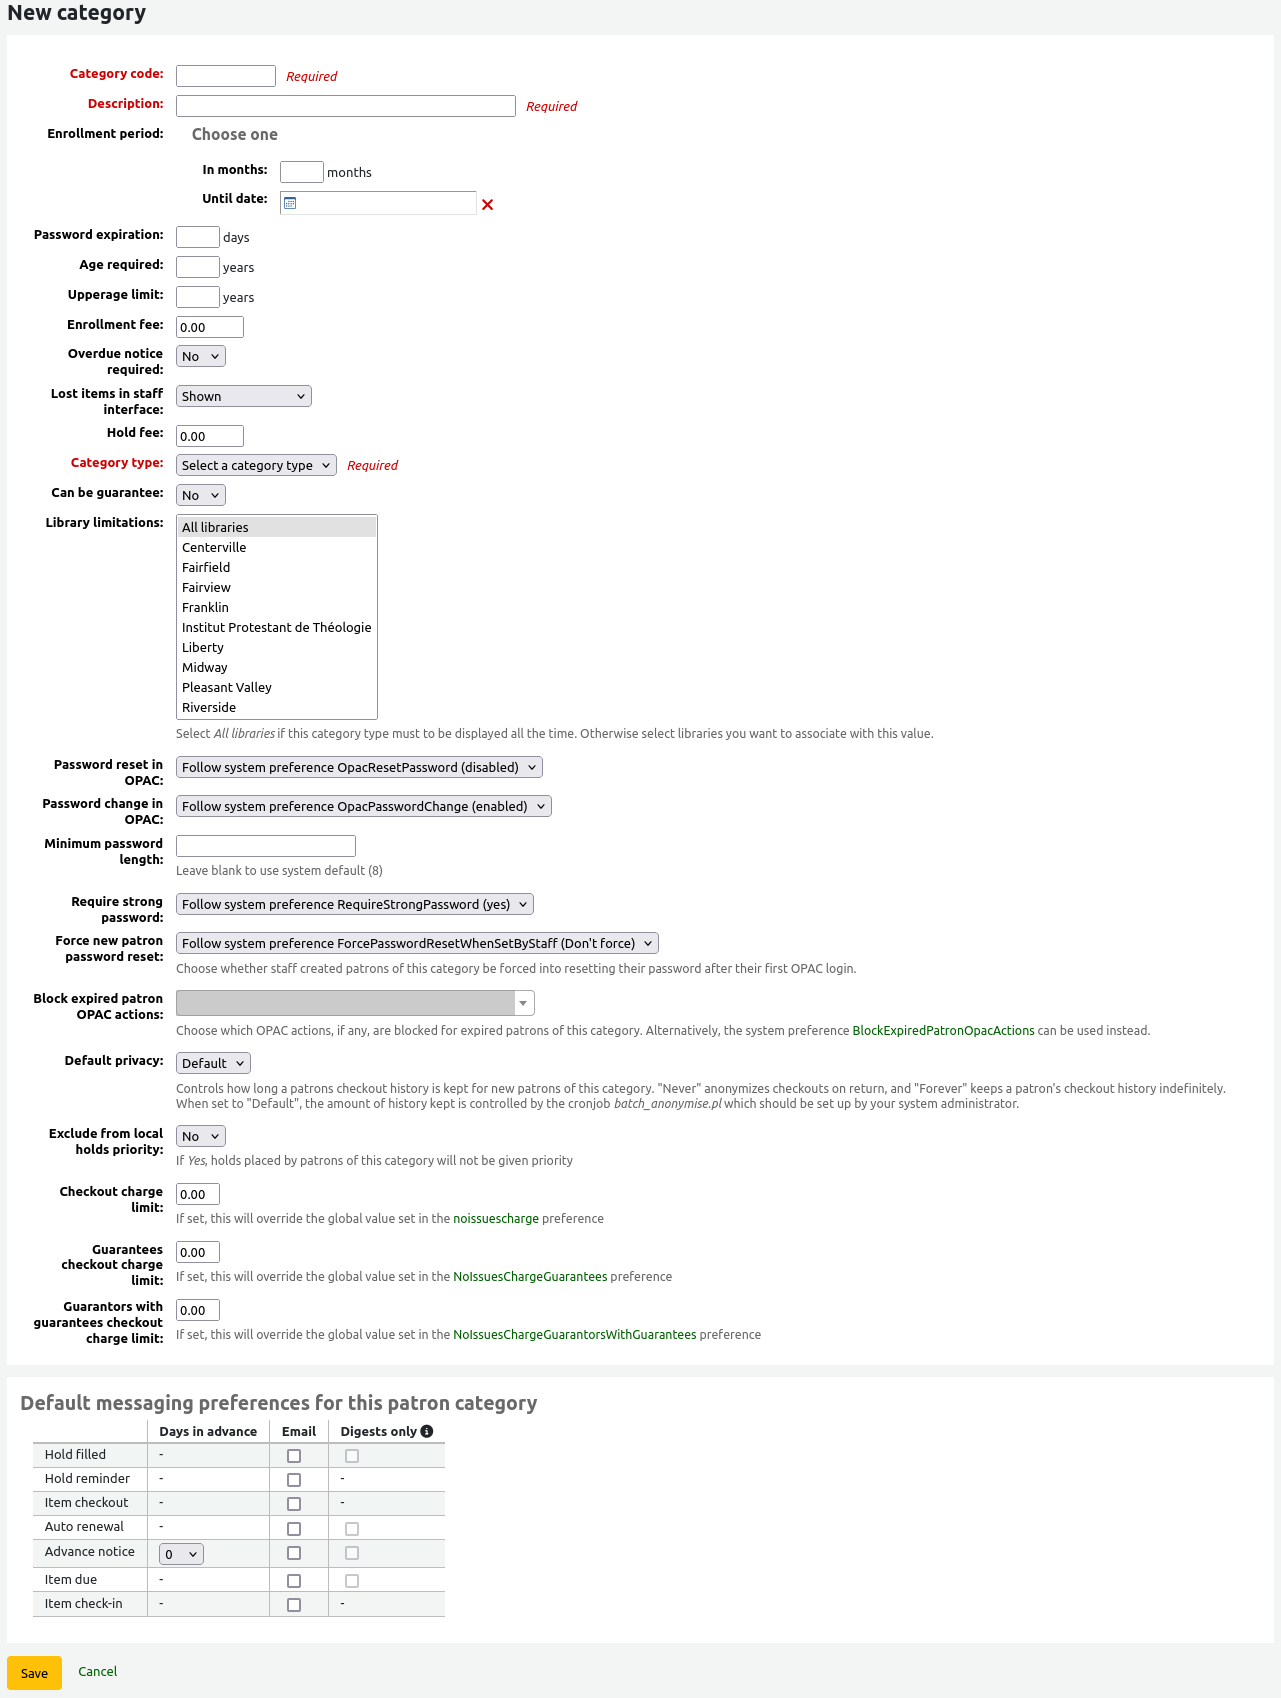
Category code: an identifier for your new category.
The category code is limited to 10 characters (numbers and letters) and must be unique.
This field is required in order to save your patron category. If left blank you will be presented with an error.
Description: a plain text version of the category.
The description will be visible throughout Koha.
This field is required in order to save your patron category. If left blank you will be presented with an error.
Enrollment period:
In months: should be filled in if you have a limited enrollment period for your patrons. For example, student cards expire after 9 months
Until date: you can choose a date when the cards will expire
This field is required in order to save your patron category. If left blank you will be presented with an error.
Warning
You cannot enter both a month limit and a date until for one category. Choose to enter either one or the other.
Password expiration: enter the number of days after which a patron has to change their password.
Age required: minimum age (in years) requirement associated with the category. For example, an ‘Adult’ patron category could have a minimum age of 18 years; this means patrons must be at least 18 to be in the patron category.
When creating or updating a patron, a warning will appear if the patron is too young for this category.

This value is used by the update_patrons_category.pl cron job to change the category of patrons who are too young.
Upper age limit: maximum age (in years) associated with the category. For example, a ‘Children’ patron category could have an upper age limit of 18, meaning patrons can have children cards until they turn 18.
When creating or updating a patron, a warning will appear if the patron is too old for this category.
This value is used by the update_patrons_category.pl cron job to change the category of patrons who are too old.
Enrollment fee: enter the amount if you charge a membership fee for your patrons (such as those who live in another region).
Warning
Only enter numbers and decimals in this field.
Note
Depending on your value for the FeeOnChangePatronCategory system preference, this fee will be charged on patron renewal as well as when they are first enrolled.
Overdue notice required: choose ‘Yes’ if you want patrons from this category to receive overdue notices. This will enable you to set the overdue notice triggers in the Tools module.
Lost items in staff interface: decide on a patron category basis if lost items are shown in the staff interface.
Shown: lost items are shown in the staff interface.
Hidden by default: lost items are hidden, but staff members can click ‘Show all items’ to see them.
Note
This is only applicable in the staff interface, so changing this value on patron categories who do not have access to the staff interface won’t make any difference.
Hold fee: enter the fee amount if you charge patrons from this category a fee for placing holds on items.
Warning
Only enter numbers and decimals in this field.
Category type: choose one of the six main parent categories
Adult: most common patron type, usually used for a general ‘Patron’ category.
Child: another common patron type.
Staff: library staff
Organizational: organizations can be used as guarantors for Professional patrons.
Professional: professional patrons can be linked to Organizational patrons.
Statistical: this patron type is used strictly for statistical purposes, such as in-house use of items.
This field is required in order to save your patron category. If left blank you will be presented with an error.
Can be guarantee: if the patrons of this category can have guarantors, choose yes. This will make the ‘Patron guarantor’ and ‘Non-patron guarantor’ sections appear in the patron form.
Library limitations: if necessary, limit this patron category to only some libraries in your library system. Select ‘All libraries’ if any library should to be able to use this category.
Tip
To select more than one library, hold the Ctrl key while making your selection.
Password reset in OPAC: decide whether patrons of this category are allowed to reset their password through the OPAC’s ‘Forgotten password’ function. By default, it will follow the rule set in the OpacResetPassword system preference.
Follow system preference OpacResetPassword.
Allowed: patrons of this category will be able to reset their password through the OPAC regardless of the setting in OpacResetPassword.
Not allowed: patrons of this category will not be able to reset their password through the OPAC regardless of the setting in OpacResetPassword.
Password change in OPAC: decide whether patrons of this category are allowed to change their password through the OPAC. By default, it will follow the rule set in the OpacPasswordChange system preference.
Follow system preference OpacPasswordChange.
Allowed: patrons of this category will be able to change their password through the OPAC regardless of the setting in OpacPasswordChange.
Not allowed: patrons of this category will be not able to change their password through the OPAC regardless of the setting in OpacPasswordChange.
Minimum password length: enter the minimum password length for patrons of this category. Leave blank to use the default length set in the minPasswordLength system preference.
Require strong password: decide whether to enforce a strong password policy (at least one uppercase letter, one lowercase letter and one digit) for patrons of this category. By default, it will follow the rule set in the RequireStrongPassword system preference.
Follow the system preference RequireStrongPassword.
Yes: patrons of this category will be required to have a strong password regardless of the setting in RequireStrongPassword.
No: patrons of this category will not be required to have a strong password regardless of the setting in RequireStrongPassword.
Force new patron password reset: choose whether staff-created patrons of this category are forced to change their password after their first OPAC login.
Follow system preference ForcePasswordResetWhenSetByStaff
Force: patrons of this category will be forced to change their password when they log into the OPAC for the first time, regardless of the setting in ForcePasswordResetWhenSetByStaff
Don’t force: patrons of this category will not be forced to change their password when they log into the OPAC for the first time, regardless of the setting in ForcePasswordResetWhenSetByStaff
Note
This only applies to patrons whose account was manually created by staff members (as opposed to self-registered patrons).
Version
This setting was added to Koha in version 24.11.
Block expired patrons OPAC actions: decide if patrons from this category are blocked from performing actions in the OPAC if their account is expired. By default, it will follow the rule set in the BlockExpiredPatronOpacActions system preference.
Follow the system preference BlockExpiredPatronOpacActions.
Block specific actions:
Note
This setting overrides what is in the BlockExpiredPatronOpacActions system preference.
Warning
Prior to Koha version 24.11, this setting is a simple on/off choice, and all actions are blocked if it is turned on.
Check for previous checkouts: if the CheckPrevCheckout system preference is set to either ‘Unless overridden by patron category’ options, you will be able to set the value for this particular patron category here.
Yes and try to override system preferences: Koha will check if the patron already checked out this item, unless the patron’s personal settings prevent it.
No and try to override system preferences: Koha will not check in the patron already checked out this item, unless the patron’s personal settings permit it.
Inherit from system preferences: the setting of the CheckPrevCheckout system preference will be followed.
Can place ILL in OPAC: if the ILLModule system preference is enabled, this setting determines if patrons of this category can place ILL requests from the OPAC.
Version
This option was added to Koha in version 23.11. In previous versions, all patrons can place ILL requests from the OPAC.
Default privacy: choose the default privacy settings for patrons of this category.
Default: checkout history will be kept indefinitely, until either the batch_anonymize.pl script is run or there is a manual batch anonymization which is performed.
Never: checkout history is anonymized upon return. Statistics are kept, but the link between the checkout, the item and the patron is removed.
Forever: checkout history is never anonymized for patrons of this category, regardless of the cron job or manual anonymization.
This setting can be edited by the patron via the OPAC if you allow it with the OPACPrivacy system preference.
Exclude from local holds priority: choose whether holds for patrons of this category are given a priority.
Yes: holds for patrons of this category are not given special priority, regardless of the setting in LocalHoldsPriority.
No: holds for patrons of this category are subjected to the setting in LocalHoldsPriority.
Checkout charge limit: prevent patrons from this category from checking out items if they owe more than the specified amount.
If this field is left empty, or is at 0, the value in the noissuescharge system preference will be used for patrons from this category.
If this field has a value, it will override the value in the noissuescharge system preference for patrons from this category.
Version
This setting was added to Koha in version 24.11.
Guarantees checkout charge limit: prevent patrons from this category from checking out items if their guarantees collectively owe more than the specified amount.
If this field is left empty, or is at 0, the value in the NoIssuesChargeGuarantees system preference will be used for patrons from this category.
If this field has a value, it will override the value in the NoIssuesChargeGuarantees system preference for patrons from this category.
Version
This setting was added to Koha in version 24.11.
Guarantors with guarantees checkout charge limit: prevent patrons from this category from checking out items if the patron has guarantors and those guarantors’ guarantees collectively owe more than the specified amount.
If this field is left empty, or is at 0, the value in the NoIssuesChargeGuarantorsWithGuarantees system preference will be used for patrons from this category.
If this field has a value, it will override the value in the NoIssuesChargeGuarantorsWithGuarantees system preference for patrons from this category.
Version
This setting was added to Koha in version 24.11.
Default messaging preferences for this patron category: assign advanced messaging preferences by default to the patron category
These default preferences can be changed on an individual basis for each patron. This setting is just a default to make it easier to set up messages when creating new patrons.
Note
This requires that you have EnhancedMessagingPreferences system preference set to ‘Allow’.
Warning
These defaults will only be applied to new patrons that are added to the system. They will not edit the preferences of the existing patrons.
If you need to apply the default preferences to existing patrons, you can force those changes by running the borrowers-force-messaging-defaults script found in the misc/maintenance folder. Ask your system administrator for assistance with this script.
These rules define how your items are circulated, how and when fines are calculated and how holds are handled.
Get there: More > Administration > Patrons and circulation > Circulation and fine rules
Note
Only staff with the manage_circ_rules permission (or the superlibrarian permission) will have access to this section.
The rules are applied from most specific to less specific, using the first found in this order:
same library, same patron category, same item type
same library, same patron category, all item types
same library, all patron categories, same item type
same library, all patron categories, all item types
default (all libraries), same patron category, same item type
default (all libraries), same patron category, all item types
default (all libraries), all patron categories, same item type
default (all libraries), all patron categories, all item types
The CircControl and HomeOrHoldingBranch also come in to play when figuring out which circulation rule to follow.
If CircControl is set to “the library you are logged in at” circulation rules will be selected based on the library you are logged in at
If CircControl is set to “the library the patron is from” circulation rules will be selected based on the patron’s library
If CircControl is set to “the library the item is from” circulation rules will be selected based on the item’s library where HomeOrHoldingBranch chooses if the item’s home library or its holding library is used.
If IndependentBranches is set to ‘Prevent’ then the value of HomeOrHoldingBranch is used in figuring out if the item can be checked out. If the item’s home library does not match the logged in library, the item cannot be checked out unless you have the superlibrarian permission.
Important
At the very least you will need to set a default circulation rule. This rule should be set for all item types, all libraries and all patron categories. That will catch all instances that do not match a specific rule. When checking out if you do not have a rule for all libraries, all item types and all patron categories then you may see patrons getting blocked from placing holds.
Using the issuing rules matrix you can define rules that depend on patron category/item type combos.
Note
The matrix being very wide, you can export the existing rules in Microsoft Excel or CSV format, to look at them, using the ‘Export’ button at the top of the table.
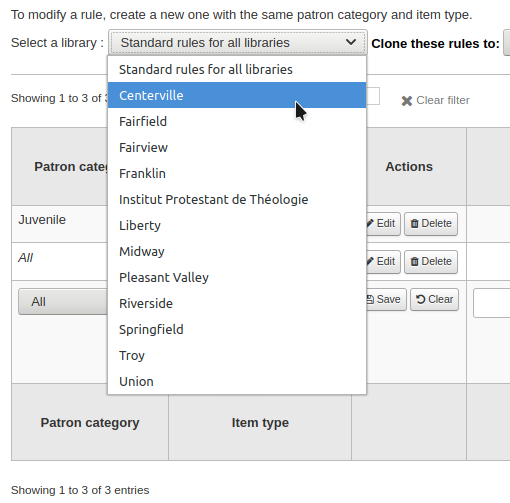
To set your rules, choose a library from the pull down (or ‘Standard rules for all libraries’ if you want to apply these rules to all branches):
From the matrix you can choose any combination of patron categories and item types to apply the rules to

First choose which patron category you’d like the rule to be applied to. If you leave this to ‘All’ it will apply to all patron categories
Choose the item type you would like this rule to apply to. If you leave this to ‘All’ it will apply to all item types for this patron category
If an item type has a parent item type, the rule will be displayed as Parent -> Child. The number of current checkouts will be limited to either the maximum for the parent (including sibling types) or the specific type’s rule, whichever is less.
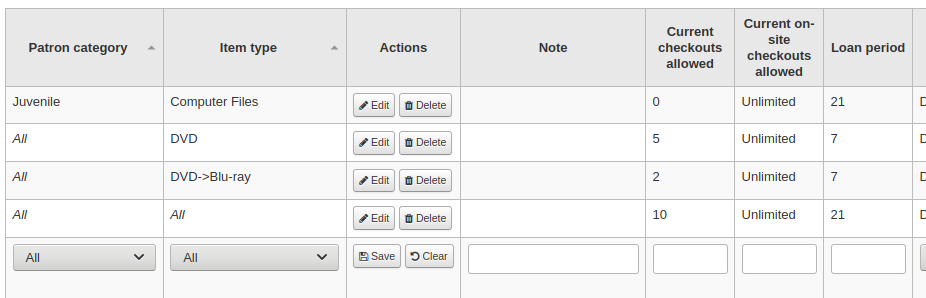
In the example above, there is a rule for the DVD item type with a maximum of 5 checkouts and a rule for Blu-ray, a child of DVD, with a maximum of 2 checkouts. A patron at this library will be able to check out a maximum of 2 Blu-rays in a total of 5 items of either DVD or Blu-ray types.
To summarize, a patron at this library would be able to take either : - 0 Blu-ray and a maximum of 5 DVDs - 1 Blu-ray and a maximum of 4 DVDs - 2 Blu-ray and a maximum of 3 DVDs
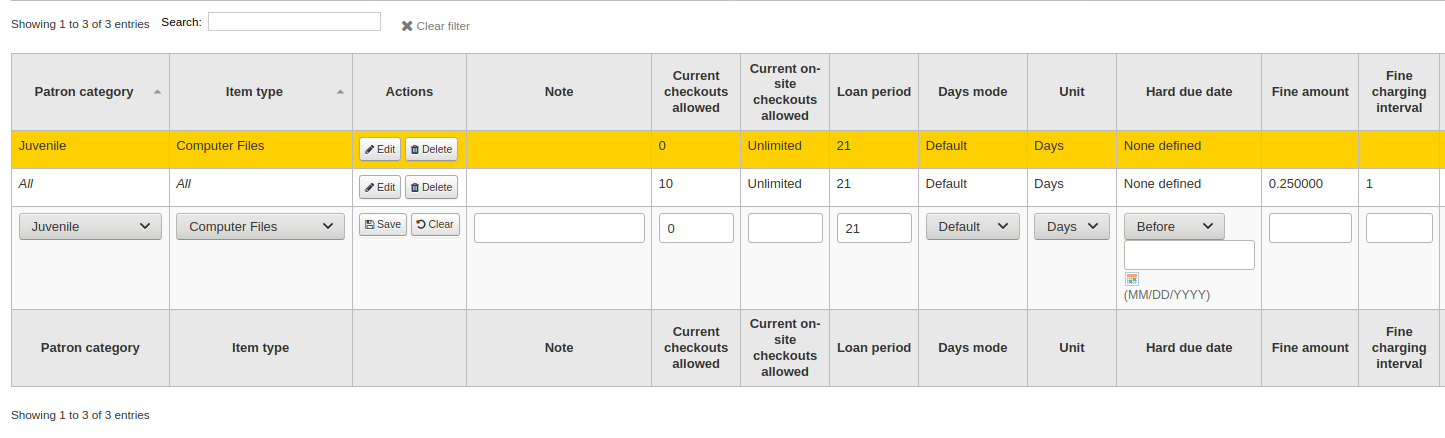
Add notes about your circulation rule into the notes field. This can be helpful to remember why and when something was last changed.
Limit the number of items of this type a patron of this category can have checked out at the same time by entering a number in the ‘Current checkouts allowed’ field.
If you’re allowing on-site checkouts then you may also want to set a limit on the number of items of this type patrons of this category can have on-site.
Note
This setting also depends on the ConsiderOnSiteCheckoutsAsNormalCheckouts preference
Define the period of time an item of this type can be checked out to a patron of this category by entering the number of units (days or hours) in the ‘Loan period’ box.
Define if the loan period should include closed days or not in the ‘Days mode’ column. The option chosen here will override the useDaysMode system preference for this particular rule.
The ‘Default’ option will take the option defined in the useDaysMode system preference
Choose the ‘Calendar’ option if you want to use the calendar to skip the days when the library is closed
Choose the ‘Datedue’ option if you want to push the due date to the next open day
Choose the ‘Days’ option if you want to ignore the calendar and calculate the due date directly
Choose the ‘Dayweek’ option if you want to use the calendar to push the due date to the next open matching weekday for weekly loan periods, or the next open day otherwise
Choose which unit of time, days or hours, that the loan period and fines will be calculated in in the ‘Unit’ column
Note
If using ‘hours’, you can set library opening hours for each library and determine how the due time is calculated should it fall outside of opening hours.
You can also define a hard due date for a specific patron category and item type. The hard due date offers three options:
Exactly on: The due date of any item checked out with this rule will be set to the hard due date.
Before: Koha will calculate the normal loan period. If the calculated due date would be after or on the hard due date, the hard due date will be used instead.
After: Koha will calculate the normal loan period. If the calculated due date would be before the hard due date, the hard due date will be used instead.
‘Fine amount’ should have the amount you would like to charge for overdue items.
Important
Enter only numbers and decimal points (no currency symbols).
Enter the ‘Fine charging interval’ in the unit you set (ex. charge fines every 1 day, or every 2 hours). The finesCalendar system preference controls whether the days the library is closed will be taken into account or not.
‘When to charge’ is most handy in libraries that have a fine charging interval of more than 1 day.
End of interval: Given a grace period of 2 days and a fine interval of 7 days, the first fine will appear 7 days after the due date, it will always take one fine interval (7 days), before the first fine is charged.
Start of interval: Given a grace period of 2 days and a fine interval of 7 days, the first fine will appear 2 days after the due date and the second fine 7 days after the due date.
The ‘Fine grace period’ is the period of time an item can be overdue before you start charging fines. The FinesIncludeGracePeriod system preference controls if the grace period will be included when calculating the fine or not.
Important
This can only be set for the ‘Day’ unit, not in ‘Hours’
The ‘Overdue fines cap’ is the maximum fine per item for this patron and item type combination.
Important
If this field is left blank then Koha will not put a limit on the fines this item will accrue. A maximum fine amount for all overdues can be set using the MaxFine system preference.
If you would like to prevent overcharging patrons for a lost items, you can check the box under ‘Cap fine at replacement price.’ This will prevent the patron’s fines from going above the replacement price on the item.
Note
If the ‘Overdue fines cap’ is also set, the fine will be the lesser of the two, if both apply to the given overdue checkout.
If your library ‘fines’ patrons by suspending their account you can enter the number of days their fine should be suspended in the ‘Suspension in days’ field.
Important
This can only be set for the ‘Day’ unit, not in ‘Hours’
You can also define the maximum number of days a patron will be suspended in the ‘Max suspension duration’ setting
The ‘Suspension charging interval’ option is just like the ‘Fin charging interval’. For example, you could ‘fine’ a patron one day suspension for every two days overdue.
Next decide if the patron can renew this item type and if so, enter how many times they can renew it in the ‘Renewals allowed’ box.
If you allow unseen renewals (see UnseenRenewals), enter how many ‘unseen’ renewals patrons can make. This is not in addition to the regular renewals, but rather how many ‘unseen’ renewals can be made among the total number of renewals.
If you’re allowing renewals you can control how long the renewal loan period will be (in the units you have chosen) in the ‘Renewal period’ box.
If you’re allowing renewals you can control how soon before the due date patrons can renew their materials with the ‘No renewals before’ box.
Items can be renewed at any time if this value is left blank. Otherwise items can only be renewed if the item is due after the number in units (days/hours) entered in this box.
To control this value on a more granular level please set the NoRenewalBeforePrecision preference.
If you enable automatic renewals (see below), enter how much time before the due date the automatic renewal takes place.
Version
This option was added to Koha in version 23.11.
In previous versions, automatic renewals use the ‘no renewals before’ value, which applies to both regular and automatic renewals.
You can enable automatic renewals for certain items/patrons if you’d like. This will renew automatically following your circulation rules unless there is a hold on the item.
Important
You will need to enable the automatic renewal cron job for this to work.
Important
This feature needs to have the “no automatic renewal before” column filled in or it will auto renew every day after the due date.
If you are using automatic renewals, you can use the ‘No automatic renewals after’ to limit the time a patron can have the item. For example: don’t allow automatic renewals after a checkout period of 80 days.
Similar to the hard due date setting, you can also stop automatic renewals after a specific date using the ‘No automatic renewal after (hard limit)’ setting.
If patrons of this category can place holds on items of this type, enter the total numbers of items (of this type) that can be put on hold in the ‘Holds allowed’ field.
Leave empty to have unlimited holds.
If you’d rather put a hold limit per patron category, independent of the item type, see the default checkout and hold policy by patron category section below.
If you want to have a hard hold limit, independent of patron category and item type, for this particular library, see the Default checkout, hold, and return policy section below.
If you want to have a hard hold limit, independent of patron category, item type, and across all libraries, see the maxreserves system preference.
You can also set a daily limit on the number of holds a patron can place.
While the two settings before limit the holds that can be placed across various records, the next setting is used to limit the number of holds that can be placed on one record at the same time. For example, for fiction books you might want to allow only one item to be placed on hold at the same time by the same user. But for serials where items represent different issues more than one hold at the same time is fine.
Note
If this is set to a number that is greater than 1, but not Unlimited, then staff will have the option of placing multiple holds at once when placing a hold on the next available item in the staff interface
Next you can decide how the availability of items influences the ability to place a hold. The ‘On shelf holds allowed’ option has three settings:
Yes: This will allow to place holds on items at all times. It doesn’t matter if they are available or checked out.
If any unavailable: This will allow to place a hold as soon as one or more items of the record are checked out. It doesn’t matter if there are still one or more items available on the shelf.
If all unavailable: This will allow to place a hold as soon as all items on the record are checked out that could fill the hold. This is especially useful for libraries that don’t offer the service of getting items placed on hold off the shelf for patrons.
Under ‘OPAC item level hold’ you can decide if patrons are allowed to place item specific holds on the item type in question. The options are:
Allow: Will allow patrons the option to choose next available or a specific item.
Don’t allow: Will only allow patrons to choose next available item.
Force: Will only allow patrons to choose a specific item.
You can set the number of days patrons have to come pick up their holds in the ‘Holds pickup period (day)’ column. This value will set the hold’s ‘expiration date’. After that period, holds will be marked as problematic and will appear in the ‘Holds waiting past their expiration date’ tab in the Holds awaiting pickup report.
The default period is set in the ReservesMaxPickUpDelay system preference, but this column allows to have more granular rules for various library, patron category, and item type combinations.
Version
This circulation rule option was added to Koha in version 23.11.
If you want to allow patrons of this category to be able to place article requests on items of this type, choose an option in the ‘Article requests’ column
No: patrons of this category will not be able to place article requests on items of this type
Yes: patrons of this category will be able to place article requests on items of this type, either on specific items (for example in the case of serial issues) or on entire records (for example in the case of monographs)
Record only: patrons of this category will be able to place article requests on records of this type, but not on specific items
Item only: patrons of this category will be able to place article requests on items of this type, but not on entire records
Warning
This column will only appear if the ArticleRequests system preference is enabled.
If you want to use the article request functionality you need to enable it using the ArticleRequests system preference and configure the form using the other related preferences.
If you charge a rental fee for the item type and want to give this specific patron category a discount on that fee, enter the percentage discount (without the % symbol) in the ‘Rental discount’ field
If the UseRecalls system preference is enabled, you will have several options to control recalls.
Recalls allowed (total): enter the number of current recalls a patron of this category can have on items or records of this item type.
Recalls per record (count): enter the number of current recalls a patron of this category can have on any one record of this item type.
On shelf recalls allowed: choose if patrons can recall items on records that have available items
If any unavailable: if a record has more than one item and at least one is unavailable, the patron will be able to recall items from this record
If all unavailable: all items of a record must be unavailable in order for a patron to recall an item from this record
Recall due date interval (day): enter the number of days a patron has to return an item that has been recalled
Recall overdue fine amount: enter the fine amount a patron will be charged if they don’t return the recalled item by the due date
Recall pickup period: enter the number of days a patron has to come pick up the item they have recalled, once it has been marked as awaiting pickup.
Note
This value supersedes the value in the RecallsMaxPickUpDelay system preference.
When finished, click ‘Save’ to save your changes. To modify a rule, simply click the ‘Edit’ button either at the beginning or at the end of the row. The row of the rule being edited will be highlighted in yellow and the values will appear filled in at the bottom of the table. Edit the values at the bottom and click save.
Note
If, while editing a rule, you change either the patron category or the item type, it will create a new rule. You can do this to duplicate rules instead of creating new ones if the values are similar.
Alternatively, you can create a rule with the same patron category and item type and it will edit the existing one, as there can only be one rule per library- patron category-item type combination.
If you would like to delete your rule, click the ‘Delete’ button at the beginning or at the end of the rule row.
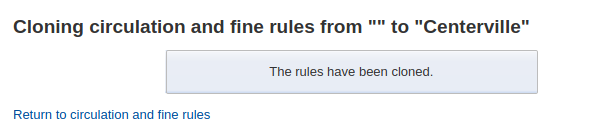
To save time you can clone rules from one library to another by choosing the clone option above the rules matrix. Please note that this will overwrite all rules already configured for that library.

After choosing to clone you will be presented with a confirmation message.
You can set a default maximum number of checkouts, a default maximum number of holds and a hold policy that will be used if none is defined below for a particular item type or category. This is the fall back rule for defaults.

From this menu you can set a default to apply to all item types and patrons in the library if no other option is set in the forms below.
In ‘Total current checkouts allowed’ enter the total number of items patrons can have checked out at one time
In ‘Total current on-site checkouts allowed’ enter the total number of items patrons can have checked out on site at a time (OnSiteCheckouts needs to be set to ‘Enable’)
In ‘Maximum total holds allowed (count)’ enter the total number of pending holds patrons can have at the same time.
Control where patrons can place holds from using the ‘Hold Policy’ menu
From Any Library: Patrons from any library may put this item on hold. (default if none is defined)
From Local Hold Group: Only patrons from a library in the item home library’s local hold group may put this book on hold.
From Home Library: Only patrons from the item’s home library may put this book on hold.
No Holds Allowed: No patron may put this book on hold.
Control where patron can pick up holds using the “Hold Pickup Library Match” menu
any library
item’s hold group
patron’s hold group
item’s home library
item’s holding library
Control where the item returns to once it is checked in
Item returns home
Item returns to issuing branch
Item floats
When an item floats it stays where it was checked in and does not ever return ‘home’
Item floats by library group: The item will not be transferred and will stay at the library it was checked in at, if the check-in library is within the same ‘float group’ in library groups as the item’s home library. If the library is not in the same float group, the item will be transferred back to its home library.
Once your policy is set, you can unset it by clicking the ‘Unset’ link to the right of the rule
Default checkout and hold policy by patron categoryFor this library, you can specify the maximum number of checkouts, on-site checkouts and holds that a patron of a given category can have, regardless of the item type.

Note
If the total amount of checkouts, on-site checkout and holds for a given patron category is left blank, no limit applies, except possibly for a limit you define in the circulation rules above.
For example, if you have a rule in the matrix that says Board patrons are allowed 10 books and 5 DVDs but you want to make it so that Board patrons only have a total of 12 things checked out at once. If you enter 12 here and the patron has 10 books out already they will only be allowed 2 DVDs to equal the 12 total they’re allowed.
Default waiting hold cancellation policyFor this library, you can specify if patrons can cancel holds that are already awaiting pickup.

For each patron category and item type combination, choose if these patrons can cancel holds that are already waiting for pickup.
Just like the circulation rules, the more specific rules will apply before the more generic rules (i.e. the “all” patron categories / “all” item types rule will apply only if no other rule exists for this combination).
Default open article requests limitIf ArticleRequests is enabled, you can set a maximum number of open article requests a patron of a category can have at one time.

Note
This will only appear if the ArticleRequests system preference is enabled.
Choose the patron category you want to limit.
Enter the number of open article requests a patron of this category can have at one given time
Click ‘Add’
Default article request feesIf ArticleRequests is enabled, you can set the fee a patron from a given category (or any category) needs to pay in order to request the article.

Note
This will only appear if the ArticleRequests system preference is enabled.
Choose the patron category for which you want to add a fee, or choose ‘All’ to set an overall fee for all patrons
Note
The fee specific to a patron category will supersede the fee for all categories.
For example, if you set a fee for all categories to 2$ and a fee for Faculty to 3$, Faculty members will be charged 3$ and any other patron will be charged 2$.
Enter the fee amount (use a period as the decimal and don’t enter any symbols, e.g. enter 5.00 for 5$)
Click ‘Add’
The fee is charged to the patron when the request is placed.
When placing the request, either through the staff interface or the OPAC, a message appears to inform the staff member or the patron that the patron will be charged for every request and the amount of the fee.
Default lost item fee refund on return policyHere, you can specify the default policy for lost item fees on return.

Refund lost item replacement fee: choose whether or not the item’s replacement cost is refunded when the lost item is returned.
Refund lost item charge: the replacement cost is refunded. This might create a credit to be paid out to the patron if they had already paid the fee.
Refund lost item charge (only if unpaid): the replacement cost is refunded only if it hasn’t yet been paid.
Refund lost item charge and charge new overdue fine: the replacement cost is refunded and overdue fines are calculated as of today.
Refund lost item charge and restore overdue fine: the replacement cost is refunded and fines are restored as of the day the item was declared lost.
Leave lost item charge: the replacement cost stays in the patron’s account.
Refund lost item processing fee: choose whether or not the item’s processing fee is refunded when the lost item is returned.
Refund lost item processing charge: the processing fee is refunded. This might create a credit to be paid out to the patron if they had already paid the fee.
Refund lost item processing charge (only if unpaid): the processing fee is refunded only if it hasn’t yet been paid.
Leave lost item processing charge: the processing fee stays in the patron’s account.
This policy will apply to this library. This rule is to be used with the RefundLostOnReturnControl system preference.
You can limit the number of days during which a lost item is refundable using the NoRefundOnLostReturnedItemsAge system preference.
Default holds policy by item typeFor this library, you can edit hold and return policies for a given item type, regardless of the patron’s category.
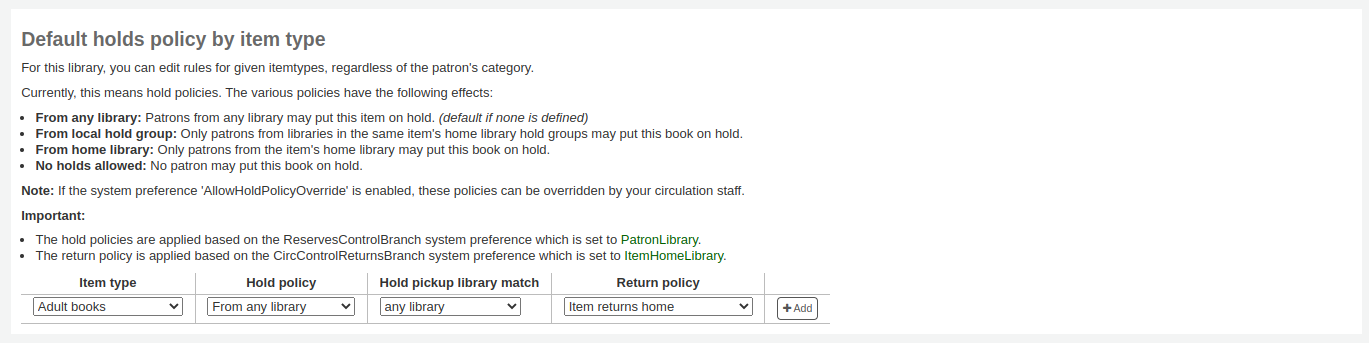
The various hold policies have the following effects:
From any library: Patrons from any library may put this item on hold. (default if none is defined)
From local hold group: Only patrons from libraries in the same item’s home library hold groups may put this book on hold.
From home library: Only patrons from the item’s home library may put this book on hold.
No holds allowed: No patron may put this book on hold.
Important
Note that if the system preference AllowHoldPolicyOverride set to ‘allow’, these policies can be overridden by your circulation staff.
Important
These policies are applied based on the ReservesControlBranch system preference.
Control where patron can pick up holds using the “Hold Pickup Library Match” menu
any library
item’s hold group
patron’ hold group
item’s home library
item’s holding library
The various return policies have the following effects:
Item returns home: The item will prompt the librarian to transfer the item to its home library
Important
If the AutomaticItemReturn preference is set to automatically transfer the items home, then a prompt will not appear
Item returns to issuing branch: The item will prompt the librarian to transfer the item back to the library where it was checked out
Important
If the AutomaticItemReturn preference is set to automatically transfer the items home, then a prompt will not appear
Item floats: The item will not be transferred from the branch it was checked in at, instead it will remain there until transferred manually or checked in at another branch
Item floats by library group: The item will not be transferred and will stay at the library it was checked in at, if the check-in library is within the same ‘float group’ in library groups as the item’s home library. If the library is not in the same float group, the item will be transferred back to its home library.
For example you might allow holds at your libraries but not what New items or DVDs to be placed on hold by other branches so you can set the ‘Hold policy’ to ‘From home library’ so that those items can only be placed on hold if the items’ owning library and the patron’s home library are the same. You can also block holds completely on specific item types from this form. This is also how you can set up floating item types and types that remain with their home library.
Note
The library whose return policy is used is determined by the CircControlReturnsBranch system preference.
Get there: More > Administration > Patrons and circulation > Patron attribute types
Note
Only staff with the manage_patron_attributes permission (or the superlibrarian permission) will have access to this section.
Patron attributes can be used to define custom fields to associate with your patron records. In order to enable the use of custom fields you need to set the ExtendedPatronAttributes system preference.
A common use for this field would be for a student ID number or a Driver’s license number.

To add a new patron attribute type, click the ‘New patron attribute type’ button at the top of the page

Patron attribute type code: enter a short code to identify this field
Warning
This setting cannot be changed after an attribute is defined
Description: enter a longer (plain text) explanation of what this field will contain
Repeatable: check this box if a patron record can have multiple values of this attribute.
Warning
This setting cannot be changed after an attribute is defined
Unique identifier: check this box if a value is given to a patron record, the same value cannot be given to a different record.
Unique attributes can be used as match points on the patron import tool
Warning
This setting cannot be changed after an attribute is defined
Is a date: check this box if the attribute value should be a date. A date picker will be available.
Important
Date attribute types cannot be linked to authorized value categories.
Version
The date option was added to Koha in version 24.05.
Display in OPAC: check this box to display this attribute on a patron’s details page in the OPAC.
Editable in OPAC: check this box to enable patrons to edit this information in the OPAC.
Searchable: check this box to make this attribute searchable in the staff interface’s patron search.
Search by default: check this box to make this attribute searchable in the staff interface’s ‘standard’ patron search, i.e., not a search on a particular field.
This option requires that the attribute type be searchable (see previous option).
Version
This option was added to Koha in version 23.11.
Mandatory: check this box if the attribute must be filled for every patron
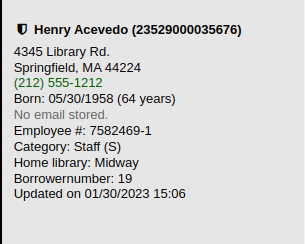
Display in patron’s brief information: check this box to make this attribute visible in the patron’s short detail display on the left of the checkout screen and other patron pages
Authorized value category: if one is selected, the patron record input page will only allow values to be chosen from the authorized value list.
You will first need to add an authorized value list for it to appear in this menu
Warning
An authorized value list is not enforced during batch patron import.
Library limitations: if you would like this attribute to only be used by specific branches you can choose those branches from this list. Choose ‘All branches’ to show it for all libraries.
Warning
Patrons with attributes already set for them will not be altered. The branch limitation only limits the field based on the library at which the current staff is logged in.
If an attribute is set for a patron, it will be displayed in their file to all staff. However, only staff from the selected branches will be able to edit it.
Category: if you’d like to only show this attribute on patrons of one type choose that patron category here
Class: if you have a lot of attributes it might be handy to group them so that you can easily find them for editing. If you create an authorized value for PA_CLASS it will show in the ‘Class’ drop-down menu and you can then change your attributes page to have sections of attributes
Click ‘Save’ to save your new attribute.
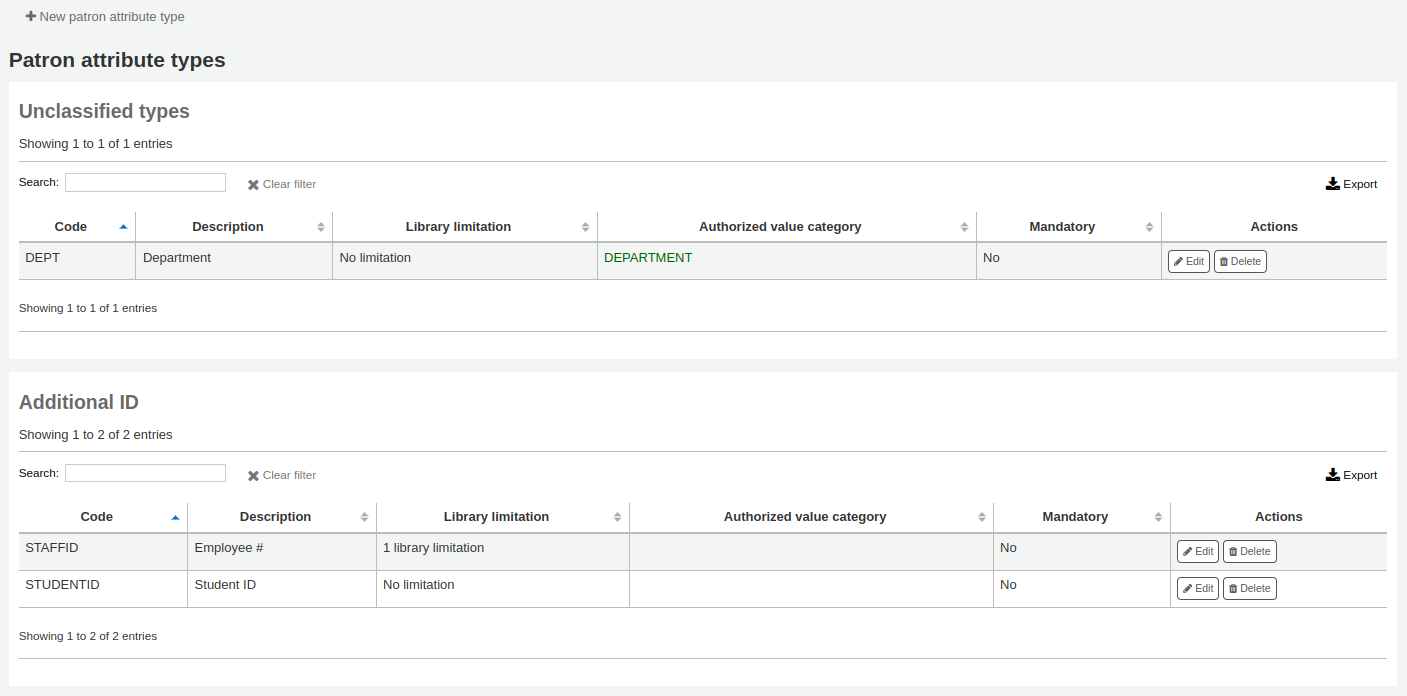
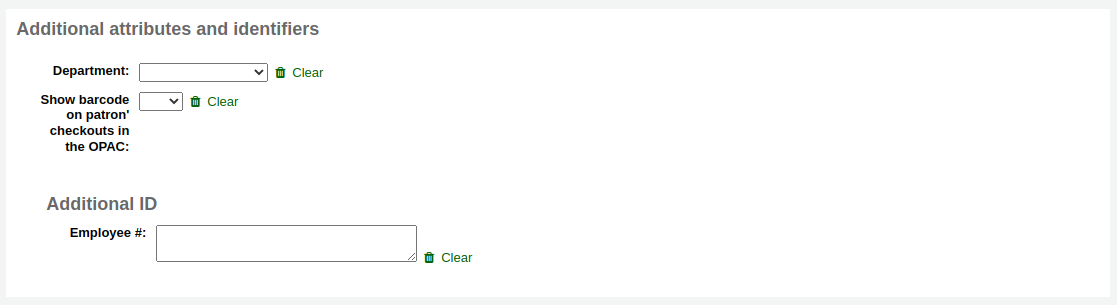
Once added, your attribute will appear on the list of attributes and also on the patron record add/edit form
Each patron attribute has an edit and a delete button beside it on the list of attributes.
Some fields in the attribute will not be editable once created:
Patron attribute type code
Repeatable
Unique identifier
You will be unable to delete an attribute if it’s in use.

Limit the ability to transfer items between libraries based on the library sending, the library receiving, and the collection code involved.
Get there: More > Administration > Patrons and circulation > Library transfer limits
Note
Only staff with the manage_transfers permission (or the superlibrarian permission) will have access to this section.
These rules only go into effect if the preference UseBranchTransferLimits is set to ‘enforce’.
Before you begin you will want to choose which library you are setting these limits for.

Transfer limits are set based on the collections codes you have applied via the Authorized values administration area.
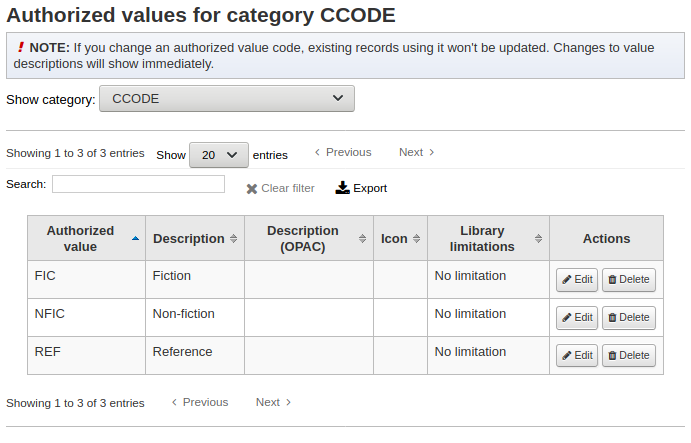
Collection codes will appear as tabs above the checkboxes:
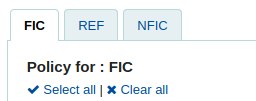
Check the boxes for the libraries you allow your items to be transferred to for the collection code you have selected at the top (in the example below - FIC)

In the above example, Centerville library will allow patrons from all libraries except Liberty and Franklin to request items from their branch.
Transport cost matrixThe transport cost matrix lets a library system define relative costs to transport books to one another.
Note
Only staff with the manage_transfers permission (or the superlibrarian permission) will have access to this section.
In order for the system to use this matrix you must first set the UseTransportCostMatrix preference to ‘Use’.
Important
The transport cost matrix takes precedence in controlling where holds are filled from, if the matrix is not used then Koha checks the StaticHoldsQueueWeight.
Costs are decimal values between some arbitrary maximum value (e.g. 1 or 100) and 0 which is the minimum (no) cost. For example, you could just use the distance between each library in miles as your ‘cost’, if that would accurately reflect the cost of transferring them. Perhaps post offices would be a better measure. Libraries sharing a post office would have a cost of 1, adjacent post offices would have a cost of 2, etc.
To enter transport costs simply click in the cell you would like to alter, uncheck the ‘Disable’ box and enter your ‘cost’

After entering in your cost, hit ‘Enter’ on your keyboard or click the ‘Save’ button at the bottom of the matrix to save your changes.
Note
A NULL value will make no difference where the From and To libraries are the same library. However, as a best practice, you should put a 0 in there. For all other To/From combinations, a NULL value will cause that relationship to act as if it has been disabled. So, in summary, don’t leave any of the values empty. It’s best to always put a number in there ( even if you choose to disable that given To/From option ).
Libraries can decide if they want to have patrons automatically notified of circulation events (check ins and check outs).
Get there: More > Administration > Patrons and circulation > Item circulation alerts
Note
Only staff with the manage_item_circ_alerts permission (or the superlibrarian permission) will have access to this section.
These preferences are set based on patron types and item types.
Important
These preference can be overridden by changes in the individual patron’s messaging preferences.
To set up circulation alerts:
Choose your library from the pull down at the top of the screen
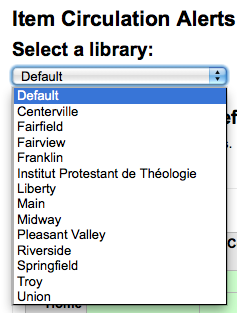
To set preferences for all libraries, keep the menu set to ‘Default’
By default all item types and all patrons are notified of check ins and check outs. To change this, click on the item/patron type combo that you would like to stop notices for.

In the above example, Juveniles and Kids will not receive check out notices.
Cities and townsTo standardize patron input you can define cities or towns within your region so that when new patrons are added librarians simply have to select the town from a list instead of having to type the town and zip (or postal) code information.
Get there: More > Administration > Patrons and circulation > Cities and towns
Note
Only staff with the manage_cities permission (or the superlibrarian permission) will have access to this section.
To add a new city, click the ‘New city’ button at the top of the page and enter the city name, state, zip/postal code and country.
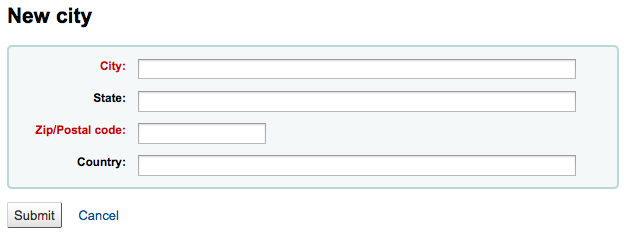
One you click Submit, your city will be saved and will be listed on the Cities and towns page

Cities can be edited or deleted at any time.
Viewing cities on patron add formIf you have defined local cities using the ‘New city’ form, then when adding or editing a patron record you will see those cities in a pull down menu to make city selection easy.
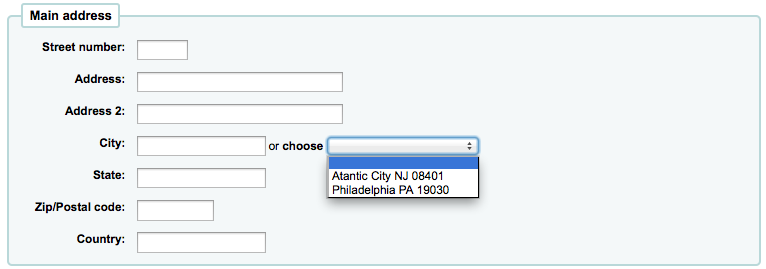
This will allow for easy entry of local cities into the patron record without risking the potential for typos or mistaken zip/postal codes.
Curbside pickupThe curbside pickup feature is used to set up appointments with patrons for them to pick up their holds. This section is used to configure the pickup windows
Get there: More > Administration > Patrons and circulation > Curbside pickup
Note
In order to use this module, you must enable it with the CurbsidePickup system preference.
Note
Only staff with the manage_curbside_pickups permission (or the superlibrarian permission) will have access to this section.
From the configuration page, click the tab corresponding to the library for which you’re setting up curbside pickup
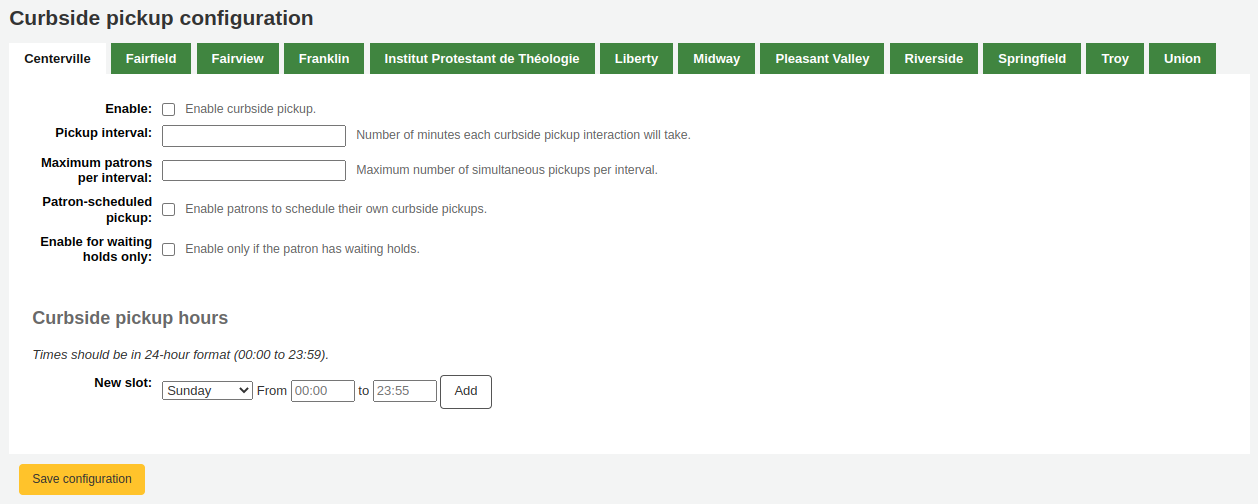
Fill out the form
Enable: check this box to enable curbside pickup at this library
Pickup interval: enter the number of minutes each curbside pickup interaction will take
Maximum patrons per interval: enter the number of patrons who can pickup in the same interval
Patron-scheduled pickup: check this box if you want to allow patrons to set up their own curbside pickup appointment through the OPAC
Enable for waiting holds only: check this box if curbside pickup should be limited to patrons who have holds awaiting pickup
Create curbside pickup slots
For each slot, enter the day of the week, the starting and ending hours of the time slot in which patrons can come
these can be your opening hours, if you allow curbside pickup throughout the day, or specific time slots in which you allow patrons to come by
For the hours, the format must be XX:XX (numbers with a colon) and it must be in 24-hour format (e.g. 1 PM is 13:00)
Click ‘Add’
Click ‘Save configuration’
Do this for every library that offers curbside pickup.
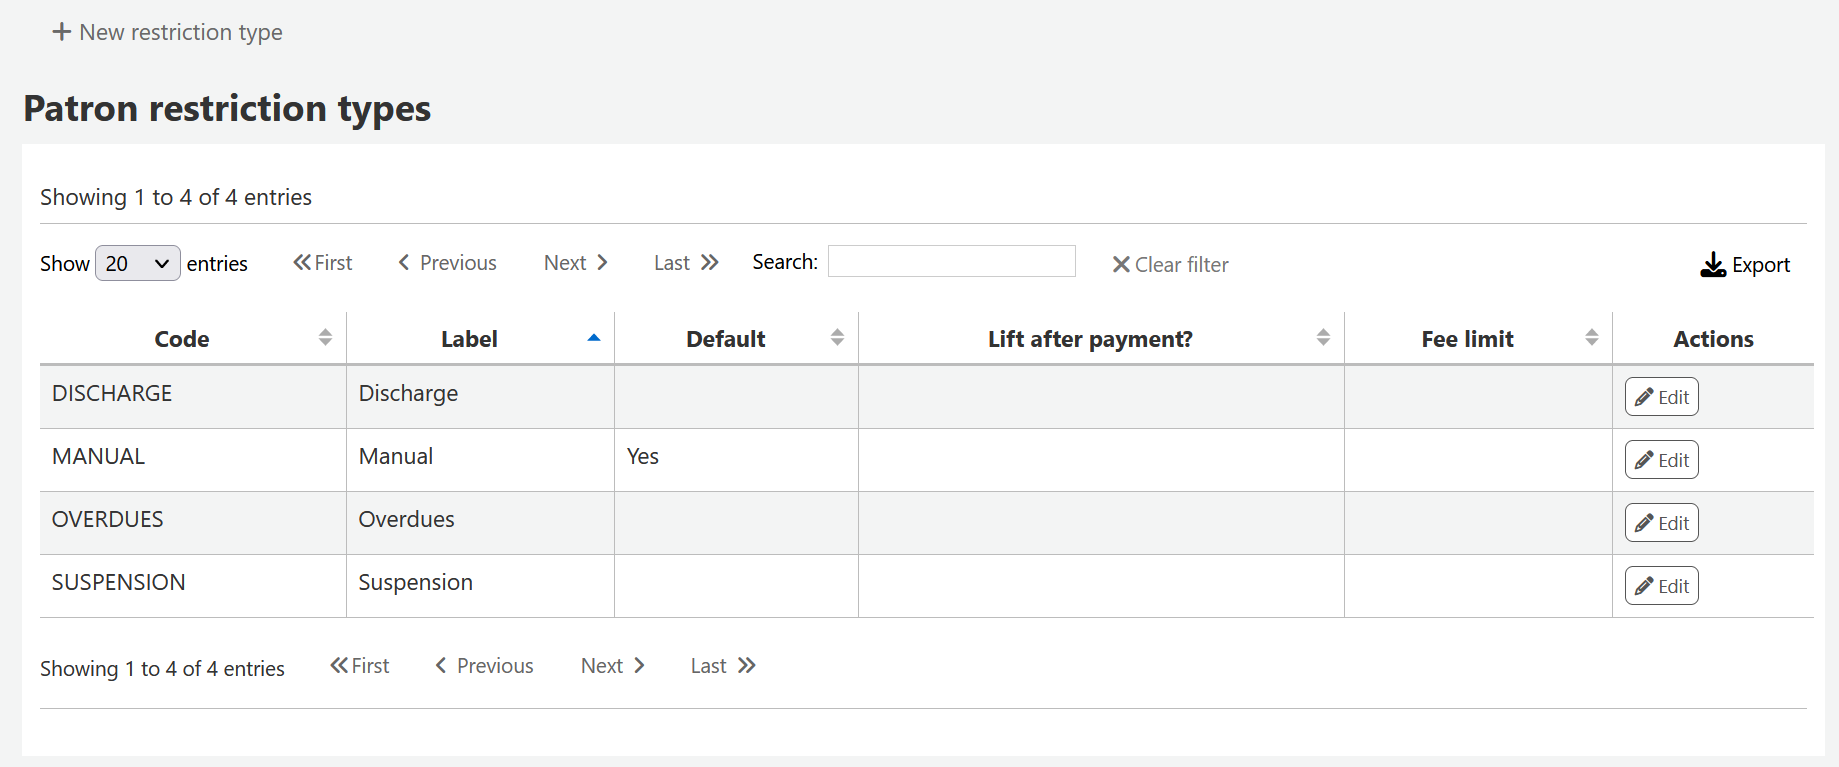
Patron restriction typesIf you are using patron restriction types, you can manage the restriction types available from here.
Patron restriction types are enabled by the PatronRestrictionTypes system preference.
Get there: More > Administration > Patrons and circulation > Patron restriction types
Note
Only staff with the manage_patron_restrictions permission (or the superlibrarian permission) will have access to this section.
To add a new restriction type, click the ‘New restriction type’ button at the top of the page.
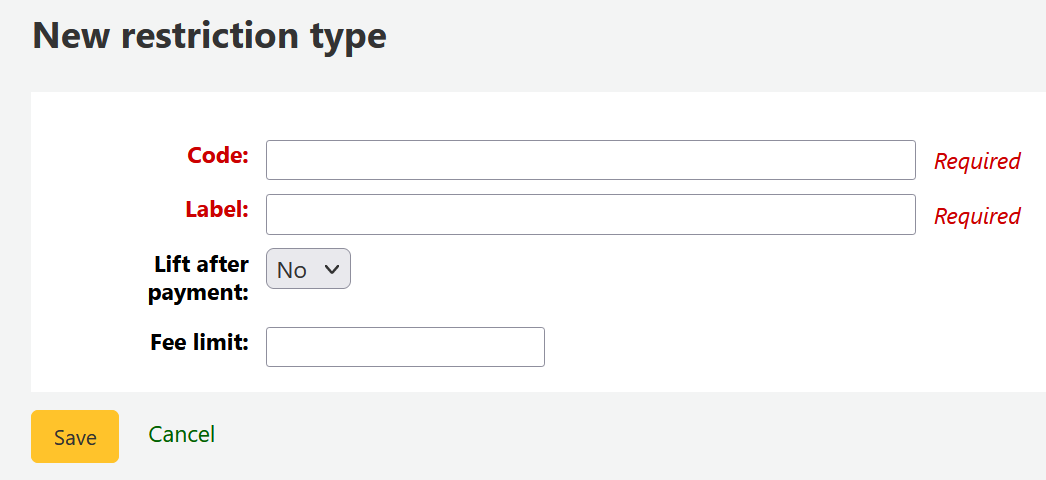
Code: enter a code for the restriction. Codes are limited to 50 characters and should not contain spaces, diacritics, or special characters.
Label: enter the label for the restriction. The label will be the one displayed throughout Koha.
Lift after payment: if set to ‘Yes’, restrictions using this type will be automatically lifted after payments equal to or exceeding the amount defined in ‘Fee Limit’.
Fee Limit: enter the amount that must be paid in order to lift a restriction of this type. This field is only used if ‘Lift after payment’ is set to ‘Yes’.
Once you click ‘Save’, your restriction type will be saved and will be listed in the table of restriction types.

Locally created restriction types can be set to set as the default restriction type to use when manually adding a restriction to a patron account. This can be achieved using the ‘Make default’ button.
You can also delete any locally created restriction types using the ‘Delete’ so long as they have not been assigned as the default.